Underwater LED Lights: Care, Leaks, Corrosion, Wiring and the Rules
Keep underwater LED lights bright and your hull dry. Learn the difference between through-hull and surface-mount lights, how to clean growth off the lens without damaging it, what to check for leaks, wiring, fusing and bonding, when the boat has to be hauled, and why the lights should not be on while you're underway.
Time
1 h
Shop would charge
$150-600
Applies to
All engines
Safety first: A through-hull underwater light is a hole in your boat below the waterline. If you see water coming in around a light housing, its nut or its cable, start the bilge pump, keep watching the water level and call a marine electrician or yard right away. If you can't keep up with the water, put on life jackets and call TowBoatUS, Sea Tow or the Coast Guard on VHF channel 16 (or 911). Never unscrew or remove a through-hull light from inside while the boat is afloat unless the maker's manual says that model is designed for it.
Owners often ask
- How do I clean barnacles off my underwater lights without scratching them?
- Is it legal to run blue underwater lights while my boat is underway?
This guide walks you through it. Still stuck? Ask the AI Mechanic about your engine.
Tools
- Soft boat brush
- Plastic scraper (never metal)
- Bucket, mild soap and fresh water
- Flashlight and inspection mirror
- Digital multimeter
- Screwdrivers and wrenches for access panels
- Masking tape (to protect lenses during bottom painting)
Parts & supplies
- Marine sealant your light maker specifies (for surface-mount screw holes and wire entries)
- Heat-shrink butt connectors and marine-grade tinned wire, if repairing wiring
- Correct fuse or breaker for the light circuit
- Replacement marine-grade stainless fasteners, if corroded
Before you start
Two main types.
- Through-hull lights: a housing (often bronze, stainless or a tough polymer) passes through a hole in the hull and is held by a big nut inside. Brightest option, common on yachts and larger boats.
- Surface-mount lights: a slim light screwed or bonded to the outside of the transom, with only a small hole for the wire. Easier to fit and common on smaller boats, pontoons and center consoles. Some are not made for the bottom of the hull or other running surfaces, so check your model.
Most lights connect to a controller or driver inside the boat, often with a switch, color controls or an app. Motor Boat & Yachting's installation guide notes these controllers need a dry spot with airflow, and the light circuit needs fused wire of the correct rating.
Know the rules before you light up. Federal navigation Rule 20 (33 CFR 83.20) says that from sunset to sunrise a boat must not show other lights that could be mistaken for navigation lights, hide them, or interfere with keeping a lookout. The marine retailers' association MRAA warns that several states enforce laws against blue lights on recreational boats, because they can be mistaken for police or emergency boats; Arizona and Wisconsin are two examples with specific bans. BoatUS adds a detail many owners miss: with waves passing over them, steady blue underwater LEDs can look like a flashing blue light, which only law enforcement boats may show, and decorative lights that can be mistaken for required lights can lead to fines. Some states also restrict decorative lights while underway. The safest habit: use underwater lights at the dock or at anchor, keep them off while underway, avoid blue (and flashing red or blue) unless you're sure your state allows it, and check your state boating agency's rules.
Have your manual. Cleaning, antifouling, bonding and out-of-water running rules differ by maker and model.
Steps
Note the brand, model, type (through-hull or surface-mount), housing material and where each light is. Find the controller, the fuse or breaker, and the cable routes inside the boat. Save the manuals in BoatMend; you'll need them for cleaning and repair rules.
With the boat in the water, open the access to each light from inside. With a flashlight and mirror look at:
- The housing nut and the sealant around it: any water, damp, salt crust or green or white corrosion
- The cable where it leaves the housing: water wicking along it, or a cracked cable gland
- The hull laminate around the housing: cracks, soft spots or a wet core
Why the core matters: in its installation how-to, BoatUS explains that in a cored hull the cut has to be dug out around the hole and filled with thickened epoxy, and even in solid fiberglass the cut edge should be sealed with epoxy, so a weeping seal can't let water into the laminate. If you don't know whether a previous owner did this, a surveyor's moisture meter around the light at haul-out will tell you.
Wipe the area dry and check again after a day. A dry, clean area is what you want. Any active drip is a reason to call a pro and plan a haul-out.
On surface-mount lights, the screws and wire hole are the leak paths. From inside, look where the wire comes through the transom for water stains or wet core. From outside (a dinghy, the swim platform or when hauled), look for cracked sealant around the light and screw heads. Installers usually put sealant in each screw hole and a thin bead around the light's edge; if yours has cracked or pulled away, reseal with the sealant your light maker specifies.
OceanLED warns that connections or bare cable ends left in a wet area or even briefly submerged will corrode and can let water travel into the light through its cable. Make sure every connection is above the bilge water line, secured, and protected with heat-shrink connectors or a sealed junction box. Look for green, crusty wire ends and replace corroded sections with tinned marine wire.
Each light circuit should have a fuse or breaker sized for the light and its wire, as close to the power source as practical. Look for:
- Warm, discolored or melted fuse holders and terminals
- Loose crimps at the controller or driver
- A controller tucked into a damp, unventilated space where it can overheat
With the lights on, measure voltage at the controller. Low voltage can cause flicker, dimming or color shifts. See our wiring and fuse panel guides for the basics.
Metal-bodied lights, especially bronze through-hulls, are underwater metal fittings like any other. Many makers require a bonding wire from the light's bonding terminal to the boat's bonding system so the anodes protect it; some polymer-bodied lights don't need bonding. Follow your manual. Check that any bonding wire is attached, tight and not corroded. Signs of trouble on the outside include paint blistering or flaking around the light, pink or pitted bronze, and heavy white powder. A light that corrodes quickly may point to stray current or a bonding problem elsewhere on the boat; see our bonding and anode guides.
Growth on the lens cuts light output fast. OceanLED says growth can noticeably dim a light in just a few weeks and recommends cleaning the lens at least monthly with a soft boat brush. When the boat is in the water, a gentle brush from the swim platform or by a diver does the job.
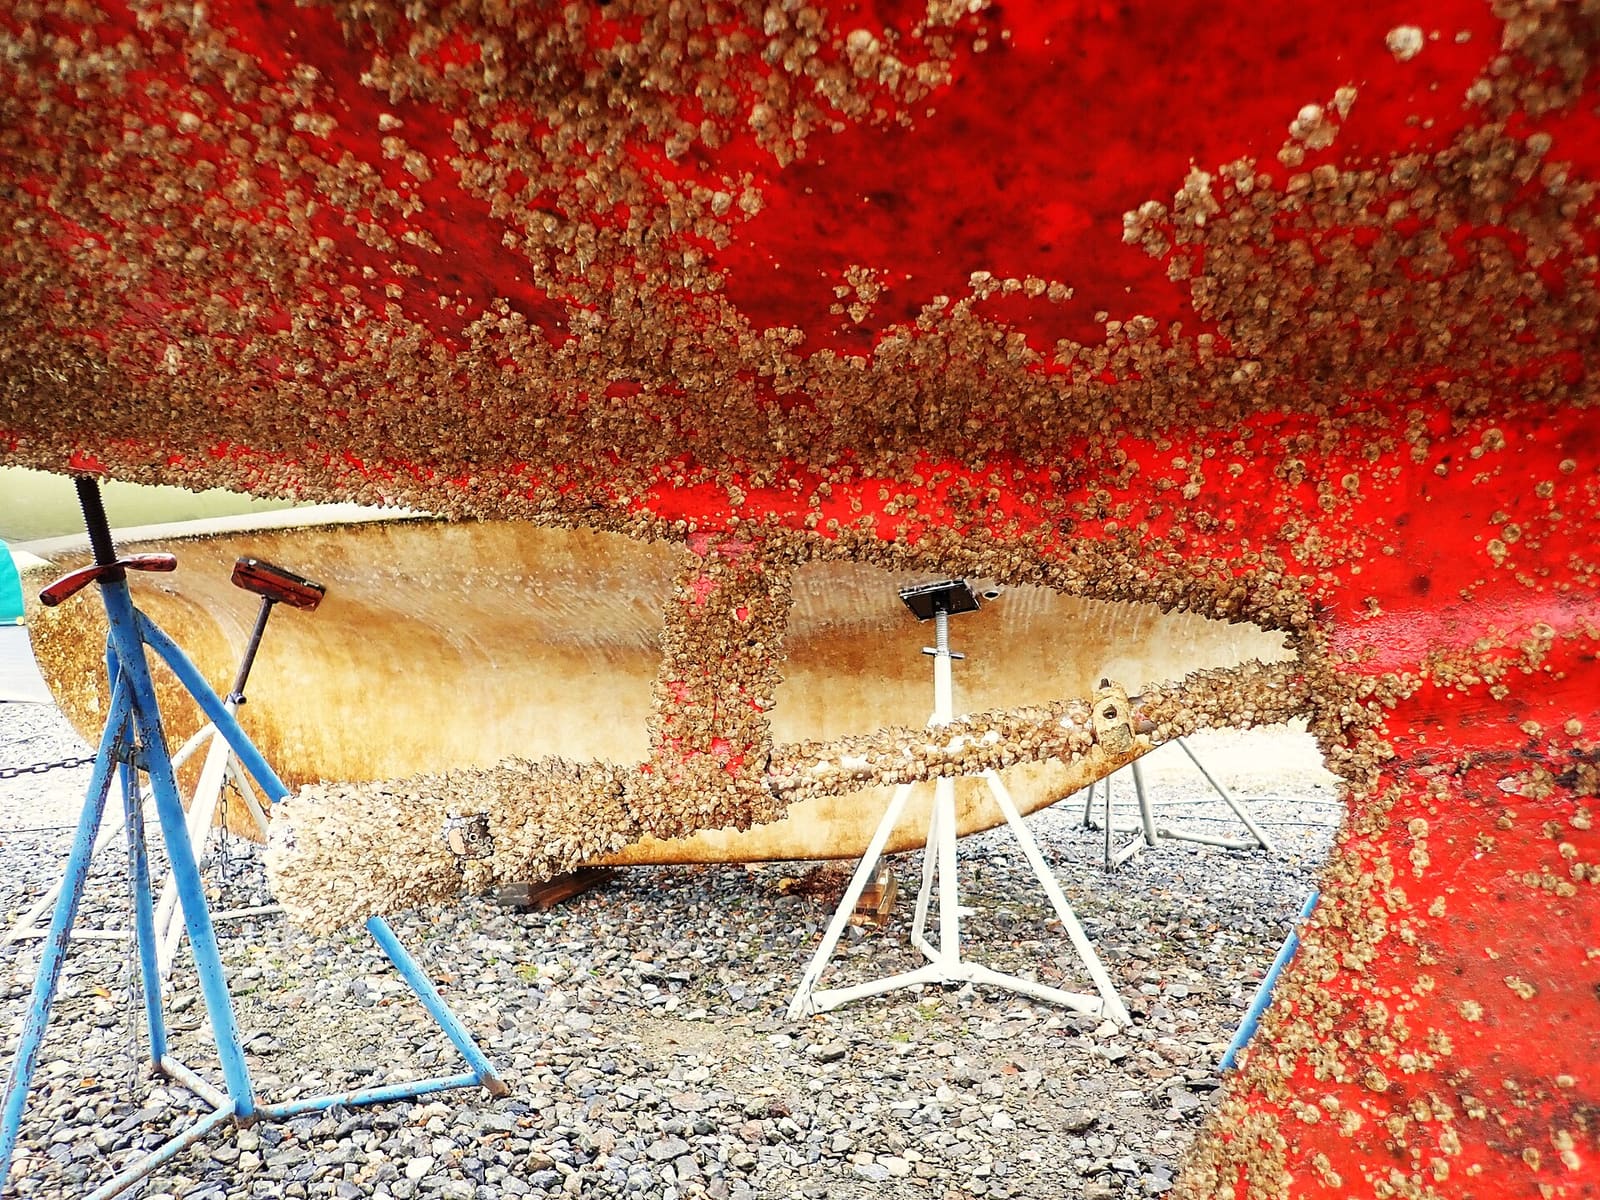
Photo: Sinikka Halme / Wikimedia Commons · CC BY-SA 4.0 For barnacles and heavy growth:
- Use a plastic scraper with moderate pressure, never a metal scraper or wire brush
- Keep the lens wet while you work; OceanLED says never scrape a dry lens
- Don't use solvents, acetone, thinners, fuel, brake cleaner, strong degreasers or harsh citrus or caustic cleaners; they can damage lens coatings and seals
- Don't aim a pressure washer at the lens or bezel; OceanLED says it can damage seals and void the warranty
Shadow-Caster suggests regular light brushing so growth stays minimal, and for staining on its own housings recommends a naval-jelly rust remover used per its label. Don't assume another brand allows that; check your own maker's approved cleaners first.
Never paint antifouling or any coating over the lens. OceanLED does not recommend bottom paint or antifouling on the light face and asks owners to contact it before painting the bezel, and says aftermarket "antifoul for lights" coatings are not approved. Other makers have different rules for painting around metal housings, so read your manual. Mask the lenses with tape before the yard sands or paints the bottom, and remove the tape right after.
Every time the boat is hauled:
- Look closely at each lens for cracks, chips or water inside
- Check the sealant around through-hull flanges and surface-mount lights
- Check mounting screws and fasteners for corrosion; they should be marine-grade stainless or whatever your maker specifies
- Test each light briefly. Many underwater lights depend on water to stay cool, so only run them for the short time your manual allows when they're out of the water. Shadow-Caster's lights, for example, have thermal protection that dims them when hot
Work from simple to complex:
- All lights dead: check the switch, controller, fuse or breaker and power to the controller
- One light dead: check its connection at the controller or junction, then the cable for damage
- Dim: clean the lens first; growth is the most common cause. Then check voltage
- Flickering or color shifting: loose or corroded connections, low voltage, or water in the cable or light
- Fogging or water inside the lens: the seal has failed. The light needs repair or replacement, which usually means a haul-out
Replacing or resealing a through-hull light usually means hauling the boat, unless your light is a design where the light unit can be swapped from inside while a sealed outer housing stays in the hull, as some makers offer. Even then, follow the manual exactly. Never take out a housing or loosen its nut afloat. Drilling new holes below the waterline is a job for a yard or experienced installer.
If the boat stays in the water, keep the bilge dry around light housings and check them during winter visits. If hauled, clean growth off the lenses while it is still wet and soft, then let everything dry. Turn the light circuit off at its breaker for the season.
Common mistakes
- Running underwater lights while underway, or using blue lights where the state bans them.
- Scraping a dry lens or using a metal scraper, which scratches the lens and coating.
- Pressure-washing the lights during haul-out cleaning.
- Letting the yard paint over the lenses with bottom paint.
- Leaving cable connections in the bilge where they sit in water.
- Testing lights for a long time on the trailer or in the yard, overheating them.
- Skipping the bonding wire the maker requires on a bronze housing.
When to call a pro
- Water coming in around a through-hull light, its nut or cable
- Water inside the lens, cracked lenses, or a light that has to be replaced
- Corrosion eating the housing, blistering paint around a light, or fast anode loss
- Melted or hot wiring, fuse holders or controllers
- Installing new lights or drilling any hole below the waterline
Tips
- Brush the lenses on a calm day at the dock every few weeks in season; it takes minutes.
- Take a photo of the lights glowing on a clear night at the start of the season to compare brightness later.
- Label the light breaker clearly and switch it off before leaving the dock.
- If you're buying lights, check your state's rules on colors before choosing. BoatUS's rule of thumb: blue carries farthest in salt water, green works best in fresh water and white attracts the most fish; LEDs run cooler and draw less than old tungsten lights.
- Drain-plug LED lights (a light built into a threaded transom drain plug) are a popular small-boat add-on. Remember it is still your drain plug: check its seal and threads like any plug before every launch, make sure its wire can't pull it loose, and keep a plain spare plug aboard.
- Some newer lights claim built-in ultraviolet LEDs that keep growth off the lens (BoatUS covered one in 2026). Even so, look at the lens at every haul-out and follow that maker's cleaning rules.
- Adding lights? BoatUS's claim files include owners who drilled into fuel tanks and wiring. Know exactly what's behind the spot, keep new holes away from exhaust outlets and other through-hulls, and leave below-waterline drilling to a yard if you're not sure.
Official references
We read these to write this guide. Your engine's own manual always wins.
- OceanLED – Cleaning your underwater lights, dos and don'ts
- Shadow-Caster – FAQs (cleaning and care, thermal protection)
- Motor Boat & Yachting – How to install your own underwater lights
- MRAA – Legal Status of Blue Accent Lighting and Non-compliant Navigation Lights Raises Concerns
- eCFR – 33 CFR 83.20, Inland Navigation Rules, Rule 20 (Application of lights)
- BoatUS Magazine – Inspect Your Boat's Navigation Lights (decorative and blue underwater lights)
- BoatUS Magazine – Install Underwater Lights (2020)
- BoatUS Magazine – Metro Marine Lighting (2026)
Safety: BoatMend is for information only and does not replace a certified marine technician. You are responsible for your safety and your boat. Read the full disclaimer.
Last updated 2026-10-24
Related guides
Boat Bonding System Explained: How to Inspect Bonding Wires, Through-Hulls and Anodes
Understand what the green bonding wires on your boat do, how they tie through-hulls, running gear, tanks and engines to your anodes and DC negative, how to inspect and test the connections yourself, and which corrosion warning signs mean it's time for an ABYC-certified technician.
How to Inspect and Replace Sacrificial Anodes (Zincs)
Check the anodes on your outboard, sterndrive or inboard running gear, replace them when they are half gone, and choose the right metal for the water you boat in. Fresh anodes are cheap insurance against expensive corrosion damage to your lower unit, drive and prop.

How to Find and Fix Corroded Electrical Connections on a Boat
Track down the green crust and loose terminals behind flickering lights, dead gauges and slow cranking with a simple voltage-drop test, then remake the connection the marine way: tinned wire, a proper crimp, adhesive-lined heat shrink and a protective coating.
12-Volt Boat Wiring Basics: Circuits, Color Codes, Fuses and Wire Size
Learn how your boat's 12-volt system is laid out, what the ABYC wire colors mean, how fuses and breakers protect the wiring, why voltage drop and tinned wire matter, and how to read a wiring diagram, so you can troubleshoot smarter and know which jobs belong to a marine electrician.

Fuse Keeps Blowing? How to Troubleshoot a Boat Fuse Block or Breaker Panel
Work through a blown fuse or tripping breaker the safe way: confirm it, tell a short from an overload, isolate the device or wire at fault, replace a worn breaker or panel switch with the same rating, and label every circuit, without ever fitting a bigger fuse.
How to Test and Fix Your Boat's Navigation Lights
Learn which navigation lights your boat must show and when, then test them and fix the usual culprits such as corroded sockets, loose pole-light plugs and blown bulbs. Working lights are legally required at night and in poor visibility and are how other boats see which way you are heading.

How to Upgrade Your Boat's Lighting to LED (and Keep Your Nav Lights Legal)
Switch cabin, cockpit and courtesy lights to LED to cut battery drain and bulb changes, choose navigation lights that are actually USCG-certified (not just LED bulbs), check voltage range and dimmers, seal every connection, and run the Coast Guard's simple VHF test to make sure the new lights aren't deafening your radio or AIS.
How to Inspect and Exercise Seacocks, Through-Hulls and Hose Clamps
Check every hole in your hull below the waterline, work each seacock open and closed, and inspect the hoses and clamps attached to them. A single failed fitting or hose is one of the most common reasons boats sink at the dock.

Bottom Paint (Antifouling): Do You Need It, Which Type, and How to Repaint
Learn whether your boat needs antifouling bottom paint, how ablative and hard paints differ, and how to prep and roll on a fresh coat safely, without poisoning yourself or the water and without ruining an aluminum hull.
How to Clean, Remove Oxidation and Wax Your Boat's Gelcoat (Plus Pontoon Tubes)
Wash your hull the right way, bring back chalky, faded gelcoat with compound, and seal it with wax so it stays glossy and protected from the sun. Includes how to clean and protect the aluminum tubes on a pontoon boat.
What to Do When Your Boat Is Taking On Water: Emergency Steps and Prevention
A step-by-step emergency plan for water coming into the boat - life jackets on, call for help early on VHF 16, find and slow the leak, pump, and head for shallow water if needed - plus the maintenance checklist that prevents most sinkings.