How to Inspect a Pontoon Motor Pod and Transom Bracket for Cracks and Loose Bolts
The aluminum pod or bracket that carries a pontoon's outboard takes every bit of thrust, steering load and trailer bounce. Learn how to find hairline weld cracks, loose or worn bolts, corrosion and flex early, spot the signs of too much motor, and know when the boat needs an aluminum welder or the dealer before it goes back out.
Time
1 h
Shop would charge
$150-1500
Applies to
Outboard · Pontoon
Safety first: A cracked motor pod can let go under power, and a several-hundred-pound outboard tearing loose at speed can sink the stern or injure people. If you find a crack in a weld, a brace or the transom plate, or the pod moves against the frame, don't run the boat until a qualified aluminum welder or your dealer has looked at it. Do the inspection with the boat on its trailer or a lift, wheels chocked, the key out and the kill switch lanyard removed. Never get under a tilted motor that isn't supported, and never crawl under a jacked-up pontoon.
Owners often ask
- I found a crack in the weld on my pontoon motor pod. Is it safe to keep using the boat?
- Do I need a transom saver when trailering my pontoon?
This guide walks you through it. Still stuck? Ask the AI Mechanic about your engine.
Tools
- Bright flashlight and a small inspection mirror
- Soft brush, mild boat soap and a hose
- Fine-tip permanent marker and a phone camera
- Magnifying glass (optional)
- Socket set and wrenches to check bolt tightness (only where your manual allows)
- Wheel chocks, and a helper
- Dye-penetrant crack-check kit (optional, for a closer look at a suspect weld)
Parts & supplies
- None for the inspection; replacement fasteners and isolating washers only as your builder specifies
Before you start
What the pod is. On most two-tube pontoons the outboard bolts to an aluminum bracket at the stern, often called the motor pod, engine pod or transom bracket. It is welded together from plate and channel and fastened (bolted, riveted or welded) to the cross-members under the deck, usually with braces or gussets running forward. Tritoons and performance pontoons may hang the motor on the center tube or a built-in pod. Your owner's manual or dealer can tell you exactly how yours is built.
Why it cracks. The pod is a lever. The motor's weight hangs off the back of it, the propeller pushes on it, steering twists it, and every wave and pothole bounces it. Aluminum welds handle this well when the pod is sized for the motor, but repeated flexing can start a fatigue crack, usually along the edge of a weld or at a corner. Pontoon owners commonly report cracks after years of hard running, long trailer trips with the motor bouncing, or a bigger motor than the boat was built for.
Know your boat's rating. The federal USCG capacity-plate rule in 33 CFR 183 Subpart C covers monohull boats under 20 feet, so it does not apply to pontoons. Instead, most pontoon builders put their own capacity label on the boat, often following the American Boat & Yacht Council (ABYC) standard H-35, Powering and Load Capacity of Pontoon Boats. Find that label (usually near the helm) and note the maximum horsepower and, if listed, the maximum engine weight. If there's no label, ask the builder or dealer.
When to inspect. At spring commissioning, after any hard grounding or collision, after a long trailer trip, before buying a used pontoon, and any time you hear a new clunk or rattle from the stern.
Steps
Put the boat on its trailer or a lift on level ground, chock the wheels, remove the key and kill switch lanyard. Lower or tilt the motor to a position where it is fully supported (trailer support or tilt lock engaged, following your engine manual). Have a helper nearby.
Compare the motor's horsepower and weight with the boat's label. Confirm the motor's real horsepower from its serial number or model plate rather than the cowl decal: decals get swapped, and buyers of used pontoons sometimes find a "40 hp" sticker on a motor that is actually larger. Look for changes since the boat was built: a repower to a bigger or heavier motor, a jack plate or setback bracket added (both move the weight further back and add leverage), or a kicker motor bolted on. None of these automatically means trouble, but they all put more load on the pod, so inspect more closely and more often. If the motor is over the label rating, talk to the builder or dealer; besides the strain, it can affect warranty and insurance coverage.
Wash the pod, braces and stern cross-members with mild soap and a soft brush, then rinse and let them dry. Dirt, algae and chalky oxidation hide hairline cracks. Don't use harsh acid cleaners on the aluminum unless the builder approves them.
Work slowly around the pod with a bright flashlight held at a low angle so cracks cast a shadow. Use the mirror for the underside and the inside corners. Pay most attention to:
- The top corners of the transom plate where it meets the side plates.
- Weld edges (the "toe" where the weld bead meets the plate).
- Where the pod and its braces join the cross-members and the deck frame.
- The motor mounting holes in the transom plate.
What it means: a fine dark line that follows or runs out from a weld, a crack in the paint or coating with a gray line under it, or a rust-colored or black streak "weeping" from a joint is a probable crack. A crack check kit (dye penetrant) can confirm a suspect spot. If you find one, mark each end with the permanent marker, write the date next to it and photograph it, then stop and call a pro (step 12).
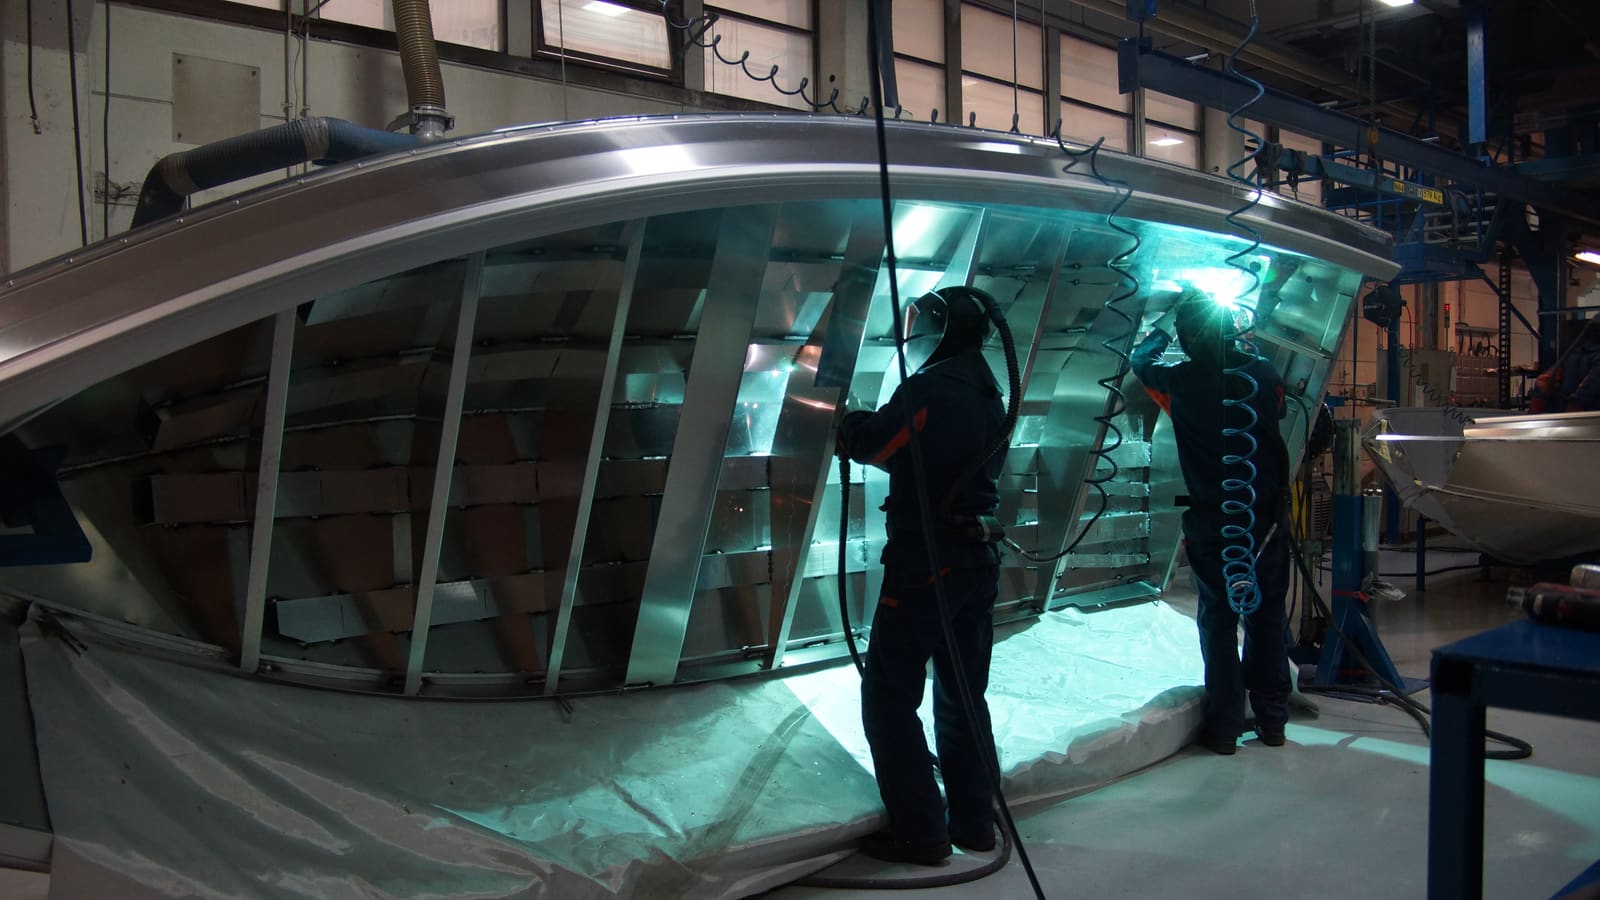
Photo: Mikasarkijarvi / Wikimedia Commons · CC0 1.0 Look along each brace or gusset from the pod to the cross-members. Bent, kinked or cracked braces mean the pod has been overloaded or hit something. Check that each brace is still attached at both ends; owners sometimes find a brace bolt missing or a brace weld broken, which turns a rattle into a real hazard.
- Motor-to-pod bolts: look for gaps between the motor's clamp bracket and the transom plate, rust streaks, or a motor that has shifted. Our outboard transom mounting guide covers checking these bolts.
- Pod-to-frame bolts or rivets: look for loose nuts, missing bolts, popped rivets and elongated holes (an oval hole with bright, polished metal around it means the joint has been moving).
- Black powder or shiny rub marks at a joint are a sign of parts rubbing against each other (fretting).
Snug a loose nut only if your owner's manual gives the procedure and the spec. A bolt that keeps working loose, or a hole that's worn oval, needs a dealer.
Aluminum corrodes quietly. Check for white powder, blistered paint, pits and crusty buildup, especially around stainless bolts, where different metals touch and where water sits. Builders usually isolate stainless fasteners from the aluminum with special washers or compounds; if those are missing or crumbling, corrosion speeds up. Heavy pitting next to a weld or bolt is a reason for a pro to look. In salt or brackish water, check the motor's anodes too; worn-out anodes and stray electrical current can eat aluminum fast. Our aluminum hull corrosion and sacrificial anode guides cover this in detail.
Saltwater pontoons: Avalon's saltwater page recommends a yearly inspection for corrosion and for deterioration of the electrical connections, and says to ask your dealer whether your boat needs added zinc anodes against stray-current corrosion. It also warns that without a barrier coat, corrosion can start where a trailer bunk presses against the aluminum, and that a "saltwater series" package doesn't make a pontoon saltwater-proof: rinse the boat with fresh water after every saltwater trip and let it dry before covering it.
With the boat on the trailer, the key out and the motor lowered and supported, have your helper firmly push the lower unit side to side and then lift and lower it a little while you watch the pod, braces and joints with a flashlight. You're looking for any movement between parts: the pod shifting against the cross-members, a joint opening and closing, or a crack line widening.
What it means: the motor should move only through its own steering and tilt. Any visible movement in the pod or its joints, or a clunk that seems to come from the frame rather than the motor, needs a professional inspection before the boat runs. If the motor itself wobbles on its bracket, see our outboard motor mounts guide.
Even without a visible crack, these point to a pod working too hard:
- A transom plate that is bowed, dented or no longer square to the deck.
- Cracks in the deck, fence or rub rail right at the stern.
- New rattles, clunks or creaks from the back of the boat under acceleration or in chop.
- Paint or coating that keeps cracking at the same corner.
- A history of hard use: big motor, frequent full-throttle running, rough water, or long trailer trips.
While you're there, check the steering cables or hydraulic hoses, fuel line and wiring that pass near the pod. They should be supported and not rubbing on sharp edges or crack-prone corners. A hose that has worn through can cause a fuel leak; if you smell fuel, stop and fix that first.
Trailer bounce is a common cause of pod cracks. Follow your engine maker's trailering advice: some motors can be trailered tilted down if there's ground clearance, while others recommend a motor support (often called a transom saver) that carries the motor's weight on the trailer. Whatever you use, the motor should not bounce freely. Make sure the bow strap and winch strap keep the boat from moving forward and back on the trailer, and that the bunks support the boat near the stern. Our trailering prep guide has a full road checklist.
- Clean welds, tight fasteners, no movement: you're done. Record it in BoatMend.
- Light surface corrosion, minor loose hardware the manual lets you fix: clean, correct, and recheck in a month.
- Any crack, broken brace, worn-oval hole, missing fastener or visible flex: don't run the boat. Take it to the dealer or a shop experienced in welding marine aluminum. A proper repair usually means removing the motor, grinding the crack out and rewelding, often with added reinforcement plates or gussets. Avalon, for example, sends owners to their dealer or an authorized aluminum repair shop for welding work.
- The motor is over the boat's rating: ask the builder whether the pod is designed for it before you repair anything; reinforcing a pod doesn't change the boat's rating.
Inspect the pod at least once a season, after long trailer trips and after any hit. If a welder repaired a crack, check that area after the first few outings and again at the end of the season, comparing with your photos.
Common mistakes
- Hiding a crack with epoxy putty, sealant or paint. Owners report that glue-type fixes don't hold on a working aluminum joint, and they hide the crack from the next inspection. Epoxy or putty soaked into a crack also contaminates the metal, which makes a proper weld harder later.
- Running a bigger or heavier motor than the boat's label allows, or adding a jack plate without asking the builder whether the pod can take it.
- Trailering with the motor bouncing freely on long trips.
- Ignoring a new clunk or rattle from the stern because "pontoons always rattle."
- Tightening bolts with a long breaker bar instead of the spec in the manual, which can crush the aluminum or strip threads.
- Using lifting points under the pod to jack the boat. It isn't a jacking point; see our pontoon lifting guide.
- Letting a non-marine welder patch it with no reinforcement. A crack in a fatigue-loaded joint often comes back if the cause isn't addressed.
- Not asking the welder the right questions. Owners who have been through it suggest asking how much marine aluminum the shop welds, what process it uses on thin plate near a tube, and how it handles a tube under the repair: a tube must be drained and dry, and welding heat expands the air trapped inside, so the welder needs a plan for that.
- Treating a crack that was welded twice as "fixed." If the same spot keeps cracking, the pod or the deck frame is flexing more than it should; ask the builder or dealer about added bracing rather than another bead of weld.
When to call a pro
- Any crack in a weld, plate, brace or the transom area
- The pod or its joints move during the flex test
- Bolts that won't stay tight, holes worn oval, missing fasteners or popped rivets
- Heavy pitting or corrosion next to welds or fasteners
- You're repowering or adding a jack plate or setback bracket
- Fuel smell or a damaged fuel line near the stern: stop and get it fixed before using the boat
- The motor came loose, shifted or struck something hard at speed
Tips
- Take the same set of photos of the pod every spring. Comparing year to year is the easiest way to see a crack growing.
- A small tag on the helm with the motor's horsepower and weight and the boat's label limits helps when you shop for a new motor.
- Ask the welder for photos of the repair and keep the invoice: buyers and insurers like to see it.
- Buying a used pontoon? Make the pod one of the first things you inspect, along with the tubes and deck.
Official references
We read these to write this guide. Your engine's own manual always wins.
- eCFR – 33 CFR Part 183 Subpart C, Safe Loading (applies to monohull boats under 20 feet)
- ABYC – Updated standards (Supplement 66), including H-35 Powering and Load Capacity of Pontoon Boats
- Avalon Pontoons – Pontoon Boat Maintenance Tips (dealer or aluminum repair shop for welding)
- Avalon Pontoons – Tips for Using a Pontoon Boat in Saltwater
Safety: BoatMend is for information only and does not replace a certified marine technician. You are responsible for your safety and your boat. Read the full disclaimer.
Last updated 2026-10-25
Related guides
How to Mount or Re-Tighten an Outboard on the Transom
A loose outboard can steer badly, crack the transom or fall off the boat. Learn how to center the motor, check engine height, tighten clamp screws, seal and bolt through the transom with backing plates, add a safety cable on small motors and spot transom flex before it becomes a costly repair.
How to Check for Worn Outboard Motor Mounts
A clunk when you shift, buzzing vibration at idle or a motor that wobbles side to side can mean the rubber mounts between the outboard and its bracket are worn out. Learn how to rule out the cheap causes first, check the mounts yourself and know when replacement belongs in a shop.

How to Care for a Hydraulic Jack Plate (Fluid, Pump, Leaks, Grease and Height)
Keep a hydraulic jack plate (Bob's Machine Shop, T-H Marine Atlas, CMC, SeaStar style) lifting smoothly: check and top up the right fluid, keep the pump and relays dry, find leaks and slow drift, lubricate only the way your model calls for, set running height safely and prepare it for winter. Mounting and setback changes are dealer work.
How to Lift or Jack a Pontoon Safely on the Trailer or the Ground
Raise a pontoon a few inches to rinse and inspect the tubes, drain them, adjust bunks or set it on storage blocks without bending a tube or getting hurt: where it can and can't take a jack, how to spread the load, why you block as you lift and never go under it, and when a dealer's forklift or lift is the right tool.
How to Find a Leak When Water Gets Into a Pontoon Tube
A pontoon that sits low on one side, lists or sloshes when you rock it probably has water in a tube. Learn how to confirm it, drain it, track down the pinhole or cracked weld, and choose between a temporary patch and a proper weld repair.
How to Spot and Prevent Corrosion on an Aluminum Boat
Aluminum hulls and pontoon tubes are tough, but they lose almost every fight with other metals. Learn the warning signs of galvanic and stray current corrosion, keep copper and loose metal away from the hull, choose the right anodes, touch up paint with the proper primer and know when a repair needs a welder.
How to Inspect and Replace Sacrificial Anodes (Zincs)
Check the anodes on your outboard, sterndrive or inboard running gear, replace them when they are half gone, and choose the right metal for the water you boat in. Fresh anodes are cheap insurance against expensive corrosion damage to your lower unit, drive and prop.
Planning a Repower: Horsepower Limits, Transom, Rigging, Prop and Costs
Putting a new engine on a boat you love can cost far less than a new boat, but only if the plan is right. Learn how to read the capacity plate for maximum horsepower and weight, check the transom, sort out controls, gauges and rigging, budget for the prop and the extras, and decide between a dealer installation and doing it yourself.

Get Your Boat Ready for the Road: Pre-Trailering Checklist
Most trailering trouble starts in the driveway: an engine left without support, a loose strap, a cover that balloons at 60 mph, gear that blows out or tongue weight that makes the rig sway. Work through this checklist before every trip and do a quick walkaround at each stop.
How to Adjust and Replace Trailer Bunks and Rollers So Your Boat Sits Right
Set up your boat trailer so the hull is supported in the right places: bunks and rollers clear of the strakes, the transom fully supported, the bow snug against the winch stop and the weight balanced on the tongue. Also covers replacing rotten bunk boards and worn carpet or rollers.