How to Inspect and Maintain a Boat Lift (Cables, Pulleys, Motor, Bunks and Storm Prep)
Inspect the cables, pulleys, motor, wiring and bunks on your boat lift, center the boat correctly, and prepare the lift and boat for storms and winter. Cable failures and overloading from rainwater or snow are the most common ways lifts drop boats.
Time
1 h 30 min
Shop would charge
$150-600
Applies to
All engines
Safety first: Never ride the boat up or down on the lift, and never stand or swim under a raised boat. Keep clear of cables while the lift is moving: a cable that snaps can whip with enough force to cause serious injury. Don't clear a jammed cable or drum with your hands; turn off the power and use tools. Lift motors run on dock power near water: if you feel a tingle in the water or on the lift, see sparks or smell burning, turn off the power at the breaker, keep everyone out of the water (electric shock drowning is real), and call a licensed marine electrician. Never swim near a dock that has power on it if you're not sure it's safe.
Owners often ask
- How often should I replace the cables on my boat lift?
- Should I leave my boat on the lift when a hurricane is coming?
This guide walks you through it. Still stuck? Ask the AI Mechanic about your engine.
Tools
- Heavy work gloves
- Flashlight
- Garden hose with fresh water and mild boat soap
- Wrenches and sockets to fit the lift hardware
- Light penetrating oil or the cable lubricant your lift maker recommends
- Grease for pulleys or bearings only where your lift manual calls for it
- Spray bottle of soapy water (air-assisted or floating lifts)
Parts & supplies
- Replacement cables of the exact type, diameter and length your lift maker specifies (when worn)
- Replacement pulleys (sheaves), bunk carpet or pads and hardware (when worn)
- Sacrificial anodes for the lift, if your lift uses them
Before you start
Know your lift type. Most residential lifts are one of these:
- Cable lifts (piling-mount, freestanding or elevator style): an electric motor or hand wheel turns a drum that winds stainless or galvanized cable over pulleys (sheaves) to raise a cradle with bunks.
- Hydraulic lifts: cylinders and hoses do the lifting.
- Floating or air-assisted lifts (such as tank-style designs): a blower fills tanks with air to float the boat up.
The steps below focus on cable lifts, with notes for the others. Keep your lift's manual handy: model details, cable specs and lubricants vary.
Know your capacity. The lift has a rated capacity. The boat, motor(s), fuel, water and gear have to stay under it, and BoatUS points out you also need margin for rainwater or snow that can collect in the boat. Owners who move up to a bigger boat on the same lift are a common source of collapses in BoatUS claims files.
How often: rinse with fresh water after use, especially in salt or brackish water. Do a careful inspection at the start and end of each season, plus a quick mid-season look at cables, welds and connections after a few months of use, as ShoreMaster's schedule suggests. ShoreMaster recommends a professional inspection once a year for lifts that get heavy use or harsh conditions.
Steps
Hose the lift down with fresh water and a mild soap, especially cables, pulleys, the drum and the cradle. BoatUS quotes a lift builder who calls washing the lift one of the best things you can do for it. In salt water, rinse every time you use the boat.
With the boat off the lift, raise and lower the empty cradle a foot or two. It should move smoothly and evenly on all corners. Stop if you hear grinding, popping or clicking, or if one corner moves faster than another. Those point to a misaligned or seized pulley, debris in a groove, or a worn or stretched cable.
Cables are the weak point of almost every lift; BoatUS calls them the Achilles heel of lifts based on its insurance claims, with breakage the big worry. With gloves on, look and feel along each cable, including the part wound on the drum. Replace a cable if you find:
- Broken wires, burrs or a fuzzy, frayed look
- Kinks, flattened or crushed sections (don't try to straighten them)
- Rust, pitting or flaking (light surface discoloration can be normal on stainless)
- A section that looks thicker, thinner or looser than the rest
Damage can also be inside where you can't see it. If a cable is old, replace it on schedule. ShoreMaster says cables can last up to about five years depending on use and water, and suggests shorter cycles (two to four years) in salt or brackish water. Follow your lift maker's interval.
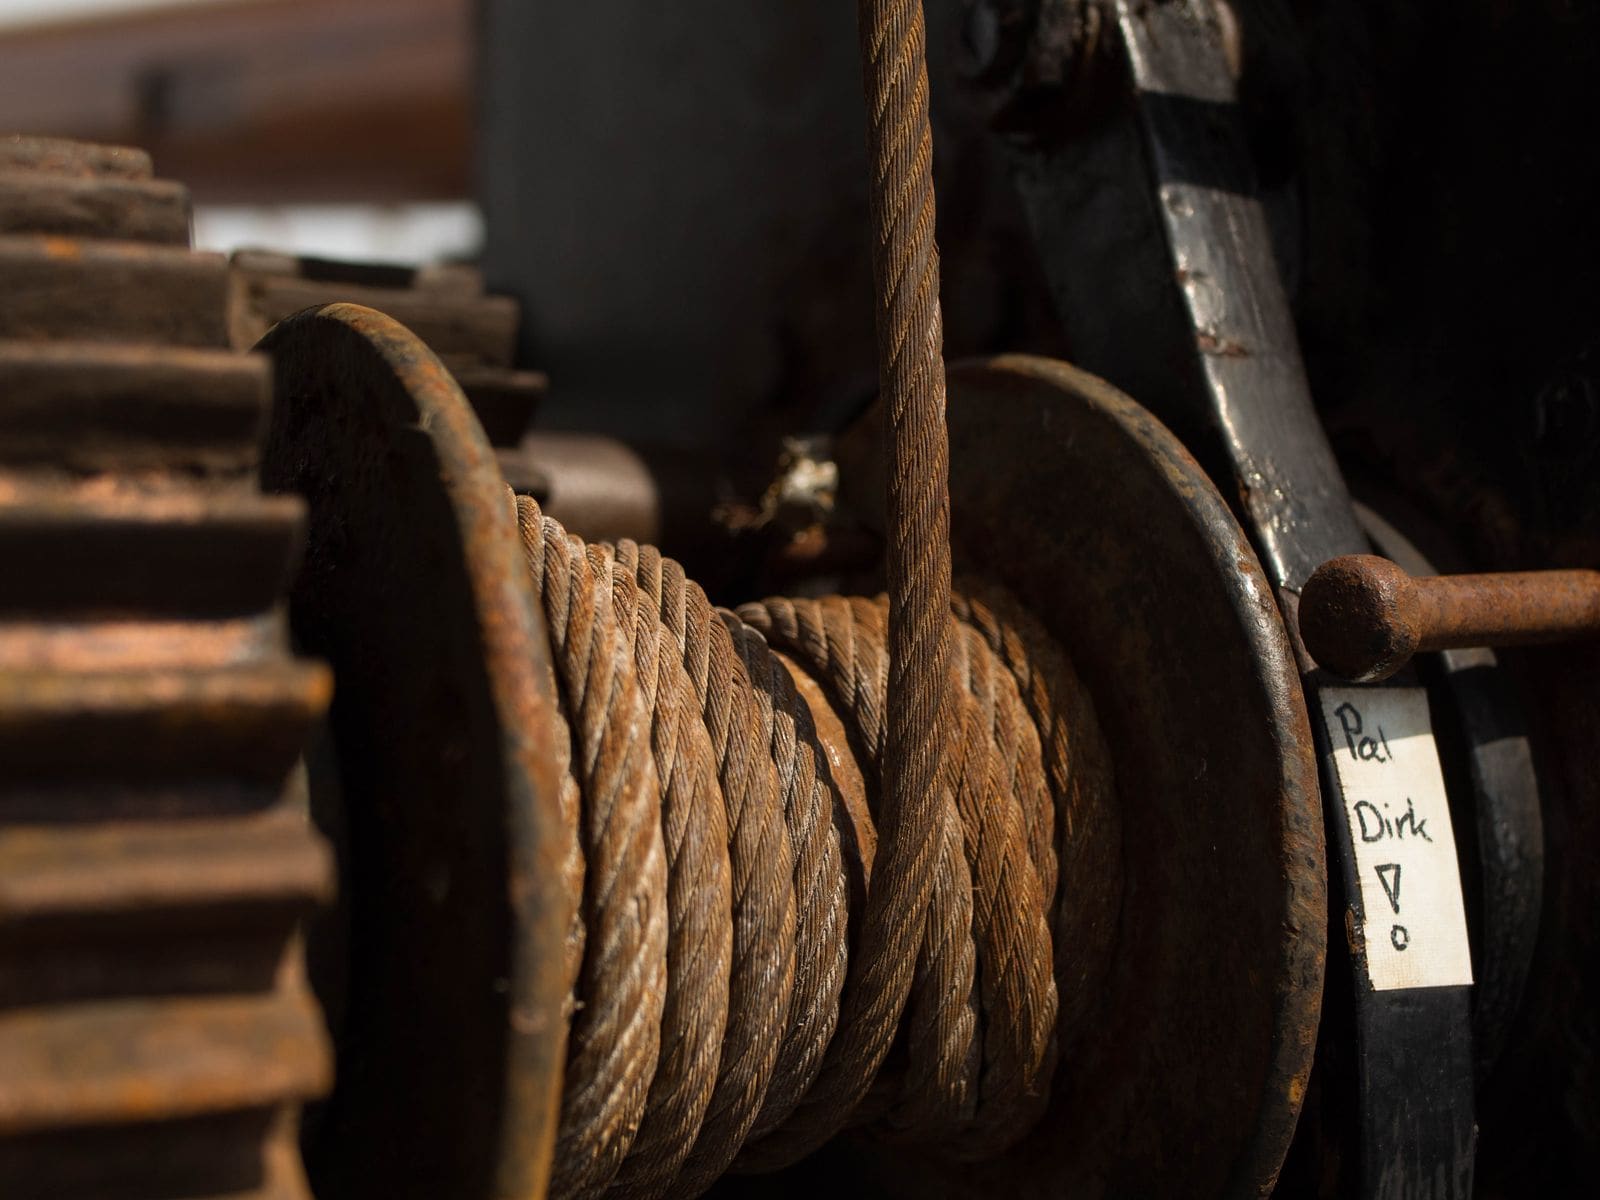
Photo: Jakob Schlothane / Pexels · Pexels License Use the cable type, diameter and length your lift maker specifies. BoatUS warns not to swap galvanized for stainless or the other way around: pulleys are sized for one or the other. Replacing a cable means supporting the cradle so it can't fall. If you're not set up for that, have a lift dealer do it.
With the cable slack, spin each pulley by hand. It should turn freely without grinding. Try to wiggle it sideways; it should barely move. Check that the cable runs straight in the center of the groove. A stiff, wobbly or misaligned pulley chews up cables fast. Clean out the grooves, lubricate the bearings or bushings as your manual says, and replace any pulley with deep groove wear, cracks or play.
The cable should wind neatly in even layers. Watch for a "riding turn," where one wrap jams under another and the lift can't move. If that happens, shut off the power and free it with tools, or call your dealer.
Wipe cables with light oil or the cable lubricant your lift maker recommends. BoatUS and ShoreMaster both say to avoid grease on cables: it traps moisture and grit inside the strands. Grease goes only where your manual says (often pulley bearings or gearboxes).
Turn off power to the lift at the breaker before touching anything electrical. Make sure the motor and drive have their cover in place. Look for:
- Corroded, loose or chafed wiring and connections
- Cords hanging into or near the water
- A missing or damaged GFCI on the lift circuit (test it with its button)
- A motor that runs slowly, hums or trips the breaker (often voltage drop on a long dock run, a corroded connection or a failing motor capacitor)
Wiring repairs and GFCI problems are a job for a licensed electrician who knows docks. Hydraulic lifts: look for leaks at fittings and cylinders and wipe exposed rods with a corrosion inhibitor. Air-assisted lifts: spray soapy water on hose connections and watch for bubbles.
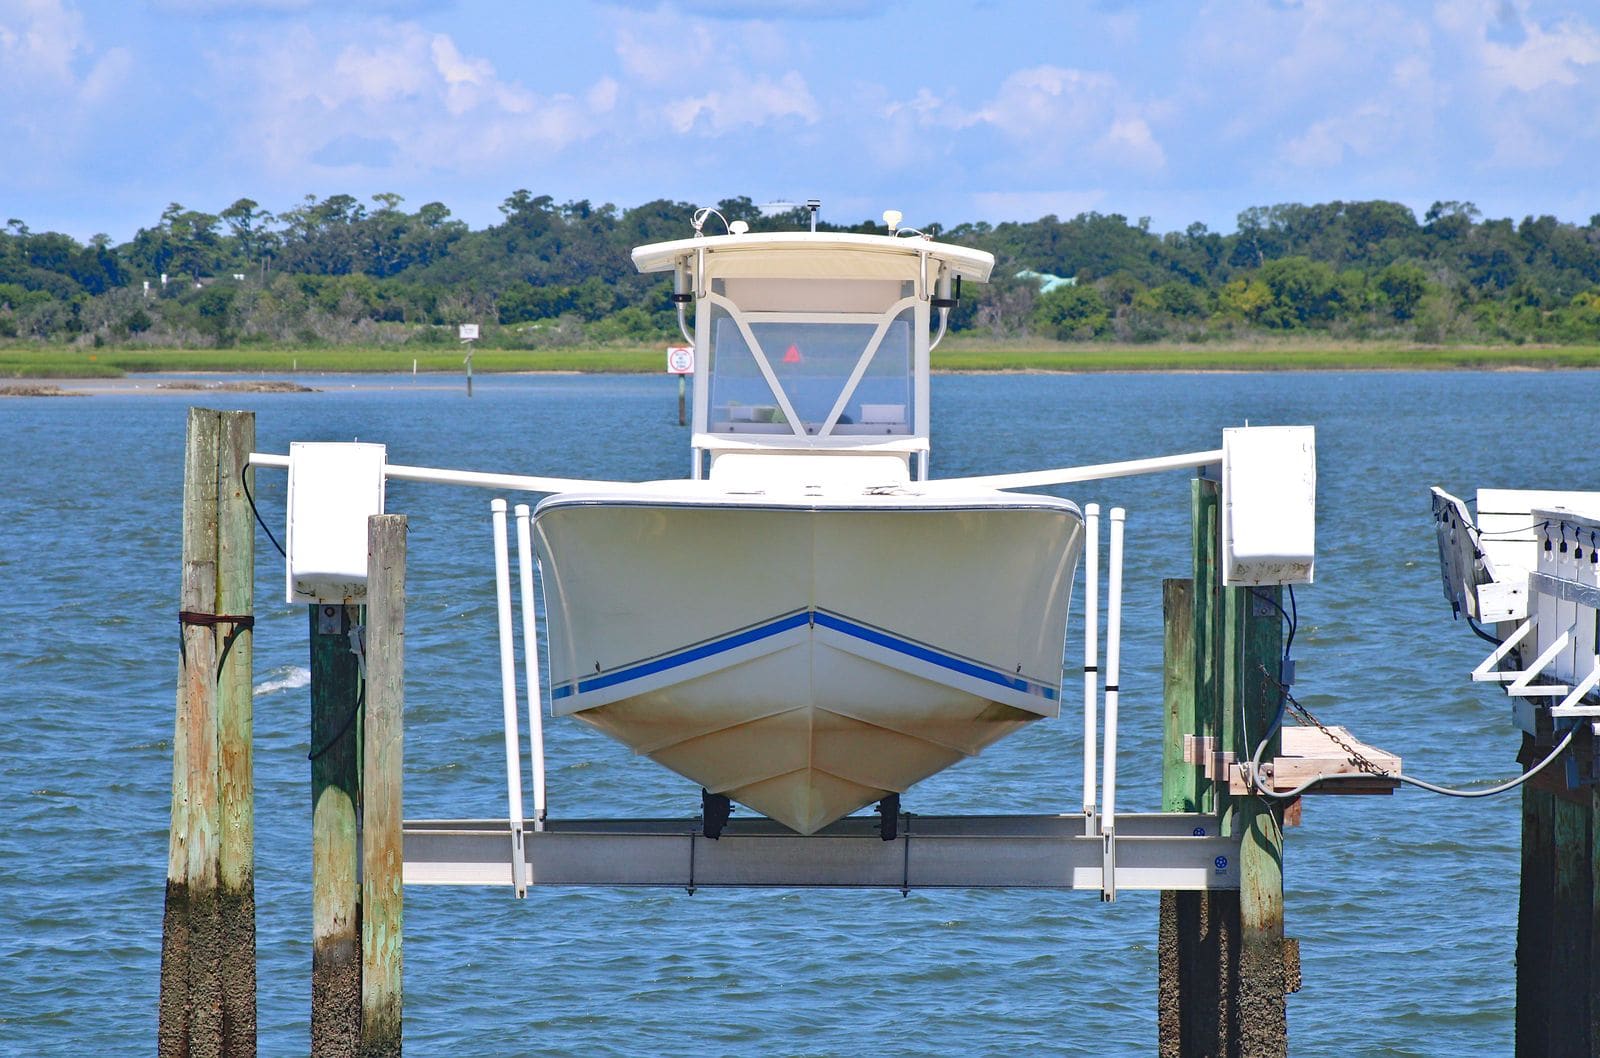
Bunks can only be checked properly with the boat off. Look for rotted or split boards, worn or torn carpet or pads, missing or rusted bolts, and cracks at welds and brackets. Check that bunks are level and evenly spaced and still match your hull. Also look at what holds the lift up: pilings, dock frame or seawall. Loose hardware, rot or erosion there is a lift failure waiting to happen. ShoreMaster adds that pilings should stand firmly upright with no decay or damage from marine borers (wood-boring sea creatures), and seawalls should show no erosion or cracking from wave impact.
Drive or float the boat in slowly with the cradle low enough that the hull clears the bunks. Line it up so it sits centered side to side and fore and aft so the weight is shared between the front and rear lifting points. Your lift maker or dealer can tell you the right fore-aft position; heavier engines usually mean moving the boat forward. Guide-ons and a bow stop or motor stop make it repeatable. Raise slowly, stop when the hull first touches, check that it's centered, then lift the rest of the way. Raise it high enough to clear normal waves and tides but no higher than needed.
A boat full of rainwater or snow can weigh far more than the lift is rated for. BoatUS describes a winterized boat left on a lift with the drain plug in: it filled with snow, the lift collapsed and both were a total loss. When the boat is on the lift, pull the drain plug (and remember to put it back before launching), keep cockpit drains clear, and use a cover that sheds water with a proper support frame.
Winter: follow your lift maker's layup steps. ShoreMaster's general advice is to raise the lift clear of the water, disconnect power, cover the motor, rinse and dry everything, and store removable controls somewhere dry. In ice country, many lifts must be pulled out or have the boat removed; ask your dealer.
Hurricanes and big storms: BoatUS, West Marine and ShoreMaster agree the best plan is to take the boat off the lift and store it ashore well before the storm. If the boat must stay:
- Pull the drain plug and clear the cockpit drains so rain can't overload the lift.
- Strip off canvas, cushions and anything that catches wind.
- Strap the boat to the lift and run lines to solid dock points too; BoatUS claims show boats secured to both the lift and the dock fared best. Back up lines in case one fails, and protect them from chafe.
- Shut off power to the lift.
- Plug the engine exhaust outlets if your engine maker allows it, and plan to remove the plugs before starting.
- Follow your lift maker's advice on cradle height for storm surge. ShoreMaster's hurricane tips say to raise its lifts to the highest point and to cross the bow and stern lines into a web tied to well-anchored cleats and pilings, with each line backed up by a second one to a different point. Surge can still float the boat off the bunks.
Write your storm plan in BoatMend before the season starts.
Common mistakes
- Leaving the drain plug in while the boat sits on the lift, especially over winter.
- Putting a bigger, heavier boat on the old lift without checking capacity or moving the bunks.
- Greasing the cables.
- Riding the boat up or down or letting kids play on a raised boat.
- Ignoring a noise or an uneven lift until a cable breaks.
- Swapping cable types or buying "close enough" cable at a hardware store.
- Leaving dock power on while working on the lift motor or wiring.
When to call a pro
- Any cable shows broken strands, kinks or heavy rust, and you aren't set up to support the cradle safely while replacing it
- The motor hums, runs slow, trips the breaker or the GFCI keeps tripping
- There's any sign of stray current in the water or a shock from the lift or dock
- Pilings, brackets, welds or the frame are cracked, bent or rotted
- Hydraulic leaks, or an air-assisted lift won't hold the boat level
- You need to change the bunks for a new boat or aren't sure of the lift's capacity
- Installing, removing or relocating a lift (permits may be required)
Tips
- Keep a simple log of cable install dates and inspections in BoatMend, with photos of each cable end and pulley.
- A full set of cables is usually a small cost compared with the boat they hold up. When in doubt, replace.
- Sacrificial anodes on the lift help in salt water if your lift is designed for them; replace them when they're worn.
- Rinse and inspect after the first few uses each season, when problems from winter usually show up.
Official references
We read these to write this guide. Your engine's own manual always wins.
- BoatUS – Give Your Boat A Lift (lift maintenance and claims)
- ShoreMaster – Pre-Season Checklist, Inspecting Your Boat Lift Cables and Pulleys
- ShoreMaster – Top Boat Lift Maintenance Tips
- ShoreMaster – How to Tie a Boat to a Lift for a Hurricane
- West Marine – Boat Storage Options, Wet, Dry, Covers and Wrap
- Electric Shock Drowning Prevention Association
Safety: BoatMend is for information only and does not replace a certified marine technician. You are responsible for your safety and your boat. Read the full disclaimer.
Last updated 2026-10-24
Related guides
Shore Power Safety: Cords, Inlets, Burned Plugs and Electric Shock Drowning
An owner's inspection routine for your shore power cord, plugs, boat inlet, galvanic isolator and ground-fault protection, plus the right way to plug in and the facts about Electric Shock Drowning. This guide is for looking and testing only; any electrical repair belongs to an ABYC-certified marine electrician.

Winter Boat Cover vs Shrink Wrap: Support, Ventilation, Safety and Spring Removal
Choose between a reusable winter cover and shrink wrap, build a support frame that sheds snow, vent it so the boat doesn't mildew, and know the fire risks before you try DIY shrink wrap. Includes spring removal and recycling.
How to Adjust and Replace Trailer Bunks and Rollers So Your Boat Sits Right
Set up your boat trailer so the hull is supported in the right places: bunks and rollers clear of the strakes, the transom fully supported, the bow snug against the winch stop and the weight balanced on the tongue. Also covers replacing rotten bunk boards and worn carpet or rollers.

How to Clean, Remove Oxidation and Wax Your Boat's Gelcoat (Plus Pontoon Tubes)
Wash your hull the right way, bring back chalky, faded gelcoat with compound, and seal it with wax so it stays glossy and protected from the sun. Includes how to clean and protect the aluminum tubes on a pontoon boat.
How to Test and Clean Your Bilge Pump and Float Switch
Make sure your bilge pump actually moves water overboard, both on the manual switch and automatically through the float switch. A working bilge pump is one of the most important safety systems on any boat that stays in the water.
How to Inspect and Replace Sacrificial Anodes (Zincs)
Check the anodes on your outboard, sterndrive or inboard running gear, replace them when they are half gone, and choose the right metal for the water you boat in. Fresh anodes are cheap insurance against expensive corrosion damage to your lower unit, drive and prop.