Jet Ski Electrical Problems: Dies in Waves, Low Voltage and Bad Connections
A personal watercraft that cuts out when it hits chop, shows low voltage, flickers its display or blows fuses usually has a corroded or loose connection, not a dead computer. Work from the battery and grounds to fuses, relays and module plugs, and learn when the job needs a dealer's diagnostic tool.
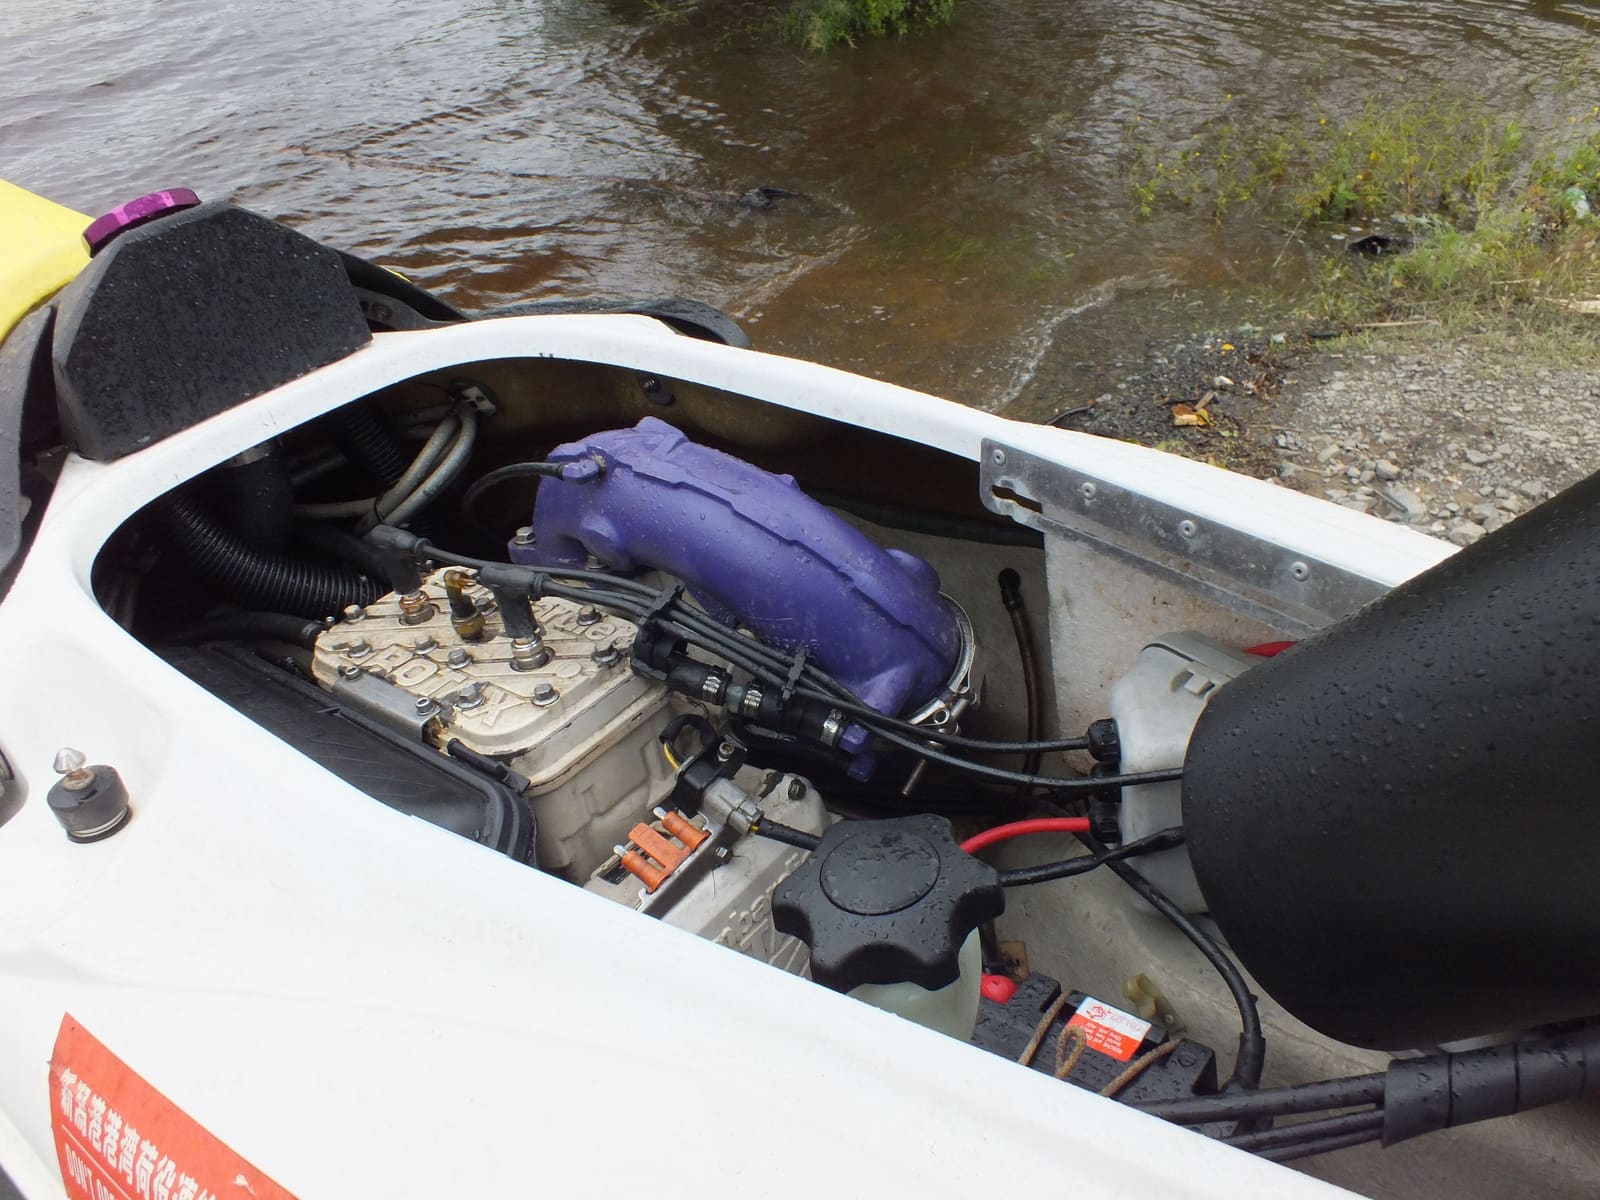
Time
1 h 30 min
Shop would charge
$150-600
Applies to
Jet ski / PWC · Jet ski / PWC
Safety first: Open the seat and let the engine compartment air out before any electrical work, and sniff for fuel: a spark from a loose cable can ignite gasoline vapor. Disconnect the battery negative cable first before unplugging modules or working on wiring. A fuse that blows again right away, melted insulation or a burning smell means a short circuit: stop and take it to a dealer. If the craft dies on the water, stay with it, wear your life jacket and call for a tow (TowBoatUS or Sea Tow), or the Coast Guard on VHF channel 16 or 911 in an emergency.
Owners often ask
- My jet ski shuts off when I hit waves but restarts right away. What causes that?
- My Sea-Doo shows a low voltage warning. Is it the battery or the charging system?
This guide walks you through it. Still stuck? Ask the AI Mechanic about your engine.
Tools
- Your Operator's Guide or owner's manual (fuse and relay locations, battery type)
- Digital multimeter
- Battery charger or maintainer suited to your battery type
- Wire brush, emery cloth and electrical contact cleaner
- Dielectric grease and a corrosion-inhibiting spray for marine electrical use
- Basic socket set and screwdrivers
- Flashlight and a notepad (or your phone) for notes and photos
Parts & supplies
- Fuses of the exact type and rating listed in your manual
- Replacement battery (if it fails a load test)
- Hex nuts and lock washers for battery terminals (if yours use wing nuts)
Before you start
Personal watercraft live in the worst possible place for electrics: the battery, fuse box and computer sit inside a sealed hull full of humid, often salty air, and the whole craft slams through waves. Yamaha's Maintenance Matters guide explains why this matters: corrosion adds resistance, so voltage drops or comes and goes, and some damage hides inside the insulation where you cannot see it.
Typical symptoms and what they usually point to (start at the top):
- Dies or the display blinks when you hit waves or chop: loose or corroded battery cable, ground or main connector. Very common on all brands.
- Low-voltage warning, slow cranking, display resets: weak battery, bad connection or a charging problem.
- Nothing works at all: battery, main fuse or a main ground.
- One item dead (gauge, horn, bilge pump, speaker): that circuit's fuse, relay or connector.
- Intermittent no-power or "no communication" faults: a corroded or loose plug at the main electronic module.
The module names you will see (general patterns; your manual has the exact name and location):
- Sea-Doo: older models use an MPEM (Multi-Purpose Electronic Module) that handles the D.E.S.S. key and starting; newer ones use an engine control module (ECM) plus other modules on a data network.
- Yamaha: an ECM, with many newer models adding a security and display system.
- Kawasaki: an ECU on fuel-injected models; older carbureted models use a simpler igniter.
All three brands use dealer-only diagnostic software to read fault codes and program keys. Your job is to rule out the simple, common causes first.
Have the battery fully charged before you start testing, and take photos of every connector before you unplug it.
Steps
When does it die or flicker: at idle, when you accelerate, in chop, after a few minutes, or only when wet? Does the display reset, show a message or beep? Does it restart right away? This record narrows the cause and saves money if you end up at the dealer.
Remove the seat, find the battery and measure across the terminals with the multimeter with everything off. A fully charged 12-volt battery typically reads around 12.6 volts or a little more; noticeably lower means it needs charging (see our marine battery guide for the full table, and confirm with your battery's label).
Charge it fully, off the craft, the way Sea-Doo describes: disconnect the negative cable first, then the positive, and charge on a dry, level surface. If it will not reach full charge, will not hold it overnight, or is more than a few seasons old, have it load tested. Yamaha notes any auto parts store can do this. A battery can show good voltage and still collapse under starter load.
A quick check before you leave home or the ramp parking lot: Sea-Doo suggests starting the craft on the trailer for only a few seconds (5 to 10 seconds at most, since there is no cooling water) just to confirm the battery is up to the job. If it cranks slowly there, it will be worse after a day of stops and starts on the water.
Make sure the replacement is the size and type your manual specifies, and that it is strapped down tight. A loose battery that bounces in waves can break internal connections or pull its own cables loose.
This single step fixes a large share of "dies in the waves" complaints. Yamaha's guidance: battery cable connections must be clean and tight and use hex nuts and lock washers, not wing nuts, because loose connections cause intermittent problems or a full no-run condition, and a terminal can be corroded underneath while looking clean on top.
- Disconnect negative, then positive.
- Clean both the post and the inside of the cable end down to bare, shiny metal with a wire brush or emery cloth.
- Reconnect positive first, then negative, and tighten firmly.
- Coat the finished connection with a terminal protector or a thin film of dielectric grease.
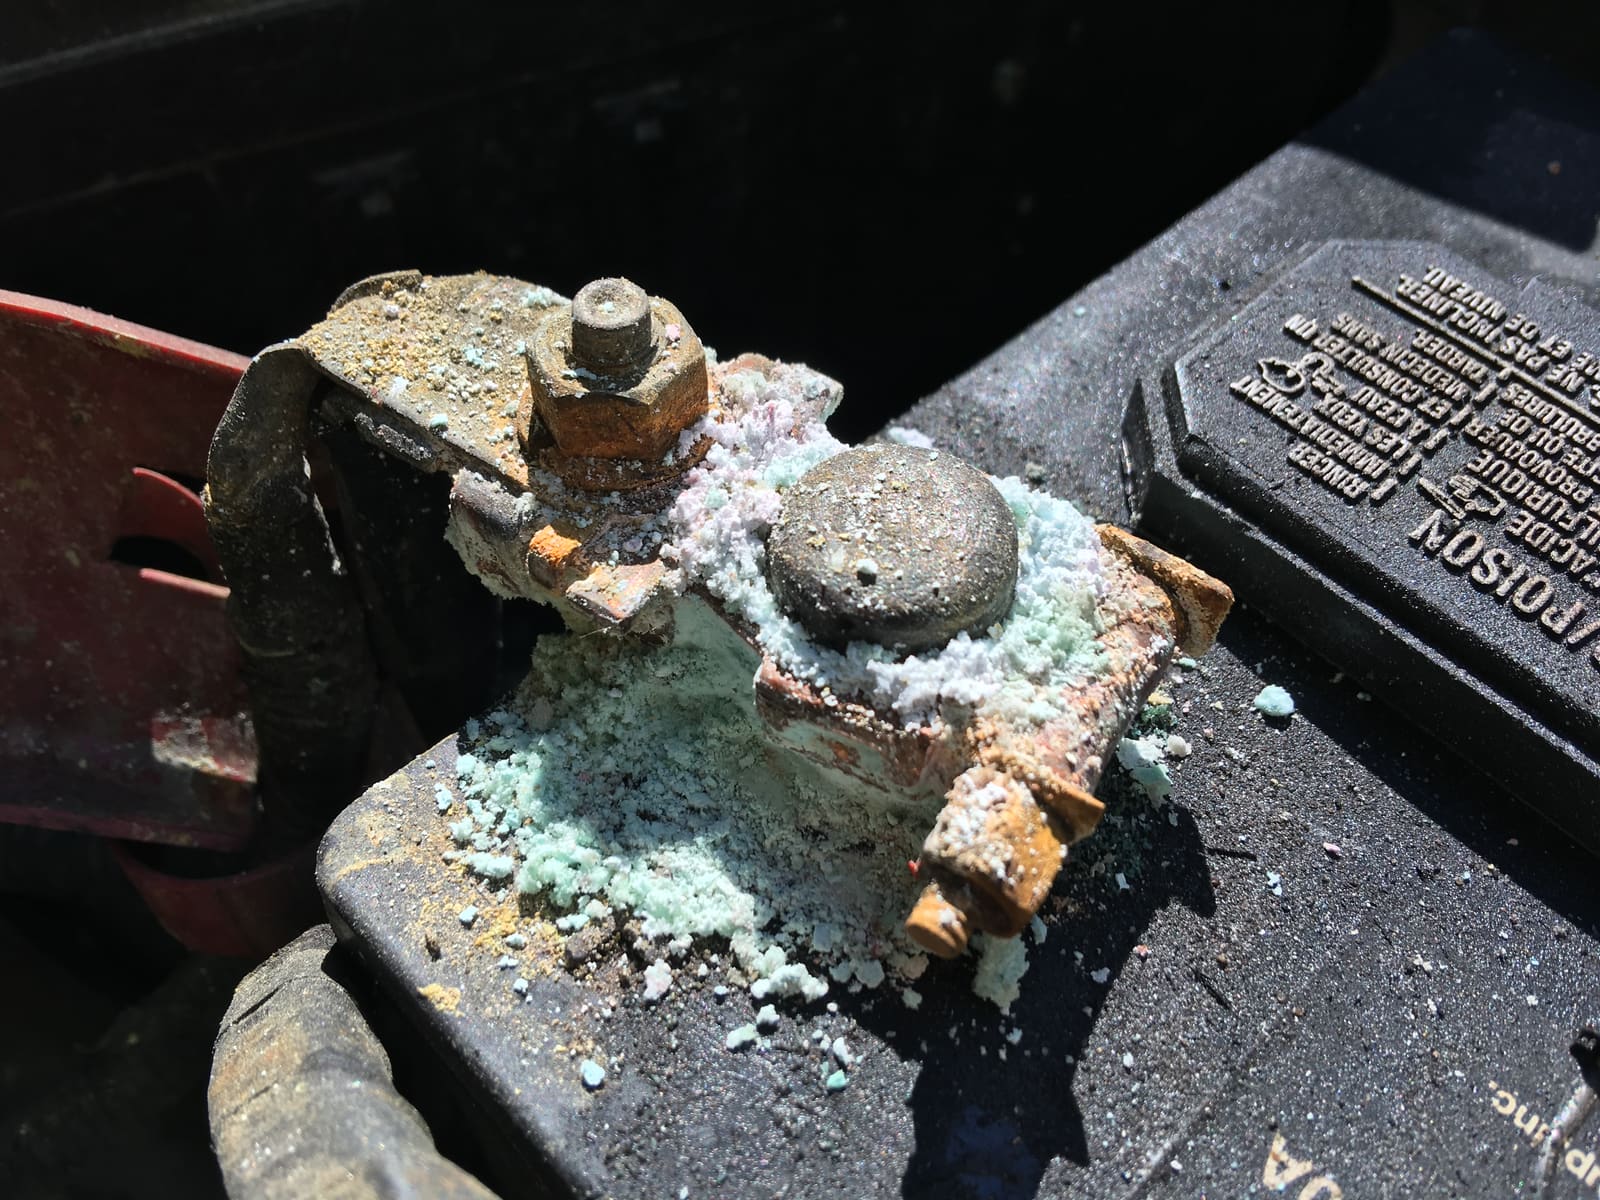
Corrosion like this adds resistance and causes cut-outs long before the battery is dead. Photo: MarkBuckawicki / Wikimedia Commons · CC0 Follow the negative battery cable to where it bolts to the engine or ground point, and the positive cable to the starter relay or solenoid. With the battery connected and the key or lanyard on (engine off), have a helper watch the display while you wiggle each cable end and connector. If the display flickers, resets or the beeps change, you have found a bad connection. Remove it, clean both surfaces to bare metal, reinstall with the proper hardware and tighten.
Also check any small ground wires bolted to the engine block or the electrical box. They corrode and loosen just like the big ones.
A cable that looks fine can be rotten inside. Yamaha suggests checking wires and connectors for resistance with a meter: there should be very little (they give about 0.1 to 0.2 ohm as the limit end to end). An easier test for owners is voltage drop:
- Put one meter lead on the battery post and the other on the far end of the same cable (for example, the negative post and the engine ground).
- Have a helper crank the engine (lanyard off or as your manual describes so it will not start, and only in short bursts).
- A reading of more than a few tenths of a volt means that cable or connection is losing power. Clean it, or replace the cable.
With the craft in the water or on a flush kit used exactly as your manual says, start the engine and measure battery voltage. On most 12-volt systems, it should rise above the resting voltage when the engine is above idle (often into the 13s or 14s; your service manual has the exact range). Many personal watercraft charge very little at idle, so a battery can run down during a day of slow cruising and repeated starts.
- Voltage never rises above resting voltage: possible failed regulator/rectifier, stator or a broken connection between them. That is a dealer or service-manual job. A "low voltage" or "12V LOW" warning on the display after you've added an accessory or a replacement part is the same story: check the battery and the charging voltage first, before blaming the new part.
- Voltage climbs well above the normal range: a regulator fault that can boil the battery and damage electronics. Stop riding and see the dealer.
Our charging system test guide explains the method in more detail.
Use your manual to find the fuse box (often under the seat, near the battery or in a sealed electrical box). Pull each fuse and look at the metal strip, or test across it with the meter. Also look for green corrosion on the fuse blades and sockets, which causes intermittent faults even with a good fuse. Clean corroded sockets with contact cleaner.
Replace a blown fuse only with the same type and amp rating. If the new fuse blows right away or after a short ride, there is a short circuit: stop and take it to the dealer. Never install a bigger fuse or bridge it with wire.
The starter relay (solenoid) and other relays click when they work. A relay that clicks but the starter barely turns usually means a weak battery or corroded cables (Steps 2 to 5). A relay that never clicks may be bad, may not be getting a signal from the key system, or may have a corroded plug. Many relays can be swapped with an identical one from a less critical circuit as a quick test, if your manual shows they are the same part.
If the engine ever cranks or starts by itself, or the starter keeps turning after you let go of the button, the starter solenoid has probably stuck (its contacts welded closed). Disconnect the battery negative cable right away to stop it, keep people away from the pump intake, and have the solenoid and start circuit checked before the craft is used again.
Water and salt in the main module connectors cause the most frustrating faults: intermittent power loss, display going blank, key not recognized, or a craft that runs fine one day and not the next. This is a common pattern with the older Sea-Doo MPEM and with module plugs on all brands.
- Disconnect the battery negative first.
- Find the main module and its connectors (your manual shows where; some are inside a sealed electrical box).
- Unplug one connector at a time, look for green or white corrosion, water, bent or pushed-back pins and a damaged seal.
- Clean with electrical contact cleaner only. Do not scrape pins with metal.
- Let it dry fully, add dielectric grease to the seal if the maker allows it, and plug it back in until it clicks.
A clue owners often report: the craft dies, then comes back when someone nudges one plug on the module. Contact cleaner alone often doesn't cure that, because the metal terminals inside have lost their grip. Experienced techs remove and clean each terminal and restore its tension one wire at a time, which takes the service manual (or a shop) and the right terminal tools; it's a common fix that saves buying a module.
Do the same at the key post (D.E.S.S. on Sea-Doo, lanyard switch on Yamaha and Kawasaki), the start/stop buttons and the gauge connector. Rinse salt off the key and post with fresh water.
Repeated corrosion means water is reaching the wiring. Check whether the electrical box lid and its gasket seal, whether the seat and hatch seals are worn (Yamaha notes worn seals let water in), and whether the hull is taking on water. Our PWC water-in-hull guide covers finding leaks. Fix the leak, or the electrical problems will return.
Yamaha recommends spraying the dry engine and electrical connections with a marine protectant (a silicone spray in fresh water, a heavier anti-corrosion spray in salt water) after rides, and checking battery terminals at every use. Keep the battery on a maintainer during storage, ideally off the craft.
Modern watercraft store fault codes that only the brand's dealer software can read and clear, and only the dealer can program keys or update module software. Take it in when:
- A check-engine light, fault message or limp mode stays after the battery and connections are fixed
- The display shows a module communication error
- The key is not recognized after you have cleaned it and the post
- The charging system tests bad
- The problem is intermittent and you have done Steps 1 to 10
Bring your notes, the symptoms log and both keys. Sea-Doo notes that its dealers have BRP-trained technicians and the diagnostic tools, and that warranty and recall work must be done at a certified BRP service center.
Common mistakes
- Replacing an expensive module when the real cause was a loose negative cable or corroded ground.
- Using wing nuts on battery terminals, or tightening a cable over corrosion.
- Charging or jump-starting the battery while it is installed in the craft.
- Fitting a higher-amp fuse because the correct one keeps blowing.
- Pulling module connectors with the battery still connected.
- Scraping connector pins with a knife or using grease that is not meant for electrical connectors.
- Ignoring a slow water leak that keeps re-corroding the wiring.
- Expecting the craft to recharge a flat battery while idling around the cove.
When to call a pro
- A fuse that keeps blowing, melted wires or a burning smell
- Charging voltage too low or too high
- Fault codes, limp mode or communication errors that remain after Steps 1 to 10
- Key programming, module replacement or software updates (dealer only)
- The craft was submerged or flipped and now has electrical faults
- You are stranded on the water: TowBoatUS, Sea Tow, or VHF 16 and 911 in an emergency
Tips
- Carry a spare set of the fuse sizes your craft uses in a small waterproof bag.
- Every few rides, wiggle the battery cables by hand: if anything moves, tighten it before it leaves you stranded.
- A cheap plug-in voltmeter or the craft's own voltage display (if it has one) can warn you of a charging problem before the battery dies.
- Yamaha's pre-ride check includes starting the engine, stopping it with the button, restarting and stopping it with the lanyard. It tests the switches and the battery at the same time.
Official references
We read these to write this guide. Your engine's own manual always wins.
- Yamaha WaveRunners – Maintenance Matters
- Yamaha WaveRunners – How to Perform a Pre-Ride Check
- Yamaha WaveRunners – Getting Your PWC Ready for the Season
- Sea-Doo – Prepping Your Watercraft for Summer Fun
- Sea-Doo – Personal Watercraft Owner's Manual
- Sea-Doo – Where Should I Have My PWC Serviced?
- Sea-Doo – Launching and Landing Your Watercraft
Safety: BoatMend is for information only and does not replace a certified marine technician. You are responsible for your safety and your boat. Read the full disclaimer.
Last updated 2026-10-24
Related guides
Jet Ski Won't Start or Won't Beep: A Step-by-Step Check
Most personal watercraft that refuse to start have a simple cause: the key or lanyard, a weak battery, a blown fuse, a security lock or a flooded engine. Work through these checks from the cheapest to the most involved and learn what each result means for Sea-Doo, Yamaha and Kawasaki models.

Marine Battery Care: Test, Charge and Store for Winter
Check your boat battery's health, charge it the right way for its type (flooded, AGM or lithium), and store it so it is ready in spring. Most "boat won't start" calls start with a neglected battery.

How to Find and Fix Corroded Electrical Connections on a Boat
Track down the green crust and loose terminals behind flickering lights, dead gauges and slow cranking with a simple voltage-drop test, then remake the connection the marine way: tinned wire, a proper crimp, adhesive-lined heat shrink and a protective coating.
Is My Engine Charging the Battery? Test the Charging System With a Multimeter
A step-by-step way to find out whether your outboard's stator and rectifier/regulator or your inboard's alternator is really charging the battery, what the voltage readings usually mean, and when the problem is just a dirty connection. Exact test specs come from your engine's service manual.
How to Winterize a Jet Ski or PWC (Sea-Doo, Yamaha WaveRunner, Kawasaki)
Get your personal watercraft ready for the off-season by flushing and draining the cooling and exhaust system, stabilizing fuel, changing oil, fogging, and storing the battery. Doing it yourself takes an afternoon and helps avoid freeze damage, corrosion and spring no-starts.
Jet Ski and Jet Boat Pump Care: Clearing the Intake Grate and Checking the Impeller and Wear Ring
Clear weeds, rope and rocks from the intake grate of a Sea-Doo, Yamaha WaveRunner, Kawasaki Jet Ski or jet boat, and learn to spot a damaged impeller or worn wear ring. A clogged or worn pump is the usual reason a jet craft revs high but goes slow.
Jet Ski Taking On Water: Find the Leak and Drain It Safely
A little water in a personal watercraft's hull after a ride is normal; a lot is not. Learn how to tell the difference, drain the hull, and track the leak from the easy causes (drain plugs, seat and hatch seals, loose hose clamps) to the serious ones (driveshaft seal, exhaust, hull cracks), and when to stop riding.