How to Replace the Carpet on a Pontoon Boat
Strip worn pontoon carpet and old glue, check the plywood underneath for rot before it gets covered again, choose between marine carpet, snap-in carpet and vinyl, then glue, trim and finish the new floor so it lasts. Most owners need a few dry weekends; soft or rotten decking is a bigger job.
Time
20 h
Shop would charge
$1500-5000
Applies to
All engines · Pontoon
Safety first: Many carpet adhesives and glue solvents give off strong, flammable fumes. Work outdoors or in a well-ventilated space, wear the respirator, gloves and eye protection the labels call for, and keep sparks, smoking and heat guns away from wet adhesive and solvent rags (let rags dry flat outdoors before disposal). Disconnect the battery before you move the helm console or any wiring. Don't let anyone walk on a deck with soft spots or open holes, and get the boat level and stable on its trailer before you start.
Owners often ask
- How do I get old glued carpet and adhesive off my pontoon deck?
- Should I replace my pontoon carpet with carpet or vinyl?
This guide walks you through it. Still stuck? Ask the AI Mechanic about your engine.
Tools
- Phone camera, masking tape, marker and zip-top bags for labeling hardware
- Socket set, screwdrivers and nut drivers for furniture, helm and trim
- Utility knife with plenty of fresh blades, and a carpet knife
- Pry bar and pliers
- Floor scraper and plastic or dull metal putty knives
- Heat gun with a low setting (for stubborn glue)
- Awl or small screwdriver for probing the plywood
- Notched trowel in the size the adhesive label calls for
- Carpet roller (or a rolling pin and a lot of patience)
- Straightedge, chalk line and tape measure
- Heavy-duty stapler with stainless staples (if your edges staple underneath)
- Respirator, gloves and eye protection rated for the adhesive and solvent you use
- Shop vacuum
Parts & supplies
- Marine-grade carpet (or marine vinyl or woven vinyl) for the deck size plus extra
- Outdoor/marine carpet adhesive that its maker approves for your deck surface and carpet backing
- Solvent or cleaner the adhesive maker recommends for cleanup
- Marine plywood, epoxy and stainless fasteners if any deck sections need replacing
- Marine sealant for furniture and fence fastener holes
Before you start
Is it time? Avalon suggests looking critically at pontoon carpet every 5 to 7 years, and sooner (within about five years) on a boat that gets heavy use, harsh sun or salt water. Replace it when it is faded and thin, torn, stained, or smells of mildew that cleaning won't remove. A musty smell or dark stains near seat bases and screw holes can mean the plywood underneath is getting wet, which is the most important thing to check while the carpet is up.
Carpet, snap-in carpet or vinyl?
- Glued marine carpet: comfortable, warm underfoot, good grip when wet and the cheapest to buy. It holds water, sand and stains, and needs to dry out to avoid mildew.
- Snap-in carpet: bound-edge carpet held down with snaps over a finished deck, so you can take it home to wash and store. Power & Motoryacht calls this "optional" carpet: easy to remove, but the deck underneath must have its own finish.
- Marine vinyl or woven vinyl: easy to hose off and resists mildew and stains, but can get hot in strong sun. Avalon lists vinyl, woven vinyl and synthetic teak as the popular alternatives to carpet. Harris, which uses foam-backed vinyl on its own boats, says vinyl won't fade in the sun but gets warm in high heat; woven vinyl adds texture underfoot. Owners commonly report that darker colors run hotter, and that textured woven vinyl takes more scrubbing to clean than smooth vinyl. Our vinyl floor repair guide covers vinyl.
- Other DIY options: Harris mentions rubber flooring (durable and easy on feet and knees, but gets hot and isn't pretty), PVC tiles (easy but costly) and non-skid marine deck paint (cheap, but the surface prep is demanding).
Choose real marine carpet. Marine carpet has UV-stabilized fibers and a backing that lets water drain and dry. Power & Motoryacht explains that polypropylene (also sold as olefin) is the fiber for anything that gets wet, and that solution-dyed fiber (color added when the fiber is made) resists fading. Marine Fabricator prefers heavier carpet (16 to 18 ounce) over thin 12-ounce product, which can open up and show the backing when wrapped over edges. Household carpet does not belong on an open deck.
Plan the weather and time. You need several dry days, a dry deck and temperatures inside the adhesive's range. Marine Fabricator advises doubling whatever time you think it will take. Avalon recommends a professional installer for the best result; many dealers and upholstery shops do pontoon floors if you'd rather not.
Steps
Measure the deck's full length and width, and note every cutout (helm, gates, hatches, toilet or changing-room enclosures). Carpet is sold in fixed roll widths, so check whether one width covers your deck or whether you'll need a seam, and where that seam should fall (ideally under furniture). Order extra: you will trim a few inches off every edge, and cutouts waste material. If you can, keep the old carpet in one piece to use as a pattern, as both Power & Motoryacht and Marine Fabricator suggest.
Photograph every seat, table, cooler bracket, ladder, helm console and piece of trim from a few angles. Label each item and bag its fasteners separately. Disconnect the battery before you unbolt the helm console, and label wires before you unplug anything. Avalon's first step is clearing everything off the deck so the whole carpeted area is open.
Fence panels: on most pontoons the fence is bolted through the deck along the edge. Taking it off is a big job; many owners leave it in place and cut the carpet neatly around each fence base. If yours must come off, label each panel and its position.
Following Avalon's method: cut along the edges and around fixed structures with a utility knife to make manageable sections, pry an edge up carefully, then roll the carpet toward the center, slicing through stubborn glue as you go. Don't gouge the plywood or aluminum with the pry bar or knife. If you need a pattern, keep it in one piece and mark the bow direction on it.
Scrape off as much old adhesive as you can with a floor scraper and putty knives. Softening stubborn spots with a heat gun on low helps; keep heat away from wiring, vinyl, the tubes and anything flammable. Avalon suggests a solvent recommended for marine use if scraping isn't enough. Marine Fabricator, on the other hand, prefers scraping and elbow grease over chemicals because solvent residue can stop the new adhesive from sticking. A good rule: scrape first, use a solvent only if the new adhesive's maker approves it, and let it evaporate completely. The new carpet needs a clean, dry, sound surface.
With the deck bare, walk every inch of it and press with your heel, especially around seat and fence bases, the helm, the gate, the ladder and every screw hole. Probe dark or stained areas with an awl.
- Firm and dry everywhere: carry on.
- Soft, spongy, delaminating or the awl sinks in: that wood is rotting. Epoxyworks explains that water gets into deck plywood along the screws and through the unsealed underside, and that once it has delaminated, the only real fix is to replace the damaged section.
Replacing plywood: cut out only back to solid wood with joints landing on a cross-member or added support, use marine plywood at least as thick as the original, and seal the back, all edges and every fastener hole with epoxy before installing. Epoxyworks stresses sealing the edges around the perimeter of a pontoon deck. Ask your builder before using pressure-treated wood: some treatments contain copper compounds that corrode aluminum cross-members. Our vinyl floor repair guide walks through deck replacement in more detail.
Pull or set any fasteners sticking up, fill gouges, and sweep and vacuum thoroughly. Seal any open screw holes you won't reuse. Some installers add a water-resistant coating to bare plywood before carpeting; if you do, check that your carpet adhesive is approved over it. Let everything dry completely: adhesive over damp wood fails, and it traps water against the deck.
Use an outdoor or marine carpet adhesive whose label lists your deck surface (marine plywood, or aluminum on an aluminum deck) and your carpet's backing type. General rules:
- Avoid indoor, water-soluble carpet glue. It softens when the deck gets wet.
- Trowel-applied adhesive is common for large flat areas. Use the notch size on the label: too much adhesive can bleed through the carpet, too little won't hold.
- Contact cement is often used where carpet wraps over edges or up vertical faces; Marine Fabricator uses a waterproof, heat-resistant contact cement. Some contact cements can react with certain backings, so test a scrap first.
- Note the open time (how long you have before laying the carpet) and the cure time before walking on it or reinstalling furniture.
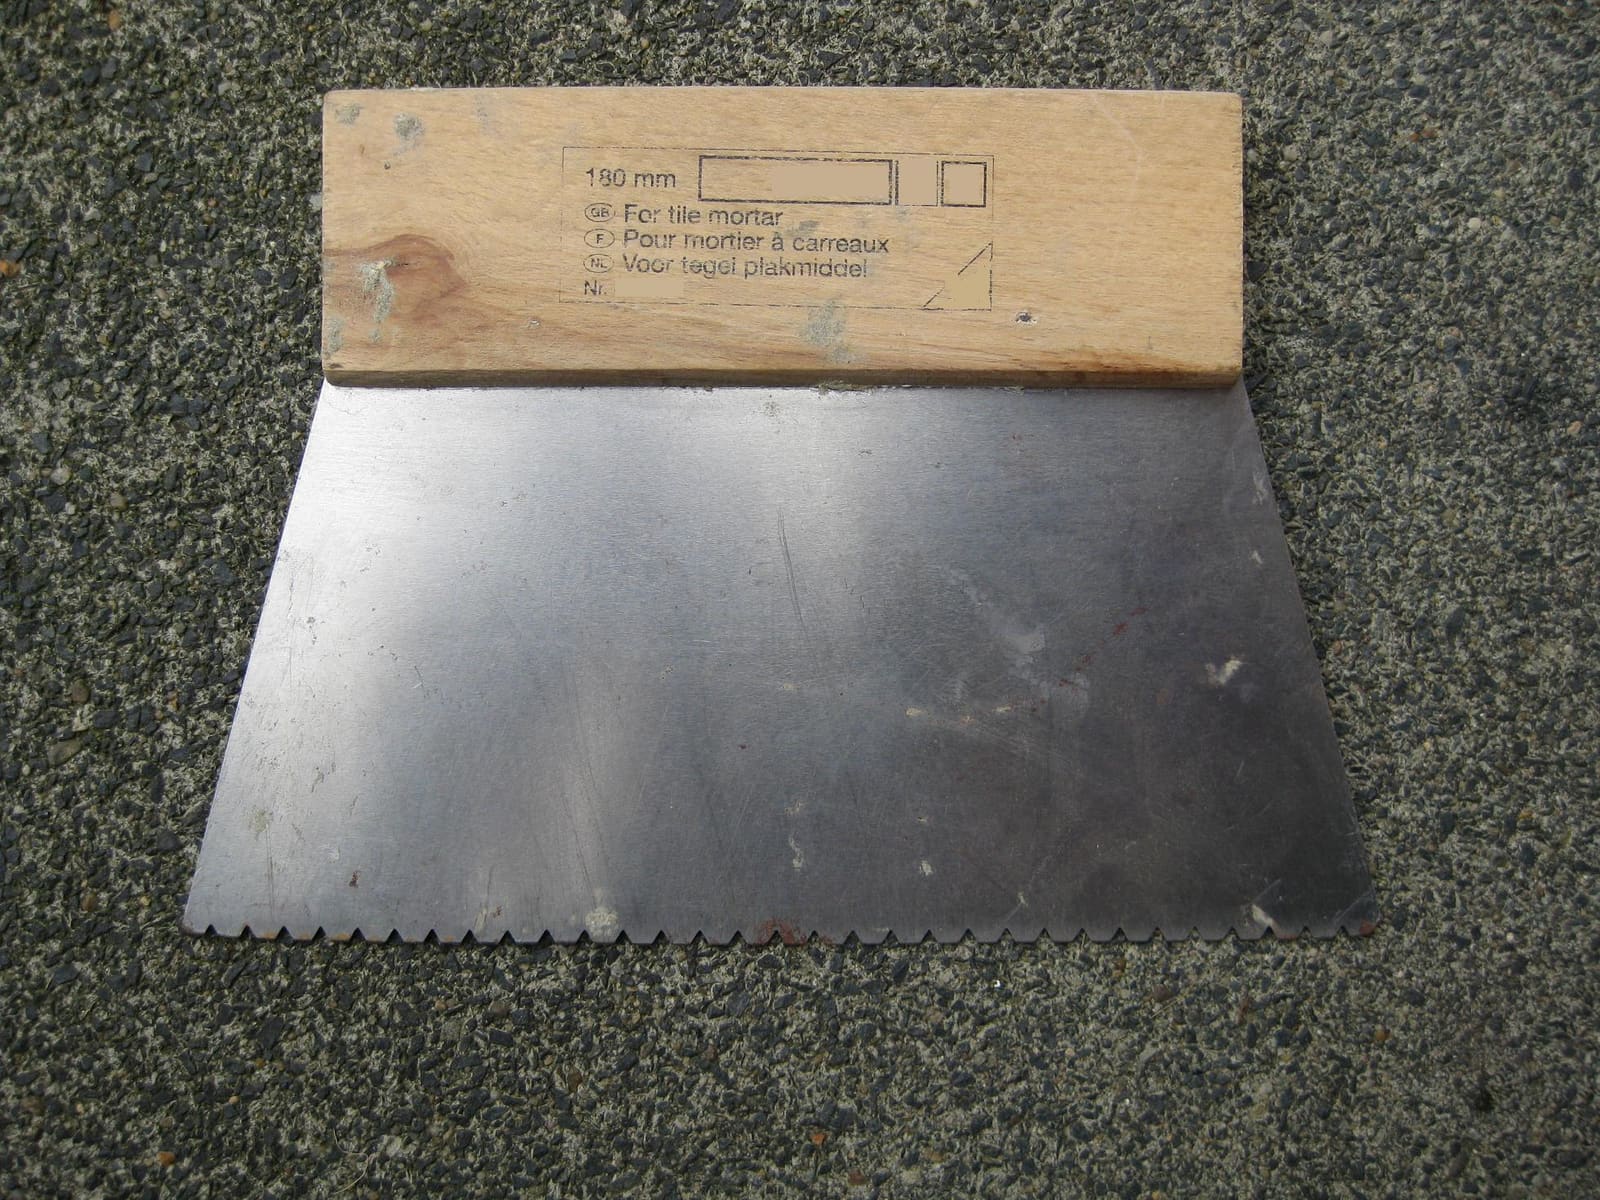
Photo: Romate / Wikimedia Commons · CC BY-SA 3.0 Unroll the carpet in the sun or a warm space for a while so the roll curl relaxes. Mark arrows on the back pointing to the bow, as Marine Fabricator recommends, so every piece runs the same way; carpet laid with the pile going different directions looks like two shades. Lay it out on the deck, position it with a few inches of overhang on every edge, and rough-cut the big cutouts oversized. The Bass Pro guide suggests leaving about 3 to 4 inches past the deck edge if your edges wrap and staple underneath.
Fold back half the carpet, spread adhesive evenly on the deck with the notched trowel (or as the label directs), wait for the open time if required, then lay the carpet back into it smoothly. Work from the center toward the edges with the roller to push out air and wrinkles. Repeat with the other half. Keep adhesive off areas you won't carpet. Wipe up any adhesive on the carpet face right away with the cleaner the adhesive maker names.
Use a sharp blade (change it often) and a straightedge.
- Cutouts: cut hatch, gate and fence-base openings carefully. Marine Fabricator notes that carpet wrapped around hatch lips needs a larger opening than the hatch itself.
- Deck edges: finish them the way your boat was built. On many pontoons the carpet runs to the edge and is covered by the perimeter trim or rub rail; on others it wraps around the deck edge and is stapled underneath. If you staple, use corrosion-resistant staples shorter than the plywood is thick, a point the Bass Pro guide makes, so they can't poke through the top.
- Seams: butt the edges tightly and glue both sides fully so they can't lift.
- Cutting carpet in place can score the deck below and let water into the wood; slide a scrap of thin plywood or aluminum under the cut line when you trim on the boat.
Give the adhesive its full cure time before heavy foot traffic or bolting furniture down. When you reinstall seats, the helm, ladders and fence bases:
- Cut the carpet back slightly from each base footprint so the base sits on the deck, not on carpet that will wick water into the bolt holes.
- Seal every fastener hole. Epoxyworks recommends sealing fastener holes in pontoon decks with epoxy; at minimum bed each one with marine sealant.
- Reconnect the helm wiring exactly as photographed, reconnect the battery and test every switch, gauge and light.
See our through-bolting guide for seat and pedestal mounting.
- Vacuum or shake out sand often; grit wears the fibers down.
- Clean spills with a mild soap solution and blot dry. Our pontoon deck care guide covers cleaning and drying in more detail.
- Avalon's cleaning advice: a vacuum is all a carpeted deck needs day to day, with heavier carpet cleaners saved for the end-of-season clean, and every bit of soap rinsed or blotted out after spot cleaning, because leftover soap attracts dirt and the stain comes back. It also warns against acetone, thinners or gasoline for stubborn spots.
- Avoid high-pressure washing on glued carpet; it can lift edges and drive water under the carpet. Mercury's cleaning tips go further: don't hose permanently installed carpet at all. Vacuum it, wipe it with a damp rag, and for bigger stains scrub gently with lukewarm water, a mild detergent and a little white vinegar.
- Let the carpet dry before covering the boat, and use a well-supported cover so rain can't pool.
- Note the install date, carpet and adhesive in BoatMend.
Common mistakes
- Laying new carpet over soft or damp plywood. It hides the rot and traps more water against it.
- Using household carpet or indoor water-based glue on an open deck.
- Leaving solvent residue or old loose glue under the new adhesive, so it never bonds.
- Too much adhesive in one spot, which bleeds through and leaves hard lumps.
- Laying pieces with the pile running different ways.
- Trimming in place without a backing board, scoring the deck and opening a path for water.
- Staples or screws long enough to poke through the top of the deck.
- Bolting furniture back on over carpet without sealing the holes.
When to call a pro
- Large areas of soft or rotten plywood, damaged cross-members, or decking you can't safely support while replacing it
- Corroded or cracked aluminum cross-members or brackets under the deck
- The helm console wiring is a tangle you can't confidently reconnect, or you find damaged or corroded wiring
- Fence panels or gates that must come off and go back on straight and secure
- You find a fuel or battery problem under the deck (fuel smell, damaged lines, leaking tank): stop and get it fixed before carrying on
- You simply want a factory-looking result: dealers and marine upholstery shops do this every day
Tips
- Take the old carpet off in as few pieces as possible; it's a free template.
- Do the job in late spring or early fall when it's warm but not scorching, so the adhesive behaves and you're not working on a hot deck.
- Buy a little extra carpet and keep a remnant for future patches.
- A cheap outdoor mat at the boarding gate keeps a lot of sand off the new carpet.
Official references
We read these to write this guide. Your engine's own manual always wins.
- Avalon Pontoons – How to Replace Carpet on a Pontoon Boat
- Epoxyworks – Repairing a Runabout Floor or Pontoon Deck
- Power & Motoryacht – Don't Tread on Thin Threads (replacing boat carpet)
- Marine Fabricator – Techniques for Installing Marine Carpet
- Bass Pro Shops 1Source – How to Install Carpet on a Boat Deck in 8 Easy Steps
- Harris Pontoons – Flooring Options, Making the Ideal Choice
- Avalon Pontoons – How to Clean a Pontoon Boat
- Mercury Marine – Next-Level Cleaning Tips for Boats
Safety: BoatMend is for information only and does not replace a certified marine technician. You are responsible for your safety and your boat. Read the full disclaimer.
Last updated 2026-10-25
Related guides

How to Repair or Replace Vinyl Flooring on a Pontoon or Bowrider
Fix small tears, lifted seams and bubbles in marine vinyl or woven vinyl flooring with the right adhesive, tell when a soft spot means the plywood underneath is rotting, and understand what a full floor replacement involves. Structural deck and stringer repairs are pro work.

How to Care for a Pontoon Deck, Flooring, Fence and Furniture
Keep a pontoon's carpet or vinyl floor clean and dry, find soft spots in the plywood deck before they spread, check fence rails, gates and seat bases, care for furniture vinyl, and cover and store the boat so mildew and sun do not win.
How to Prevent and Remove Mold and Mildew on Your Boat
Stop the musty smell and black spots before they start. Find and fix the water source, keep air moving, control humidity safely, and clean mold off gelcoat, vinyl and cabin surfaces with products that won't damage them.
How to Mount Rod Holders, Fish Finders, Cleats and Antennas Without Causing Leaks
Add accessories to your boat the right way, with through-bolts, backing plates, sealed core and proper wire pass-throughs, so every new hole stays dry and strong. Also learn where you should never drill.
How to Fix a Loose Boat Seat Pedestal, Base or Leaning Post
Find out why seat pedestals and leaning posts work loose, through-bolt the base with a proper backing plate, deal with soft or rotten floor under it, and keep swivels and slides working smoothly so your helm seat stays solid in rough water.
How to Find a Leak When Water Gets Into a Pontoon Tube
A pontoon that sits low on one side, lists or sloshes when you rock it probably has water in a tube. Learn how to confirm it, drain it, track down the pinhole or cracked weld, and choose between a temporary patch and a proper weld repair.
How to Detail Your Boat's Interior (Vinyl Seats, Carpet, Storage and Drains)
Give your cockpit and cabin a proper detail. Clean marine vinyl without stripping its UV protection, wash snap-in and glued-down carpet, clear out cup holders, storage boxes and their drains, beat mildew and pink stains, and know which household cleaners to keep off your boat.