How to Install a Backup Bilge Pump and High-Water Alarm
Add a second, larger automatic bilge pump mounted above the primary, with its own overboard discharge and a loud high-water alarm wired so it works even with the battery switch off, then test it every month so it buys you real time if the boat starts taking on water.
Time
3 h
Shop would charge
$400-1000
Applies to
All engines
Safety first: A backup pump buys time; it does not fix a leak. If the high-water alarm ever goes off on the water, get everyone into life jackets, look for the source, and call USCG on VHF 16 or 911 and Sea Tow or TowBoatUS if you can't keep up. Turn the battery switch OFF and disconnect the battery before wiring. Cutting a new hole in the hull is serious: put any new fitting well above the waterline, and leave below-waterline work to a yard. If you smell gasoline in the bilge, don't run pumps or switches: ventilate, get off the boat and call a mechanic.
Owners often ask
- Where should I mount a backup bilge pump and can I tee it into the main pump hose?
- Should my bilge pump and high-water alarm work with the battery switch turned off?
This guide walks you through it. Still stuck? Ask the AI Mechanic about your engine.
Tools
- Wire stripper, ratchet crimper and heat gun
- Drill with assorted bits and a hole saw sized for the discharge fitting (only if adding a new fitting)
- Screwdrivers and nut drivers
- Digital multimeter
- Tape measure
- Flashlight or headlamp
- Garden hose (for the water test)
Parts & supplies
- Automatic-ready centrifugal bilge pump, larger than the primary
- Bilge pump float switch (or the switch supplied with an alarm kit)
- High-water alarm (12-volt horn or buzzer with helm light, or a bilge alarm kit)
- Optional horn silence switch and a "pump running" indicator light for the helm
- Smooth-interior marine bilge hose sized for the pump outlet
- Stainless steel hose clamps (two per hose end where the barb allows)
- Above-waterline discharge through-hull (bronze or stainless preferred) and marine sealant, if needed
- Vented loop, if the discharge can't rise well above the waterline
- Tinned two-conductor marine wire sized for the round-trip length
- Fuse holder and fuse sized for the pump and wire
- Adhesive-lined heat-shrink butt connectors and ring terminals
- Liquid electrical tape, cable ties and stainless mounting screws
Before you start
Why bother. Most boats leave the factory with one small automatic pump. It handles rain and drips, but it can clog, its float can stick, and a single pump is easily overwhelmed. BoatUS contributing editor Frank Lanier, a marine surveyor, recommends pairing a larger backup pump with a high-water alarm: together they can give you extra minutes to find a leak, put on life jackets and call for help, or alert marina staff before the boat sinks at the dock.
How the system works.
- The primary pump stays low and handles everyday water.
- The backup pump sits a few inches higher and only runs when water rises past the primary's normal level, meaning something is wrong.
- A high-water alarm (loud horn or buzzer, ideally with a light) triggers at that same higher level. BoatUS notes the backup pump and alarm can share one float switch.
- Both are wired so they work even with the battery switches off, because that's how most boats are left at the dock.
Check the primary first. BoatUS suggests confirming the existing pump is installed correctly, works and is big enough before you add a backup. Clean the bilge: debris and oily sludge clog pumps and jam float switches. See our bilge pump and bilge pump wiring guides.
Plan on paper. Sketch the pump, float, alarm, fuse, every wire run and the discharge hose route to its overboard fitting. BoatUS recommends this both for planning and for future troubleshooting. Make sure every part will be reachable later.
Steps
Electric centrifugal pumps are the usual choice. BoatUS lists their strengths for this job: lots of capacity for the money, designed to run fully submerged, and able to pass small debris. Their weakness is lift: the higher they push water, the less they move. BoatUS's 2022 bilge article says just 2 feet of vertical lift can halve a small centrifugal pump's output, so the gallons-per-hour number on the box is a best case. Check the maker's chart for output at your actual lift.
Go bigger than the primary, within reason and within what your space and wiring can support. BoatUS makes a useful distinction: a backup pump adds margin for moderate water ingress; it is not an emergency pump that can save a boat with a major hull breach.
The alarm has to be heard: at the helm at speed, and ideally by a neighbor or marina staff when you're not aboard. BoatUS points out that many off-the-shelf bilge alarm kits (float plus small panel with buzzer, roughly $70) are not very loud or weatherproof, so they get mounted below decks where no one hears them. Options:
- A bilge alarm kit with a helm panel and light, mounted where you'll see and hear it.
- A simple float switch driving a 12-volt marine horn, as Lanier did on his own boat.
- Add a helm strobe or light, and a silence switch for the horn so you can think in an emergency.
Why "heard by a neighbor" matters: BoatUS Marine Insurance found that 69 percent of the boats it saw sink went down at the dock, which is why a BoatUS surveyor suggests connecting the high-water sensor to the boat's horn so people nearby know something is wrong. On a boat with more than one bilge area, he recommends a separate alarm for each area, with a light, a sound and a label at the helm saying which compartment is flooding.
Mount the backup pump and its float switch securely in the bilge, about 2 to 3 inches above the level where the primary pump switches on (BoatUS's 2026 how-to; its 2022 article gives 3 to 4 inches as typical, low enough that water can't reach floorboards or equipment first). This way:
- The small primary handles nuisance water with less battery drain.
- The backup doesn't sit in dirty bilge water, where it can clog or seize from disuse.
BoatUS suggests orienting a flapper-type float fore and aft with the flapper pointing toward the stern, clear of wires and hoses, so surging water on takeoff doesn't damage it. Use stainless screws into a solid base; don't drill through the hull bottom to mount anything.
Pick the switch type with your bilge in mind. BoatUS's article on automatic bilge switches explains how each kind fails:
- Hinged floats jam on debris, and on boats kept in salt water their flexible leads sit in the bilge until the insulation breaks down and the copper inside dissolves. The switch then looks fine but does nothing.
- Air-pressure (dome) switches keep the contacts away from water, but their small sensing tube can clog.
- Conductivity sensors can be fooled by oil or grease in the bilge.
- Electronic, no-moving-part sensors shrug off debris and oil, draw a tiny standby current and usually have a short delay so sloshing doesn't cycle the pump.
Shower or sink water draining into the bilge leaves a soapy film that upsets almost any sensor, which is one more reason to keep the bilge clean.
Never tee the backup into the primary's hose. BoatUS explains why: it cuts the capacity of both pumps, and water pushed by one can flow back into the boat through the other.
- Use a spare above-waterline fitting if one is free, or install a new one well above the waterline in the hull side or transom. Make sure loading the boat heavily won't put it near the water.
- Run smooth-interior bilge hose (ribbed-inside hose loses flow), with no sags where water sits, and double-clamp each end with stainless clamps where the barb is long enough.
- Add a riser loop or vented loop that reaches at least 18 inches above the static waterline where possible, to stop water siphoning back in.
- Don't add a check valve. BoatUS recommends removing them because they can clog or fail.
Installing a new through-hull means drilling the hull, bedding the fitting and backing it properly. If you're not confident, have a yard do this part (see our seacocks and through-hulls guide).
Measure the round-trip length: from the battery to the float, the pump and the alarm, and back to the battery negative. Look up the pump's amp draw on its label, then use a marine wire chart such as Blue Sea Systems' (bilge pumps are safety equipment, so size for low voltage drop) or an online wire calculator. Use tinned, stranded two-conductor marine wire.
Start at the battery end without connecting it. Run the duplex wire to the float switch, the pump and the alarm. Keep it above normal bilge water and support it at least every 18 inches (BoatUS). Protect it where it passes bulkheads or sharp edges.
- The float switch closes the positive feed to both the backup pump and the alarm, which are wired in parallel from the switched side of the float. Each returns to negative. Follow the wiring diagram supplied with your pump, float or alarm kit, since some use three-wire pumps or electronic switches.
- Use adhesive-lined heat-shrink butt connectors or terminals, crimped with a ratchet crimper. BoatUS also coats finished connections with liquid electrical tape.
- Keep every connection as high as the wire runs allow; most bilge pump failures start at corroded connectors near the pump or float.
Install a fuse in the positive wire right at the power source. Size it for the pump: never above the maximum fuse rating on the pump label, and small enough to protect the wire (Blue Sea Systems). BoatUS warns that an oversized fuse on a pump motor won't blow if the impeller jams, and the motor can overheat and catch fire.
Where to take power:
- Directly at the battery, through its own fuse (BoatUS's 2026 how-to). The backup works with every switch off.
- The always-hot side of the battery switch, through its own fuse (preferred in BoatUS's 2022 article), which can let the pump draw from both banks depending on the switch setup.
- A small dedicated fuse or breaker panel for all bilge pumps and alarms, fed from the battery, if the battery stud already has four terminals on it. ABYC allows no more than four per stud.
Don't power the backup through the main DC panel, where someone can switch it off with the main breaker.
Remember that "always on" also means "always drawing from the battery when it runs." Keep that battery charged at the dock (charger or solar) and check it on every visit.
BoatUS suggests:
- A manual ON switch for each pump, so you can run it if the float fails.
- A "pump running" light at the helm for each pump. A primary that runs much more than usual is your earliest warning, before the high-water alarm sounds.
- A pump cycle counter on the primary, which makes a slow leak obvious.
How they connect (BoatUS, "How To Monitor Your Bilge Pump"): a light or counter is spliced into the wire between the float switch and the pump, with its other lead to ground, so it comes on whenever the float runs the pump. A pump with a built-in water sensor usually has a third wire for manual override; that wire is live when the pump runs, so the light or counter goes there. Pumps that switch on every few minutes to "feel" for water by impeller load make a light or counter useless, because they run whether there's water or not. A light only helps when someone is aboard to see it; a counter tells you what happened while you were away.
Connect the positive (fused) lead, then the negative, at the battery. Lift the float by hand: the backup pump should run and the alarm should sound. Let go and both should stop. Test the silence switch and helm light if you fitted them.
BoatUS stresses that a pump test must prove water actually goes overboard, not just that the motor hums. With the boat in the water or on the trailer (with the drain plug in), fill the bilge with a garden hose until the primary runs, then keep going until the backup and alarm kick in. Check:
- Water leaves the new discharge fitting in a strong stream
- No leaks at hose clamps or the fitting
- No water flows back after the pump stops
- The primary still handles normal water on its own
Pump the bilge dry afterward (keep any oily water out of the lake or sea; see our bilge oil spill guide if there's a sheen).
- Monthly in season: lift the float to check the pump and alarm, and glance at the battery voltage. BoatUS says test all bilge pumps and alarms at least quarterly; monthly takes two minutes and catches failures sooner.
- Every few months: do the full water test.
- Once a year: remove and inspect the pump, check the strainer, float, wiring and mounts (mounts can crack from pump torque), clean the vented loop and check the hose and clamps.
- List each pump's type, size and location in your BoatMend boat profile and keep spares (fuse, float switch, pump cartridge if it uses one).
Agree on a plan with your crew: slow down or stop, life jackets on, find the source (raw-water hose, through-hull, drain plug, stern gland, cooling system), close any seacock you can, and call for help early. Our boat taking on water guide covers the full response.
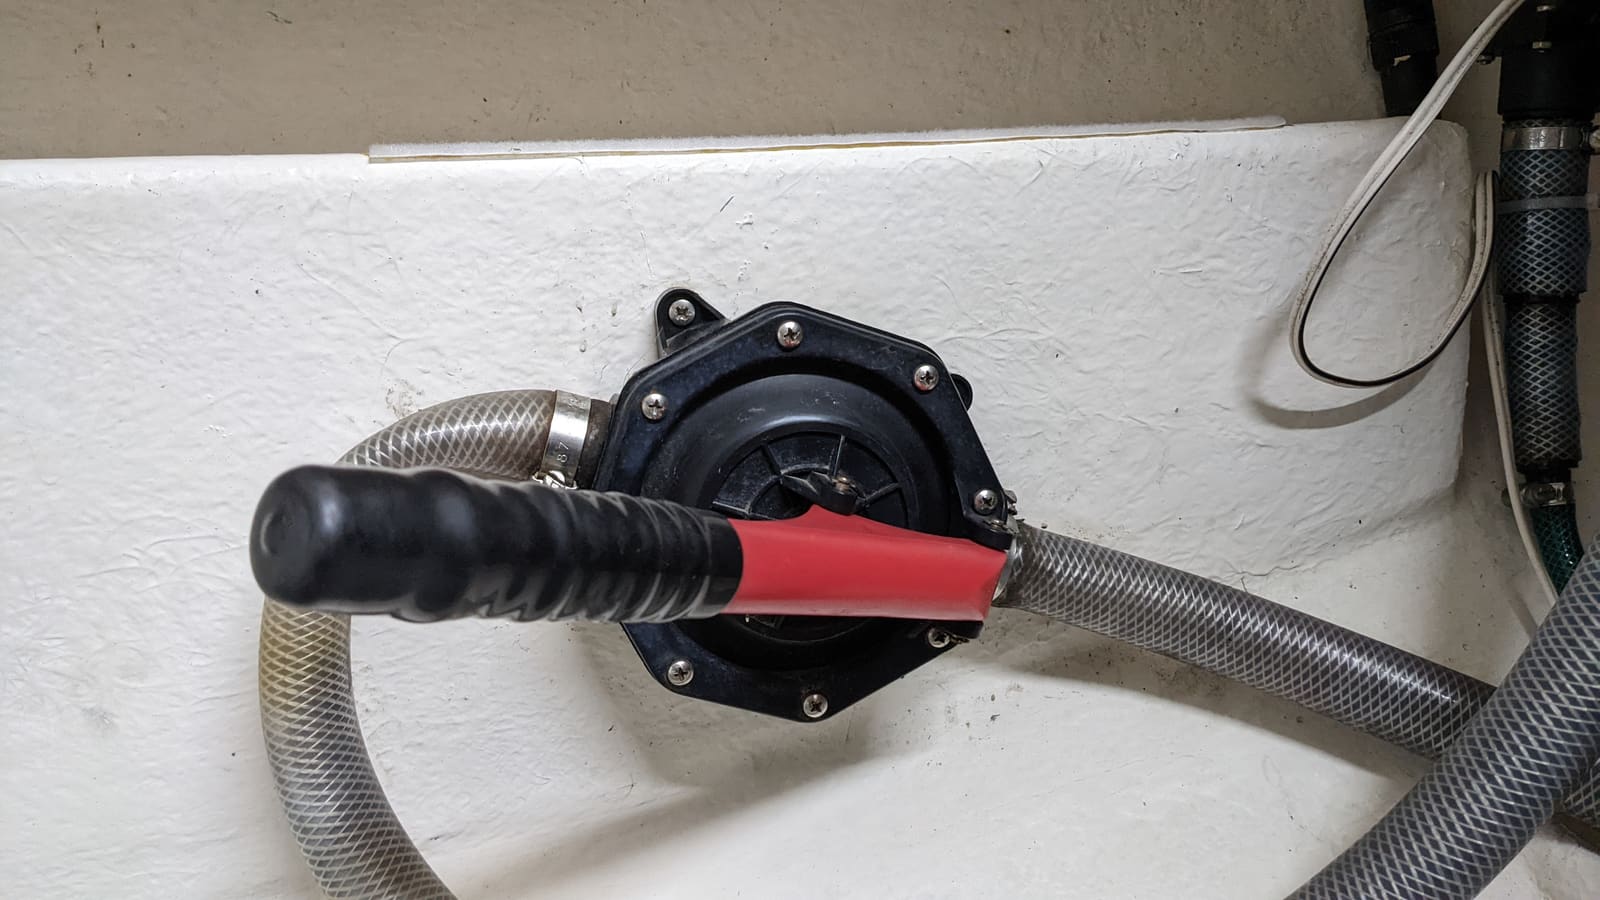
If both electric pumps or the battery fail, a mounted manual pump (or a sturdy bucket) is what's left. Photo: Jbasic / Wikimedia Commons · CC BY-SA 4.0
Common mistakes
- Teeing the backup's discharge into the primary hose.
- Mounting the backup at the same level as the primary, so it sits in sludge and seizes.
- Wiring it through the main panel or the switched side of the battery switch, so it's dead when the boat is left with switches off.
- Installing a quiet alarm below decks where nobody can hear it.
- Discharge fittings close to the waterline, with no riser loop.
- Over-fusing the pump.
- Testing by "hearing it run" instead of watching water go overboard.
- Forgetting that an always-on pump can flatten a battery that nothing recharges.
When to call a pro
- Any new hole in the hull, or any fitting near or below the waterline
- You can't find room for a second fitting well above the waterline
- Wiring would involve battery cables, crowded battery posts, the battery switch or a new panel
- The primary pump runs often and you can't find the leak
- Boats with multiple watertight compartments, which need their own pumps and alarms
- Lithium battery systems with built-in disconnects, where "always on" needs special planning
Tips
- A bilge that's clean and dry makes a new leak obvious. Keep it that way.
- Mount the alarm or a second buzzer where marina neighbors can hear it, and give them your phone number.
- Remote boat monitors that text you about high water, pump cycles and battery voltage are a good extra layer for boats left in the water.
- Keep a manual pump or a sturdy bucket aboard as the last line of defense.
Official references
We read these to write this guide. Your engine's own manual always wins.
- BoatUS – Double Duty (installing a backup bilge pump and high-water alarm, 2026)
- BoatUS – Everything You Need To Know About Your Boat's Bilge Pump
- BoatUS Magazine – Three Alarms That Can Save Your Boat (high-water alarms, sinkings at the dock)
- BoatUS – Automatic Bilge Switches (float, air-pressure, conductivity and electronic switches)
- BoatUS – How To Monitor Your Bilge Pump (warning light and cycle counter)
- Blue Sea Systems – Part 1, Choosing the Correct Wire Size for a DC Circuit
- Blue Sea Systems – Part 2, Select a Fuse and Fuse Holder for Your DC Product Installation
- BoatUS – Avoiding Boat Electrical Mistakes (motor circuit fusing, four terminals per post)
- eCFR – 33 CFR 183.455, Overcurrent protection
Safety: BoatMend is for information only and does not replace a certified marine technician. You are responsible for your safety and your boat. Read the full disclaimer.
Last updated 2026-10-24
Related guides
How to Test and Clean Your Bilge Pump and Float Switch
Make sure your bilge pump actually moves water overboard, both on the manual switch and automatically through the float switch. A working bilge pump is one of the most important safety systems on any boat that stays in the water.

How to Wire a Bilge Pump Correctly (Automatic Float, Panel Switch and Fuse)
Wire your bilge pump so the automatic float works even with the battery switch off, the helm switch gives you a manual override, and every circuit has the right fuse, wire size and connections kept above the bilge water. A pump that is wired wrong can leave the boat unprotected exactly when nobody is aboard.

What to Do When Your Boat Is Taking On Water: Emergency Steps and Prevention
A step-by-step emergency plan for water coming into the boat - life jackets on, call for help early on VHF 16, find and slow the leak, pump, and head for shallow water if needed - plus the maintenance checklist that prevents most sinkings.

How to Inspect and Exercise Seacocks, Through-Hulls and Hose Clamps
Check every hole in your hull below the waterline, work each seacock open and closed, and inspect the hoses and clamps attached to them. A single failed fitting or hose is one of the most common reasons boats sink at the dock.

12-Volt Boat Wiring Basics: Circuits, Color Codes, Fuses and Wire Size
Learn how your boat's 12-volt system is laid out, what the ABYC wire colors mean, how fuses and breakers protect the wiring, why voltage drop and tinned wire matter, and how to read a wiring diagram, so you can troubleshoot smarter and know which jobs belong to a marine electrician.

Fuse Keeps Blowing? How to Troubleshoot a Boat Fuse Block or Breaker Panel
Work through a blown fuse or tripping breaker the safe way: confirm it, tell a short from an overload, isolate the device or wire at fault, replace a worn breaker or panel switch with the same rating, and label every circuit, without ever fitting a bigger fuse.

Marine Battery Care: Test, Charge and Store for Winter
Check your boat battery's health, charge it the right way for its type (flooded, AGM or lithium), and store it so it is ready in spring. Most "boat won't start" calls start with a neglected battery.

How to Prepare Your Boat for a Hurricane or Tropical Storm
Make a written storm plan before the season, then haul out or secure the boat with doubled lines and chafe gear, strip off everything that catches wind, and check it safely after the storm. Never ride out a hurricane aboard.