How to Find, Drain and Reseal a Wet Sailboat Rudder
Most fiberglass rudders eventually take on water, and trapped water can freeze and split the blade or quietly rust the steel frame inside. Learn the warning signs after haul-out, how to drill drain holes and dry the rudder over winter, how to seal it before launch, and when a rebuild or replacement is the safer call.
Time
4 h
Shop would charge
$300-4000
Applies to
All engines · Sailboat
Safety first: Never move, loosen or lean on the boat's jack stands or blocking while you work under it, and check yard rules before drilling or sanding. Bottom paint dust is toxic: wear a respirator, eye protection and gloves, and catch the dust on a drop cloth. Removing a rudder means supporting a heavy, awkward part and often lifting the boat, which is a yard job. If the helm suddenly feels loose or turns too easily under way, the stock may be spinning inside the blade: steer with the engine or emergency tiller, head for shelter, and call TowBoatUS or Sea Tow, or USCG on VHF 16 if you are in danger.
Owners often ask
- Rusty water is weeping out of my sailboat rudder after haul-out. Is that a problem?
- Should I drill drain holes in my rudder before winter?
This guide walks you through it. Still stuck? Ask the AI Mechanic about your engine.
Tools
- Drill with sharp bits and a depth stop (or tape on the bit as a depth flag)
- Screwdriver with a hard handle for sounding the blade
- Moisture meter (optional but very helpful)
- Felt-tip marker and a tape measure
- Small container to catch and look at drained water
- Countersink bit
- Sandpaper (80 grit) and a sanding block
- Plastic spreader and mixing cups for epoxy
- Heat lamp or black plastic bag and tape (for drying)
- Respirator rated for paint dust, safety glasses, nitrile gloves and coveralls
- Drop cloth to catch bottom paint dust
Parts & supplies
- Marine epoxy resin and hardener
- Epoxy filler (colloidal silica or a low-density filler) or a ready-thickened epoxy adhesive
- Acetone and clean rags
- Barrier coat primer and bottom paint to match the rest of the rudder
- Flexible marine sealant for the rudderstock joint, if it is reachable
Before you start
How water gets in: Practical Sailor describes the usual build: two molded fiberglass halves filled with foam around a solid rudderstock, with steel plates (webs) welded to the stock to grip the blade. Stainless steel and fiberglass expand at different rates, so the joint where the stock leaves the blade opens up, if only microscopically, and admits water. Gudgeon bolts, cracks and old repairs are other ways in. Epoxyworks found the stock area to be the most common leak spot in rudders they have worked on.
Why it matters: In freezing climates, Epoxyworks notes that a rudder can hold enough water to crack open when it freezes. Even without ice, salt water inside can corrode the welds and webs. Practical Sailor's advisor column puts it plainly: draining is like bailing faster. It slows the damage but does not fix why the rudder is wet, so pair any drain job with a plan.
Timing: Drain in the fall right after haul-out, dry over the winter, and seal before launch.
Steps
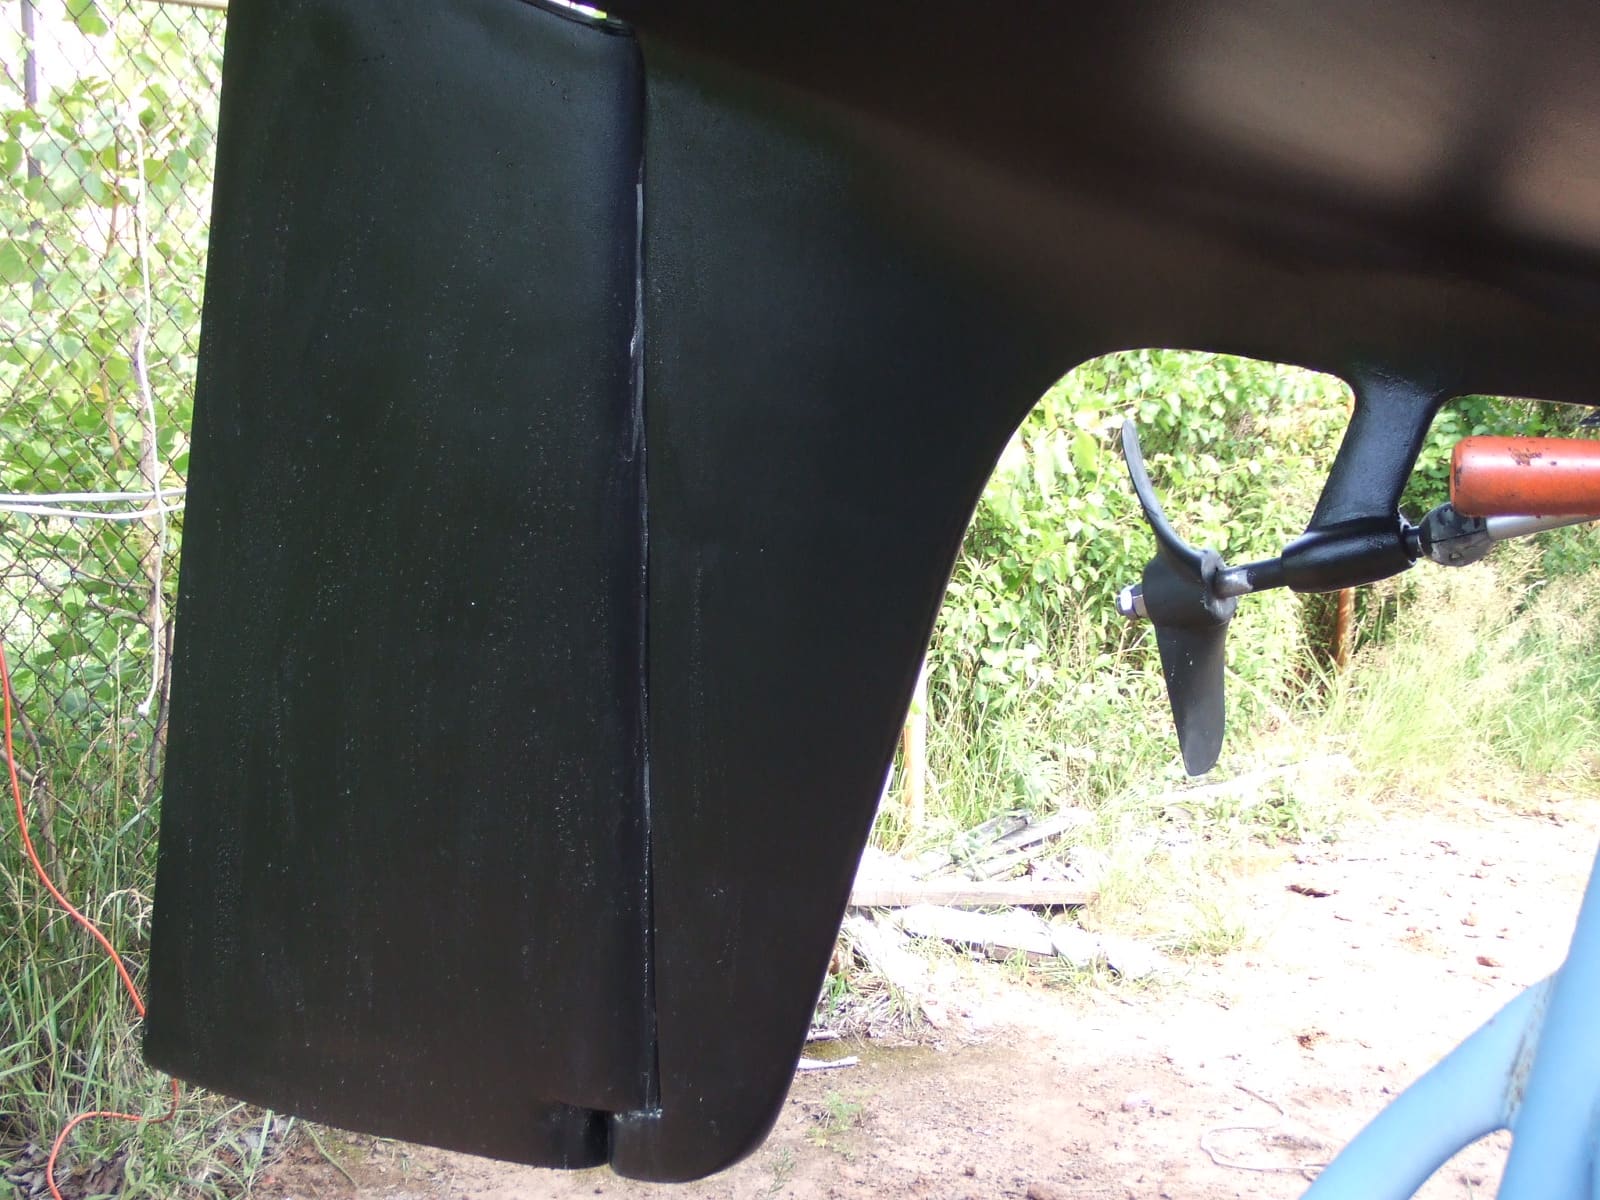
Walk around the rudder as soon as the boat is on land and again over the next few days. Practical Sailor's telltale sign is rust-colored water weeping from the joint where the stock enters the blade. Weeping can also show at pinholes along the thin trailing edge or at the bottom. Note where, how much, and the color: clear water means the core is wet, rusty water suggests the metal inside is corroding.
Tap the whole blade lightly with the handle of a screwdriver, as Epoxyworks did, and mark dull or "dead" sounding spots with a marker. Those are usually delaminated skin or waterlogged core. Also look for:
- Cracks, especially near the stock and along the top and trailing edges
- Bulges, blisters or split seams between the two halves
- High readings on a moisture meter, compared with the dry hull nearby
If the rudder has been removed, a wet one is often far heavier than you expect.
Grab the trailing edge and try to move it side to side and up and down, and turn the wheel or tiller while someone watches the blade. Movement between the blade and the stock (the blade lags or rotates while the stock turns) is serious: Practical Sailor describes a rudderstock that spun inside its blade after the internal webs rusted away. Do not sail until a yard has checked it. Rudder failures can sink boats: BoatUS's summary of the 2024 Bermuda Race safety reports describes a race boat whose crew heard a loud clunk, lost steering, found the rudder stock adrift and a large breach at the lower rudder bearing, and had to abandon ship. For bearing wear and the rudder tube, see the rudder bearings guide.
- Small weeping, solid blade, no play: drill to drain, dry over winter, seal in spring (steps 5 to 10), and keep an eye on it.
- Rust-colored water, cracks, big delaminated areas or any play: drain now to prevent freeze damage, but plan a proper rebuild or replacement (step 12).
Epoxyworks did exactly that on a Cal 33: a quick drain and seal to get through one season, then a full repair the next fall.
Gravity does the work, so the first hole goes at the lowest point of the blade. Practical Sailor adds two catches: water that entered at the top may not reach a hole at the bottom if the foam blocks it, and water tends to collect along the stock and the webs, so you may need holes where you think the webs are. Sand off a small patch of bottom paint at each spot. Keep well clear of where the stock runs inside the blade. If your builder or owners' association has a construction drawing showing the webs, use it.
Set a depth stop so the bit goes through the fiberglass skin and just into the foam, not into the stock or webs. Epoxyworks used 3/8-inch holes on the Cal 33. Hold a container under the hole and look at what comes out. Practical Sailor notes that on its test boat, the holes kept weeping on and off all winter, so do not expect a gush and then nothing.
Epoxyworks lists the options from simple to best:
- Gravity: a hole at the bottom drains most free water and should lower the moisture enough to prevent ice cracking.
- Sun: outdoors, tape a black plastic bag over the rudder. On sunny days it warms the blade above freezing and adds drying days, even around 25°F.
- Heat: a heat lamp aimed at the blade (never close enough to scorch it or anything nearby), or a heated shop if the rudder is off the boat.
- Vacuum bagging: the most efficient method, done with the rudder off the boat in a controlled space. It lets water boil off at low temperature. This is advanced or shop-level work.
Check the holes when you visit the boat. Keep them open and clear of ice and debris. If new cracks or bulges appear after a hard freeze, take photos and talk to your yard before launch.

Fall haul-out is the time to check for weeping and drill drain holes, so the rudder can drain and dry all winter. Photo: Erik Mclean / Pexels When the holes have stopped weeping and the area is dry:
- Countersink (chamfer) each hole and sand the chamfer with 80-grit paper, as Epoxyworks did.
- Wipe with acetone and let it flash off.
- Fill with thickened epoxy (Epoxyworks used a ready-thickened epoxy adhesive; Practical Sailor used epoxy with microballoons), smooth it with a plastic spreader, and let it cure.
- Sand fair, then apply barrier coat and bottom paint to match.
Practical Sailor found that one hole kept pushing the epoxy out during the heat of the day, because warm air inside the blade expanded, then drew it in during the cool evening. If a hole keeps weeping or the epoxy will not cure, try again in the cool of the evening when the rudder is drawing air in.
Practical Sailor mentions an alternative: tap the hole for a small brass or bronze plumber's plug, set it in sealant each spring, and replace it every fall. Its advisor column notes that on a thin rudder skin the plug will stand proud of the surface. Some owners prefer drilling the same spot each fall and filling it each spring.
If you can reach the joint where the stock enters the blade, clean it out and apply a bead of flexible marine sealant, as Practical Sailor suggests. On many boats the gap is too tight to work on with the rudder in place. Also check gudgeon bolts and any old repair patches, which Epoxyworks found was the actual entry point on the Cal 33. See the marine sealants guide for choosing a flexible, removable product.
Plan a proper repair (usually with the rudder removed) if you find:
- Rust-colored water year after year, especially in salt water, where corrosion of the webs and welds is more likely
- Any play or slipping between the blade and the stock
- Large delaminated areas, deep cracks or a split along the seam
- A rudder that is still soaking wet after a full winter of draining
Epoxyworks describes the shop approach: remove the rudder, cut away the delaminated skin, dry the core (vacuum bagging worked best), check the stock and internal metal for corrosion, then relaminate with epoxy and fiberglass. In their example the repair cost a fraction of a new rudder. If the webs or welds are badly corroded or the stock is bent, a new rudder or a professionally rebuilt one is the safer choice.
A second Epoxyworks case shows what a full core replacement involves, so you know what you're asking a shop to do: the rudder looked fine except for a crack around the stock, but sounding with a hammer gave a dull note on both sides and test holes showed the whole foam core was wet. The repairer cut windows in the skin, chiseled out the foam, dried the shell, treated rust on the internal plate, filled it with new expanding foam, and rebuilt the skins with tapered (beveled) fiberglass laminations. It is a multi-day, multi-skill job. A crack around the stock is a common first sign that it may be needed.
Signs that the bearings or bushings need attention too, from Practical Sailor's rudder restoration article: play you can feel in the tiller or wheel, vibration at certain speeds, or a slap or thud from the rudder when you tack or jibe. Have those checked while the rudder is off (see the rudder bearings guide).
Write down the date, where you drilled, how much water came out and its color, and how you sealed it, with photos, in BoatMend. Comparing year to year tells you whether the rudder is drying out or getting worse.
Common mistakes
- Draining every year and never asking why. The water keeps coming back, and the metal inside keeps corroding.
- Drilling into the stock or webs. Use a depth stop and stay clear of where the stock runs.
- Only drilling at the bottom. Water trapped higher up along the webs may never reach that hole.
- Sealing the holes while they still weep. The epoxy will not cure, or water stays trapped inside.
- Ignoring rust-colored water. It is the clearest outside sign of corrosion you cannot see.
- Sailing with play between blade and stock. That is how a rudder fails at the worst moment.
- Moving jack stands to get a better angle. Ask the yard to reposition the boat instead.
When to call a pro
- There is any movement between the blade and the stock, or the helm feels loose
- Rusty water keeps weeping, especially on a saltwater boat
- You see big delaminated areas, deep cracks, a split seam, or freeze damage
- The rudder needs to come off (it is heavy, often requires lifting the boat or digging below it, and the yard should handle it)
- The rudder tube, bearings or the hull around the rudder show cracks, gaps or leaks (if water is coming into the boat, call USCG on VHF 16 or 911)
Tips
- Ask owners of sister ships whether your model's rudders have a history of water intrusion or web corrosion; Practical Sailor suggests researching this and getting a construction drawing if you can.
- Pick a light-colored rag and wipe the weeping spots to see the water's color clearly.
- Drill and seal on the same schedule every year, so it becomes part of winterizing and spring commissioning.
- If you plan to replace bearings or seals anyway, that haul-out is the cheapest time to have the rudder inspected inside.
Official references
We read these to write this guide. Your engine's own manual always wins.
- Epoxyworks (WEST System) – Wet Rudder Repair
- Practical Sailor – The Holes That Wouldn't Close
- Practical Sailor – PS Advisor, Water-Logged Rudder
- Practical Sailor – Good Intentions (fall rudder check)
- BoatUS – Lessons Learned From Sail Racer Vessel Abandonments
- Epoxyworks – Replacing the Wet Core in Another Spade's Rudder
- Practical Sailor – Rudder Restoration, Eight Lessons Learned (free introduction)
Safety: BoatMend is for information only and does not replace a certified marine technician. You are responsible for your safety and your boat. Read the full disclaimer.
Last updated 2026-10-25
Related guides
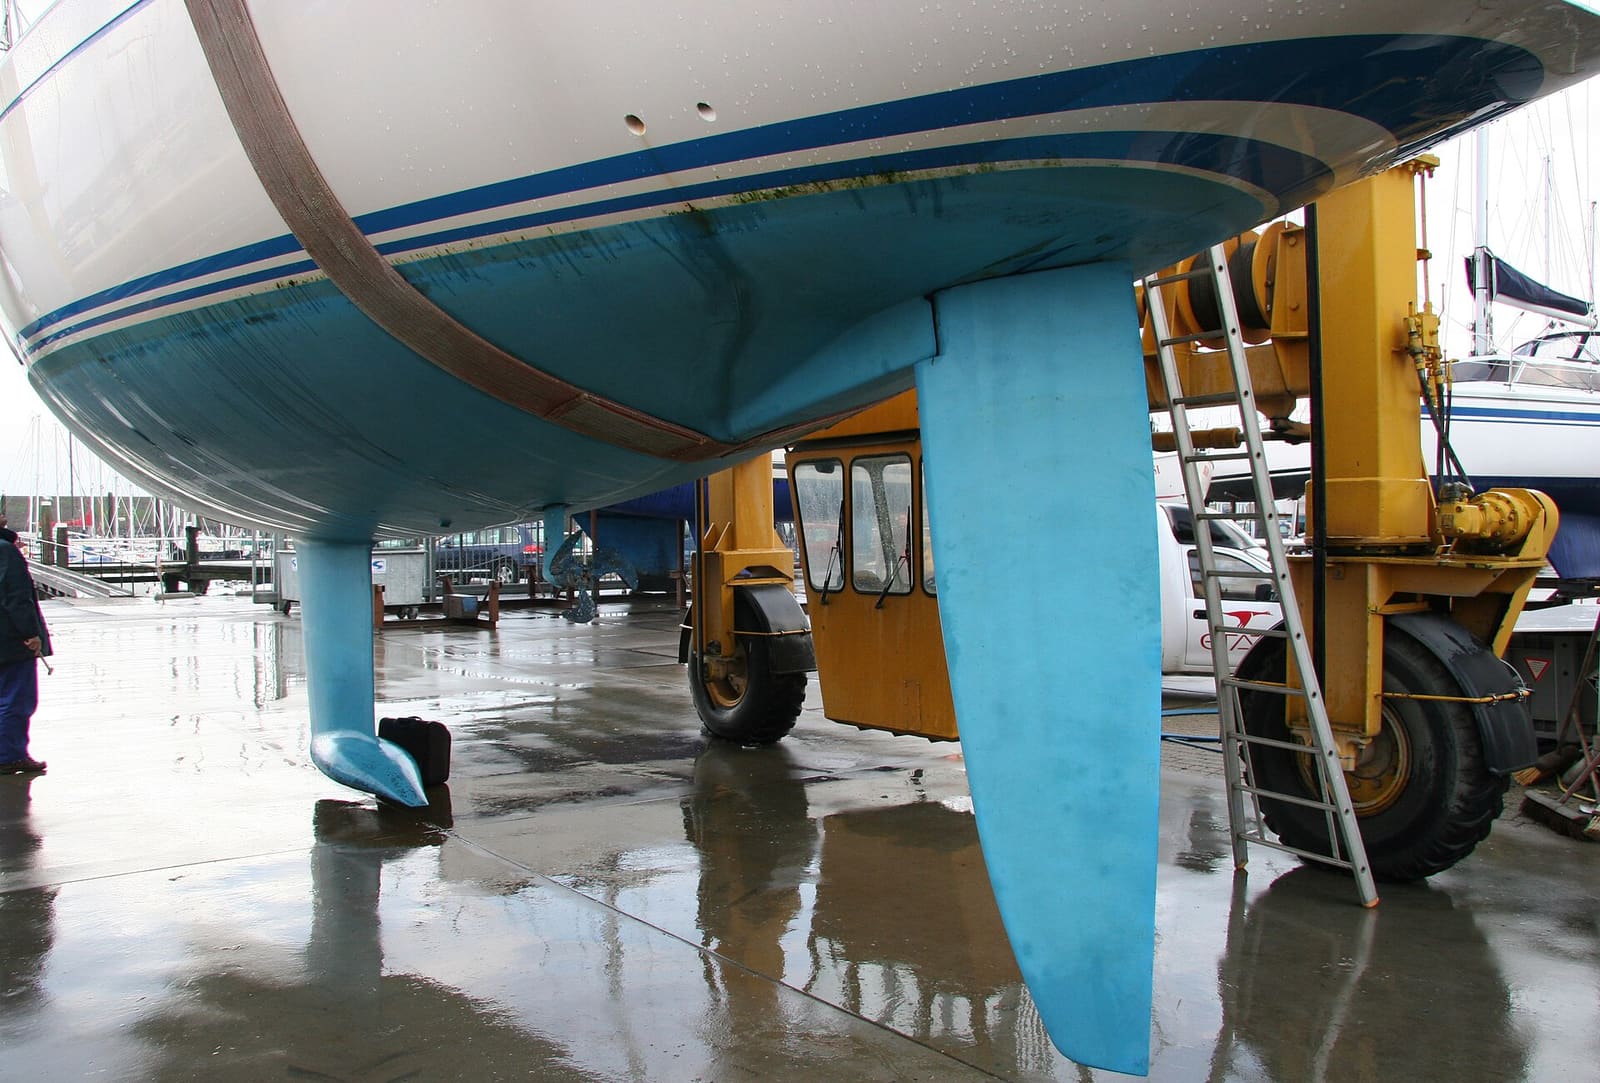
Rudder, Rudder Bearings and Steering Gear Inspection (Sailboats and Inboards)
Check your rudder for play, water inside the blade and stock corrosion, inspect the rudder tube and its seal, and go over cables, sheaves, quadrant and stops so the steering does not fail when you need it. Includes how to find, fit and practice with the emergency tiller.

How to Winterize a Sailboat: Rig, Sails, Engine, Plumbing and Storage
A sailboat-specific winter layup plan, from deciding whether the mast comes down to getting sails, running rigging and canvas off, protecting the diesel or saildrive, plumbing and head, and leaving the boat well supported, covered and ventilated. Each engine and water job links to its detailed BoatMend guide.

Sailboat Spring Commissioning: Rig, Sails, Bottom, Engine and First Sail
A sailboat-specific spring checklist: inspect the rig before it goes up, bend on the sails, check through-hulls and the bottom, recommission the diesel or saildrive, bring the head and freshwater back, test electronics and safety gear, and shake it all down on a first sail. Each system links to its detailed BoatMend guide.

Hull Blisters (Osmosis): How to Tell Cosmetic Pimples From Serious Pox
Learn what osmotic blisters are, how to inspect a fiberglass bottom at haul-out, which blisters you can fix yourself with epoxy, what moisture meter readings can and can't tell you, and when to hire an independent surveyor.

Bottom Paint (Antifouling): Do You Need It, Which Type, and How to Repaint
Learn whether your boat needs antifouling bottom paint, how ablative and hard paints differ, and how to prep and roll on a fresh coat safely, without poisoning yourself or the water and without ruining an aluminum hull.

Storing a Boat on Stands and Blocks: Keel Blocking, Stand Placement and Safety Chains
Learn how a boat should sit on keel blocks and boat stands for winter or a haul-out, so you can check the yard's work, spot dangerous setups, and keep your boat from settling, distorting or falling over in wind, rain or a storm.
Marine Sealants Explained: 5200, 4200, 4000UV, Polysulfide, Silicone and Butyl Tape
Pick the right sealant before you bed a cleat, a through-hull, a window or a transducer. The wrong goo either leaks in a year or glues a part on so hard you damage the boat getting it off.
How to Inspect a Used Boat Before You Buy
A step-by-step checklist for looking over a used boat, from paperwork and the hull ID number to the transom, engine, compression test, sea trial and trailer. Know what to check yourself, what the red flags mean, and when to pay a marine surveyor.