How to Dry or Replace Waterlogged Boat Seat Cushion Foam
Stop the soggy-seat problem: find out why the foam inside boat cushions holds water, dry it out the fast way, and choose the right replacement foam (standard, closed-cell or quick-drying reticulated) so your seats stay dry, firm and mildew-free.
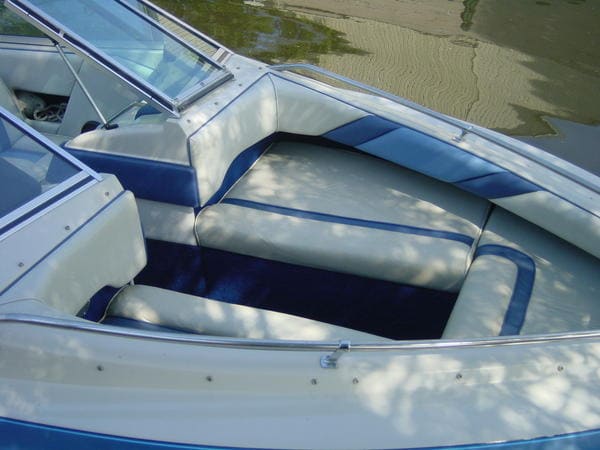
Time
3 h
Shop would charge
$150-600
Applies to
All engines
Safety first: Wet foam that smells musty is usually growing mold inside. Wear gloves and a dust mask when you open it up, and work outside. Don't cut into, re-cover or modify a USCG-approved throwable flotation cushion: it's safety gear with its own approval label, and once it's waterlogged, torn or altered it should be replaced, not repaired.
Owners often ask
- Every time I sit down after a rain my boat seat soaks my shorts. How do I dry the foam?
- What foam should I use when I replace my boat seat cushions?
This guide walks you through it. Still stuck? Ask the AI Mechanic about your engine.
Tools
- Staple remover or flat screwdriver, and pliers
- Screwdrivers or a drill to take seats off their bases
- Wet/dry shop vacuum and a heavy plastic contractor bag
- Duct tape
- Electric carving knife or long serrated bread knife (for cutting foam)
- Pneumatic or heavy-duty hand stapler with stainless or Monel staples
- Tape measure, marker and phone camera
- Gloves and a dust mask (moldy foam)
Parts & supplies
- Replacement foam suited to where the cushion lives (see step 7)
- Plastic barrier film for wrapping foam (often sold as cushion wrap or silk film)
- Breathable mesh fabric for cushion bottoms, if you're making drainable cushions
- Marine vinyl or outdoor fabric and thread, if you're re-covering
- Epoxy or marine finish, or new marine plywood, if the seat base is rotten
Before you start
Why cushions get soaked: most boat seats are standard polyurethane upholstery foam. It's "open-cell": the tiny bubbles are connected, so it soaks up water like a sponge and gives it back very slowly. Sailrite's foam guide says plainly that this foam has to be protected from water to last outdoors. Water gets in through:
- Seams and zipper gaps in the cover, and staple holes in the bottom
- A torn barrier film. BoatUS explains that many cushions have a thin plastic film around the foam (sometimes called silk film or slip film). It mainly helps slide the foam into the cover, but it also keeps the foam dry. Once it tears, the foam soaks up every rain.
- No cover on the boat, or a cover that traps condensation
- Seats folded or flipped closed while still wet after a washdown
Signs you have a problem: a wet backside after sitting down, water squeezing out of seams, a sour or musty smell, dark spots coming through the vinyl from the inside, or foam that feels flat, crunchy or lumpy. BoatUS warns that mold growing in a soaked cushion can spread to the rest of the seat from the inside out.
Dry it or replace it? Foam that's only wet, still springy and smells fine can be dried and re-wrapped. Foam that's flattened ("bottomed out"), crumbling, black inside, or smells strongly of mildew should be replaced. Sailrite notes that foam in good shape that hasn't bottomed out can be reused.
Steps
Unscrew the cushion from its base or hinge and take it somewhere you can work. Photograph the screw positions and any hinges or brackets first. On many seats the cushion, foam and a plywood base come off as one piece.
Zippered cushions are easy. Stapled seats need the staples pulled from the underside of the base, one at a time, with a staple remover or flat screwdriver and pliers. Pull staples rather than cutting the vinyl, so you can reuse the cover or use it as a pattern. Take photos of how the vinyl folds at the corners.
Squeeze the foam and look inside. Is the barrier film torn or missing? Is the foam wet all the way through, or just on one side? Does it spring back? Then check the plywood base: probe around the screw holes with an awl. Soft or dark wood is rotten and won't hold staples or screws (see folding seat hinges for rebuilding a base).
Don't just leave a soaked block of foam in the sun; it can take days and the sun degrades the foam. BoatUS describes a faster trick: put the foam in a heavy plastic contractor bag, push the hose of a wet/dry shop vac into the opening, duct-tape the bag closed around the hose and run the vac. It pulls a surprising amount of water out. You can also press water out by hand (don't wring or twist the foam; it tears).
After vacuuming, stand the foam on edge in a dry, shaded, airy spot, out of direct sun, and turn it now and then. It needs to be dry all the way to the center before you wrap it, or you'll seal the moisture and mold inside. Squeeze the middle: if it feels cool or damp, give it more time.
If the foam is only lightly spotted, you can sponge it with a mild cleaner, rinse, vacuum out and dry again. Strong mildew smell or black staining inside the foam usually means replace it. Clean the inside of the vinyl cover with a mild boat soap or a vinyl cleaner. BoatUS warns that bleach and high-alcohol cleaners attack vinyl and especially the stitching thread, so seams come apart.
Don't forget the storage space under the seat. A moldy cushion often sits over a damp locker full of damp gear. Mercury's tip for mold in storage compartments: empty it, open it up to air out, test a mix of 3 parts white vinegar to 2 parts distilled water on a hidden spot, then spray and scrub with a soft brush. Use a commercial mold remover only if stains remain, following its label. Clean the stored gear the same way, and let everything dry fully before you close the lid.
The Sailrite guide is clear that no foam is perfect outdoors; each has trade-offs:
- Antimicrobial marine polyurethane foam. Comfortable and the usual choice for upholstered seats. It still soaks up water, so it needs a barrier film and a water-resistant cover. Sailrite rates it at a few years outdoors.
- High-density upholstery foam. Lasts longer and feels better, but only if it's fully sealed: Sailrite suggests it for seats where the foam sits under marine vinyl stapled to a backer board, with no sewn seams on top for water to enter.
- Reticulated ("dry fast") foam. A very open foam with large pores, so water drains straight through instead of being held. It dries quickly, which is why it's used for cushions with mesh bottoms. The trade-offs: it's less durable (Sailrite calls it an occasional-use foam) and sunlight reaching it through mesh fabric breaks it down faster.
- Closed-cell foam. The bubbles are sealed, so it doesn't absorb water and it floats. It's very firm, which is a plus for cockpit cushions you step on. Practical Sailor recommends firm closed-cell foam for sailboat cockpit cushions and says open-cell cushions don't float and shouldn't be counted on in a man-overboard plan.
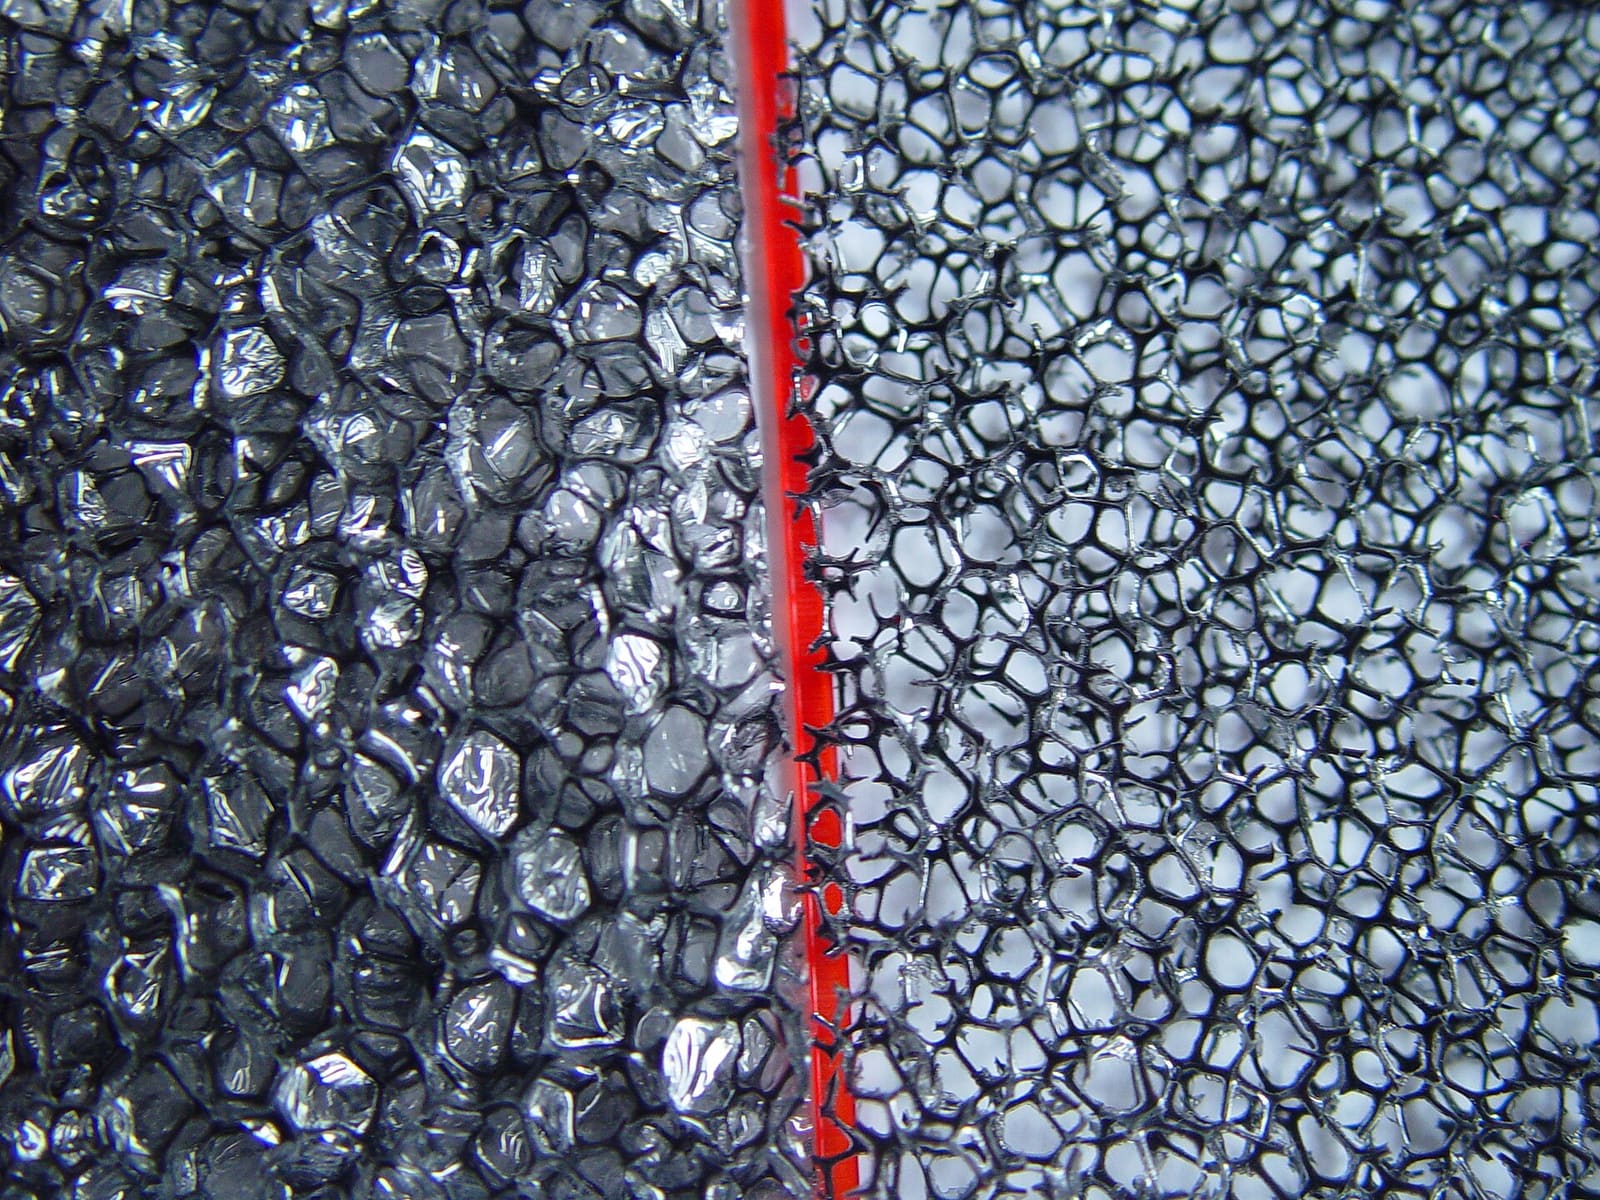
Normal foam (left) has thin cell walls that trap water; reticulated foam (right) is an open web that water drains through. Photo: Silverchemist / Wikimedia Commons · CC0 Use the old foam as your pattern if it kept its shape, or measure the base. Cut slightly larger than the base (a little oversize fills the cover tightly and looks better). An electric carving knife gives clean, square edges. Mark with a marker, keep the knife vertical, and let the blade do the work. Many upholstery suppliers will also cut foam to size if you send dimensions.
- For standard foam: wrap it in barrier film before it goes into the cover, folding the film like a gift and taping it. That's the layer that keeps rain out of the foam.
- For quick-drying cushions: use reticulated foam with no film, a breathable top and a mesh bottom so water runs out. The award-winning flybridge cushions Marine Fabricator featured were built exactly this way. Sailrite suggests wrapping quick-dry foam in polyester batting: it still drains, and it shields the foam from sunlight coming through mesh. If you use film to help slide quick-dry foam into the cover, take the film out afterward or the foam can't drain.
- Sealed vinyl cushions: vinyl doesn't breathe, so Sailrite fits a small vent grommet in film-wrapped vinyl cushions to let air escape when someone sits down.
- Drain holes: if the seat has a plywood base, drill a few small holes in it so water that does get in can drain, and seal the edges of each hole.
Put the wrapped foam back in the cover (Sailrite's trick for a tight cover: wrap the foam loosely in film, put a vacuum hose in the open end and suck the air out so the foam shrinks, slide it in, then let it expand), pull the vinyl tight, and staple it to the base starting in the middle of each side and working toward the corners, folding the corners the way your photos show. Use stainless or Monel staples so they don't rust through the vinyl. If the old cover is cracked, faded or splitting at the seams, this is the time to have a new one made (see the tips).
Screw the seat back onto the boat. From now on: cover the seats when the boat sits, and use a cover that breathes. BoatUS points out that non-breathable covers trap moisture and grow mildew. After washing the boat, leave flip-up bolsters and folding seats open until they're dry.
Common mistakes
- Wrapping damp foam. You've just built a mold incubator. Dry it to the core first.
- Drying foam in hot sun for days. UV and heat break foam down. Vacuum the water out and dry it in the shade.
- Using indoor furniture foam with no barrier. It will soak up water the first time it rains.
- Mesh-bottom cushions with standard foam. Water gets in but can't drain out. Mesh bottoms go with reticulated foam.
- Cleaning with bleach. It rots the thread and the vinyl coating. Use vinyl-safe cleaners.
- Throwing a wet cushion back under a cover. Let everything dry before covering the boat.
When to call a pro
- The cover is cracked, split or sun-rotted and you want new upholstery that fits and looks factory
- The seats have complex shapes, pleats or piping you don't want to sew yourself
- The plywood base or the seat frame is rotten or broken and you don't want to rebuild it
- Mold has spread into the seat bases, storage compartments or the boat's interior
- The soaking keeps coming back and you can't find where the water gets in
Tips
- Re-cover yourself or use a shop? Pulling staples, drying foam, rewrapping and re-stapling an existing cover is a very doable DIY job. Sewing a brand-new cover is a bigger project. Upholstery suppliers publish free how-to videos, but many owners pay a marine upholstery shop for the covers and do the foam work themselves.
- Ask the shop which foam they recommend for your boat and how you use it (daily use, weekend use, freshwater or salt).
- Keep cushions off the boat over winter if you can, stored on edge in a dry place.
- A thin layer of closed-cell foam under softer foam gives a seat that doesn't soak through as easily but is still comfortable to sit on.
- Log the replacement in BoatMend with the foam type you used, so you know what worked next time.
Official references
We read these to write this guide. Your engine's own manual always wins.
- BoatUS – Have A Seat (vinyl care, saturated cushions and barrier film)
- Sailrite – Outdoor Foam Buying Guide
- Sailrite – How to Upholster a Boat Helm Seat
- Sailrite – How to Protect Foam From Moisture and UV Damage
- Practical Sailor – Choosing and Securing Seat Cushions
- Marine Fabricator – Cushions Constructed of Reticulated Foam
- Mercury Marine – Quick Tip, How to Remove Mold or Mildew from Your Boat's Storage Compartments
Safety: BoatMend is for information only and does not replace a certified marine technician. You are responsible for your safety and your boat. Read the full disclaimer.
Last updated 2026-10-25
Related guides
How to Detail Your Boat's Interior (Vinyl Seats, Carpet, Storage and Drains)
Give your cockpit and cabin a proper detail. Clean marine vinyl without stripping its UV protection, wash snap-in and glued-down carpet, clear out cup holders, storage boxes and their drains, beat mildew and pink stains, and know which household cleaners to keep off your boat.
How to Prevent and Remove Mold and Mildew on Your Boat
Stop the musty smell and black spots before they start. Find and fix the water source, keep air moving, control humidity safely, and clean mold off gelcoat, vinyl and cabin surfaces with products that won't damage them.
How to Clean and Protect Boat Canvas, Bimini Tops and Vinyl Seats
Wash your bimini, covers and enclosure the right way, beat mildew without wrecking the stitching, keep vinyl seats soft and stain-free, look after zippers and snaps, and store everything so it comes out clean next spring.
How to Replace Folding Boat Seat Hinges and Fix Back-to-Back Seats
Fix flip-up seats, fold-down fishing seats and back-to-back lounge seats that sag, jam or rip loose. Replace rusted or bent hinges with stainless hardware, rebuild a rotten plywood base so the new screws actually hold, and adjust the latches so the seat stays put.
How to Fit, Support, Clean and Store a Boat Cover
Make your mooring or storage cover last for years by getting the fit right, supporting and venting it so water never pools, using a cover that's rated for the highway, cleaning and re-waterproofing it the right way, and fixing small tears before they grow.

How to Care for a Pontoon Deck, Flooring, Fence and Furniture
Keep a pontoon's carpet or vinyl floor clean and dry, find soft spots in the plywood deck before they spread, check fence rails, gates and seat bases, care for furniture vinyl, and cover and store the boat so mildew and sun do not win.

How to Tell if Your Boat's Flotation Foam Is Waterlogged
Learn the signs that the foam under the floor or seats of a small boat has soaked up water, how to check without tearing the boat apart, what the Coast Guard flotation rules mean for you, and why replacing foam is usually a big job for a pro.