Engine and Gearbox Oil Analysis: How to Take a Clean Sample and Read the Report
A lab oil analysis is like a blood test for your engine, transmission or lower unit. Learn how to pull a clean sample, what the lab measures, what wear metals, coolant, sea water and fuel in the oil can mean, and why the trend over several samples matters more than any one number.
Time
30 min
Shop would charge
$30-80
Applies to
Outboard, Sterndrive (I/O), Gas inboard, Marine diesel
Safety first: Oil from an engine that just ran can be hot enough to burn: wear gloves and let a hot engine sit a few minutes before you open anything. Keep hands, hair and tubing away from belts and the flywheel, and never sample with the engine running. Wipe up spills right away and dispose of used oil and rags at a recycling center. If a report shows coolant or sea water in the oil, don't keep running the engine "to see what happens": call your mechanic first.
Owners often ask
- Is a lab oil analysis worth it for my boat engine, and how often should I do it?
- What does high sodium in my marine engine oil report mean?
This guide walks you through it. Still stuck? Ask the AI Mechanic about your engine.
Tools
- Oil sample kit from the lab (bottle, label or form, mailer)
- Hand vacuum sample pump (sold by most labs)
- New length of sample tubing for each sample
- Marker or tape, scissors
- Rags or shop towels, gloves
- Drain pan (if you sample during an oil change)
Parts & supplies
- The lab's sample kit (one per engine, transmission or gearcase)
Before you start
What it is. BoatUS describes oil sample analysis as a lab test of the levels and types of metals in the oil, plus contaminants such as dirt, soot, water, fuel and engine coolant. A typical report includes a metals scan, viscosity (how thick the oil is), a flash point test (which drops when fuel is in the oil) and insolubles (solids). The lab flags anything unusual and adds comments in plain English.
What to sample. Four-stroke outboards, sterndrive and inboard gas engines, diesels, marine transmissions and lower units or outdrives. Two-stroke outboards burn their oil, so there's no engine oil sump to sample, but their gearcase oil can still be tested.
When. BoatUS suggests a regular schedule: every 50 hours, or once a year just before winter layup for lightly used boats. Oil that was changed very recently doesn't tell you much; BoatUS notes that about 50 hours on the oil gives more meaningful results. Pick a timing and stick to it so samples compare fairly.
Cost. BoatUS put the lab cost at about $30 in 2019, and Blackstone listed $40 per sample in 2026. Most labs sell a reusable hand pump. Results usually come back by email within a few days of the lab receiving the sample.
Steps
Order one kit per engine, transmission or gearcase from the lab that will test it. Labs differ in small details, such as how much oil they want (Blackstone asks for about 3 ounces; BoatUS's writer says about 2 ounces is typical). Follow your lab's instructions where they differ from this guide.
The lab compares your numbers against averages for your type of engine, so the form matters. Before you start, note:
- Engine or gear make, model and serial number, and its position on twin engines (port or starboard)
- Total engine hours and hours on this oil
- Oil brand and grade, and how much oil you've added since the last change (Blackstone calls this "make-up oil")
- Anything unusual: overheating, water in the bilge, a recent repair
BoatUS recommends using only the oil your engine maker recommends and not switching brands back and forth, because each oil's additive package shows up in the results and makes trends harder to read. If you do switch, say so on the form.
Advice differs here. BoatUS's 2019 article says to sample at normal operating temperature, because warm oil keeps particles suspended instead of letting them settle in the pan. Blackstone's instructions say to try not to start the engine just before sampling, because a cold start can put fuel into the oil, and that it's no big deal if you do, as long as you tell them. Either way, what matters most is doing it the same way every time. If you run the engine, shut it down and let it sit a few minutes before you open the dipstick.
This is the easiest method and doesn't need an oil change:
- Cut a fresh length of tubing. Lay it next to the dipstick and mark the dipstick's length on it.
- Fit the tubing through the pump head as the pump's instructions show, and screw the empty bottle onto the pump.
- Feed the tube down the dipstick tube to about your mark. BoatUS's writers describe two ways to stay off the bottom: stop at the dipstick mark, or touch bottom and then pull back an inch or two. You want oil from the middle of the pan, not sludge from the bottom. Don't force the tube: Blackstone notes some engines have a baffle and may need different tubing.
- Pump slowly. Keep the pump level and stop before the bottle is full, so oil doesn't get into the pump.
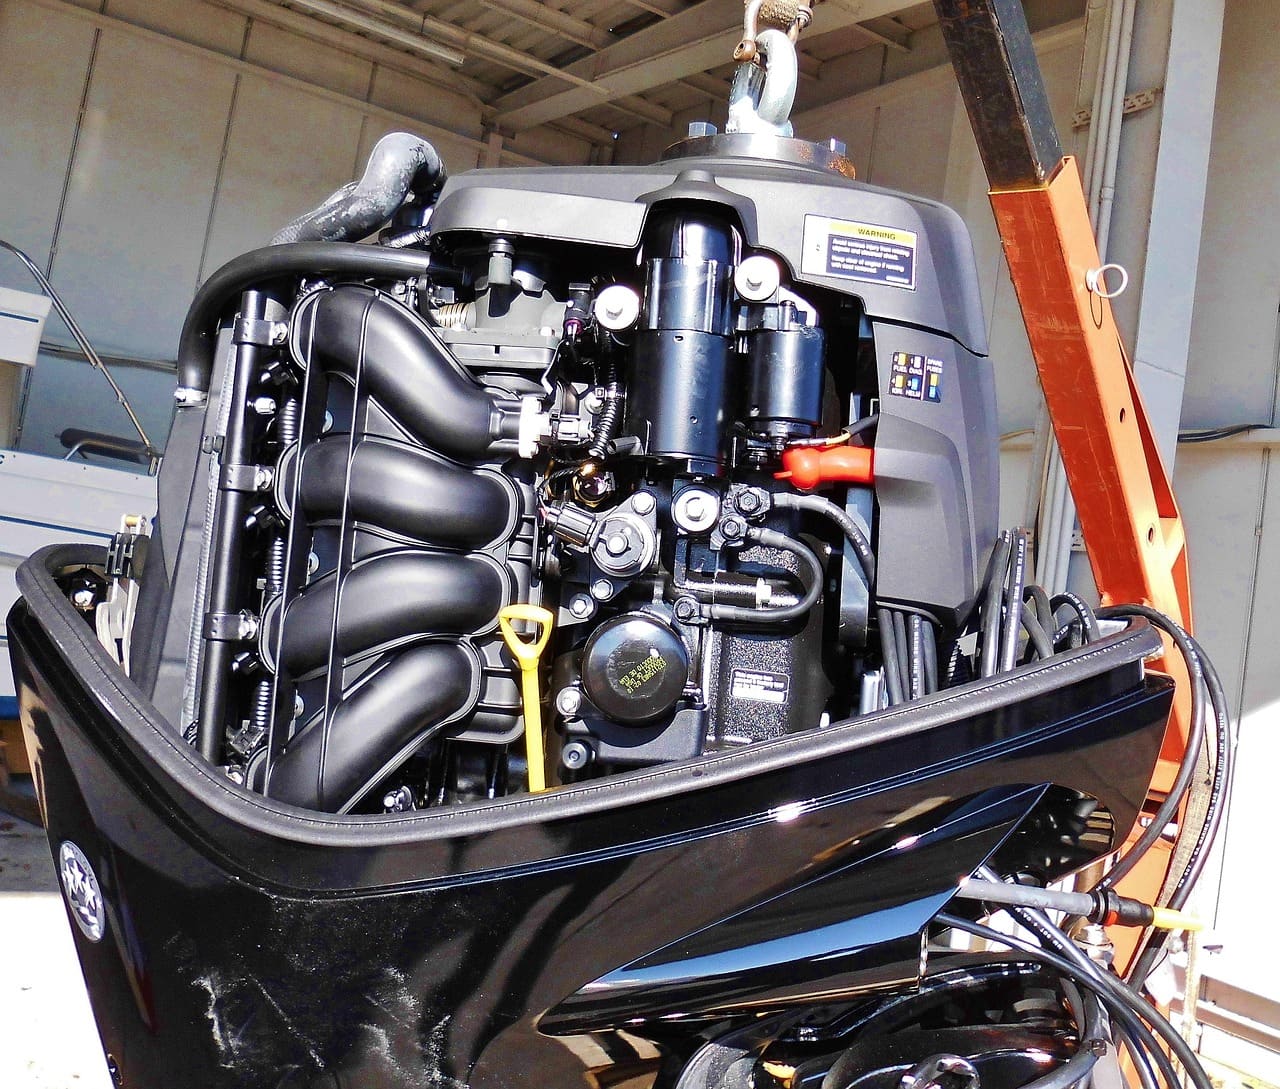
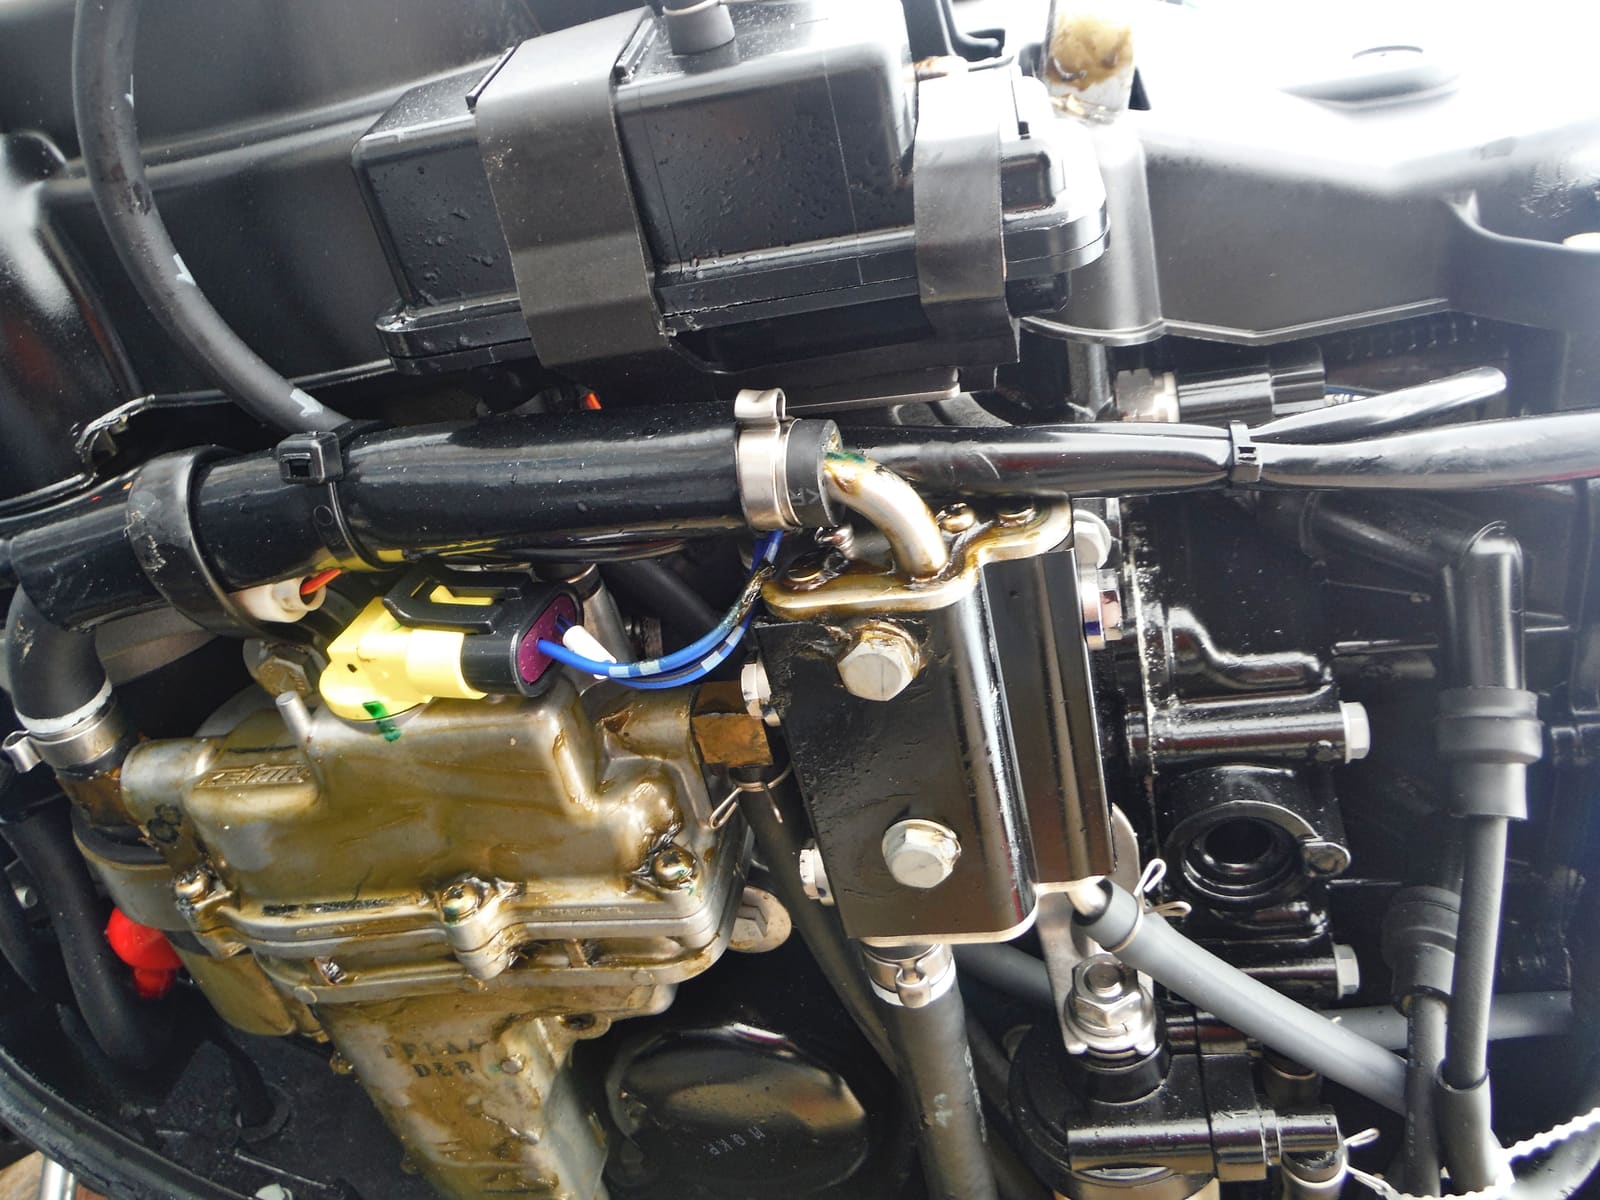
On this outboard the yellow loop is the dipstick handle; the sample tube goes down the dipstick tube. Photo: reverent / Pixabay If you're changing the oil anyway, Blackstone suggests catching the sample from the middle of the drain flow: the first oil out can carry dirt from around the drain plug, and if you wait until the end you may run out. Never scoop a sample out of the drain pan; BoatUS lists that among the mistakes that make a sample worthless.
Blackstone says there's no need to run a transmission before sampling; just avoid the very first and very last oil out of it. On an outboard lower unit or sterndrive, the easiest time is during a gear oil change: catch some from the middle of the drain. Note any milky look or metal on the drain plug magnet on the form (see the lower unit oil change guide for what those mean).
A sample that gets contaminated can send you chasing a problem that isn't there. BoatUS's list of mistakes includes reusing tubing or bottles and getting oil into the pump. Use new tubing every time, keep the bottle cap on a clean surface, and clean the pump with a rag, not solvent, since solvent residue can skew the next sample.
Label the bottle immediately; BoatUS warns how easy it is to mix up samples from twin engines. Pack it the way the kit shows (Blackstone's kit uses an absorbent wrap, a bag and a mailer tube) and send it with the completed form.
Start with the lab's summary. Blackstone's guide says the comments tell you whether wear looks normal, whether anything is high or unusual, and whether you need to act. Blackstone compares your wear metals with averages for that type of engine and, once you have several samples, with your own history. Close to average or slightly off is usually OK. Much higher can be a problem, depending on what's been going on with the engine. One high reading isn't necessarily trouble: trends tell the fuller story.
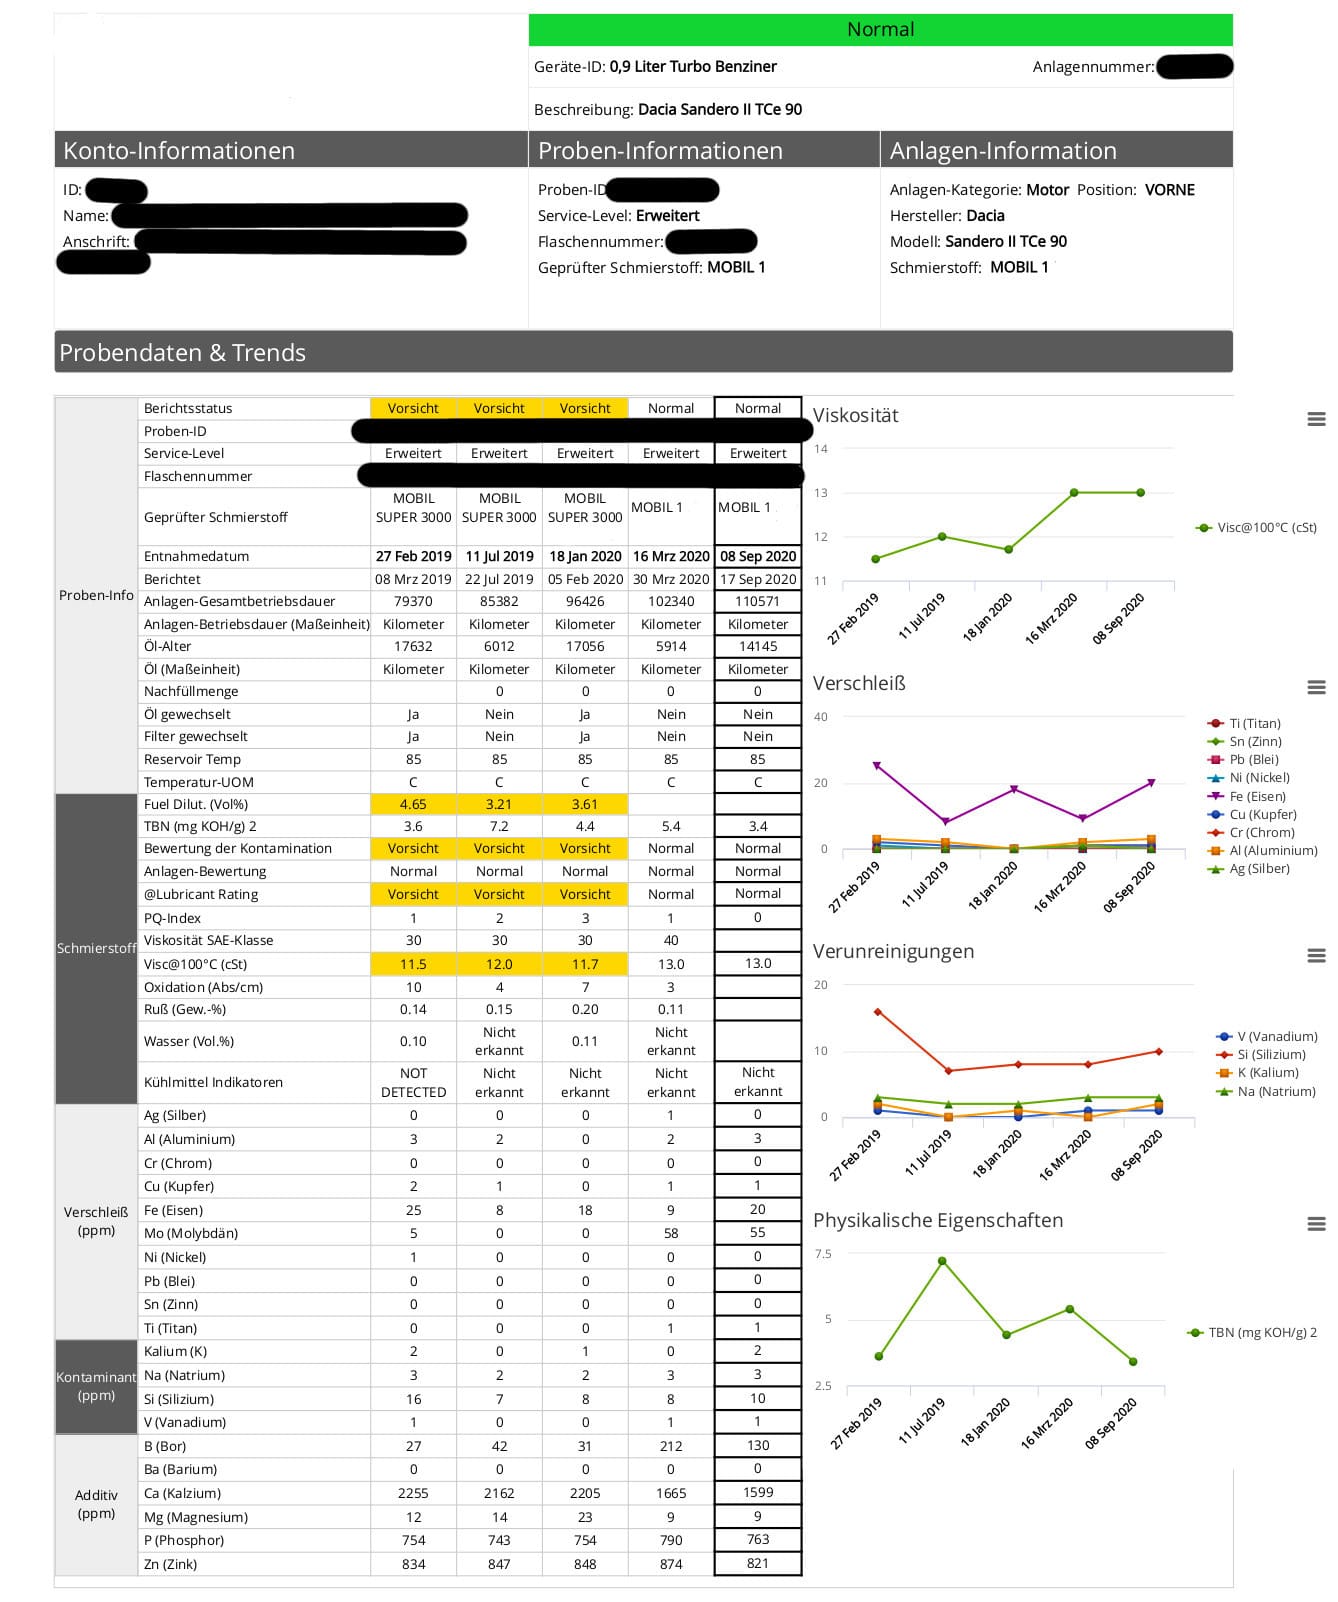
A real report (in German, for a car). Five samples sit side by side. Yellow cells flag fuel dilution and low viscosity in three of them, and boron and molybdenum jump after the owner changed oil brands. Photo: Hermannk / Wikimedia Commons · Public domain Blackstone and BoatUS list typical sources. The lab's comments for your engine type matter more than any general list:
- Iron: cylinders, crankshaft and camshaft, valve train, gears, any steel part
- Aluminum: pistons, some bearings, the engine case. Practical Sailor adds that on turbocharged diesels, rising aluminum can be an early sign of turbo trouble.
- Chromium: piston rings, some cylinder liners
- Copper: bushings and oil coolers; BoatUS lists oil coolers as a common source
- Lead and tin: plain bearings. BoatUS gives the example of lead or tin creeping up over several samples, still in the normal range, as an early sign of faster bearing wear.
- Nickel: crankshafts, valves, camshafts
In a gearbox, iron usually comes from gears and shafts, and copper from bronze parts or the oil cooler (Blackstone's transmission list).
- Fuel dilution (low flash point, thin oil): Blackstone notes that too much fuel reduces lubrication, and BoatUS says it speeds up cylinder and bearing wear. BoatUS links it to blow-by; long idling and short runs that never warm the engine are other common suspects. Ask your mechanic about injectors and ignition if it keeps showing up.
- Coolant (antifreeze): Blackstone says a serious coolant leak can destroy an engine. Sodium and potassium together often point to coolant; BoatUS gives a cracked or pinholed part letting antifreeze into the oil as the likely cause of high sodium. On engines with closed cooling, suspects include the head gasket, an oil cooler or a cracked part.
- Sea water: Blackstone lists sea water in marine engines as one source of sodium, and says no moisture should be present in the oil. Water in the oil of a raw-water cooled or saltwater engine can come from an oil cooler, a leaking exhaust manifold or riser, or water coming back through the exhaust. See the water in engine oil guide.
- Coolant or sea water? Look at sodium and potassium together. Practical Sailor explains that coolant carries both, while sea water has far more sodium than potassium. High sodium with normal potassium and little glycol points toward sea water rather than coolant. On a diesel, its suggested suspects are a leaking seal on a raw-water pump driven off the engine, and water backing up through the exhaust elbow. Also note that the water reading itself can look normal: a hot engine boils off water, but the salt stays behind.
- Silicon: usually dirt getting past the air intake or filter, but Blackstone notes silicone sealers and some additives also show up as silicon.
- Soot and solids (diesels): BoatUS lists dirty injectors, low compression or a restricted intake or exhaust as possible causes, and notes that servicing a dirty injector early can save a rebuild.
- Thick oil: Blackstone links high viscosity to excess heat or soot.
- Everything normal: keep your usual oil change schedule and sample at the same point next time.
- One reading slightly high: resample sooner, at a shorter interval, before spending money. Check that the form was right (oil hours, oil brand).
- Coolant, sea water or a big jump in a wear metal: call your mechanic before you run the engine again, and send them the report. Some problems, like a leaking oil cooler or exhaust riser, get much more expensive if you keep running.
- Buying a used boat: a single sample can flag a serious problem, but BoatUS cautions that a one-time result needs careful reading by a marine engine technician or surveyor who knows the engine's hours and history. Blackstone adds that a pre-buy sample is still useful even if the seller just changed the oil: a small coolant leak shows up in the lab long before the oil looks milky, and the report also flags the wrong oil grade, dirt from an intake leak or extra fuel. Most sellers will let you pull a sample through the dipstick tube; a seller who refuses without a good reason is a warning sign in itself. Tell the lab the oil's hours (or "unknown") so the numbers can be judged fairly.
Save the reports in your BoatMend log with the engine hours. BoatUS points out that a history of oil analyses is a strong selling point: it shows the true condition of the machinery and that the owner looked after it.
Common mistakes
- Sampling oil that was changed a few hours ago, then expecting the report to show wear.
- Scooping the sample out of the drain pan, or letting the tube suck sludge off the bottom of the oil pan.
- Reusing tubing or cleaning the pump with solvent, which contaminates the next sample.
- Leaving the oil hours, make-up oil or oil brand off the form, so the lab can't judge the numbers.
- Switching oil brands between samples and then worrying about changed additive numbers.
- Panicking over one slightly high number instead of resampling and looking at the trend.
- Mixing up twin-engine samples because the bottles weren't labeled right away.
- Relying on spot-test cards at home. BoatUS calls them a poor substitute for a lab test.
When to call a pro
- The report shows coolant, water or sodium in the oil, or the lab recommends action
- A wear metal jumps sharply from one sample to the next
- Fuel dilution keeps showing up, or the oil level is rising between changes (see the oil level rising guide)
- You're buying a used boat and want a sample read alongside a full engine survey
- You can't reach the oil without removing parts, or the dipstick tube won't take a sample tube
Tips
- Take the first sample when you buy the boat or rebuild the engine. It becomes your baseline.
- Sample at the same point every time, for example the fall oil change, so you compare like with like.
- Some labs, Blackstone among them, offer free sample kits; keep one aboard so you're ready when the hours come up.
- On twin engines, sample both. The difference between two identical engines is a useful clue in itself.
- Don't forget the generator. Boatyard managers quoted by Power & Motoryacht sample main engines and generators every year, and point out that analysis is most conclusive on diesels. A consistent report history can show whether your oil change interval could be shortened or kept as is; don't stretch it past your owner's manual, especially under warranty.
- Boats with hydraulic steering, stabilizers or thrusters can have the hydraulic oil tested too; one specialist in the same article suggests every five years, to catch wear, condensation or sea water from a failed cooler.
Official references
We read these to write this guide. Your engine's own manual always wins.
- BoatUS – Oil Sample Analysis
- BoatUS – What Your Oil Says About Your Boat's Health
- Blackstone Laboratories – Sampling Procedures
- Blackstone Laboratories – How to Read Your Oil Report
- Blackstone Laboratories – Pre-Buy Samples, The Art of the (Craigslist) Deal
- Practical Sailor – What Oil Analysis Reveals About Your Engine
- Power & Motoryacht – Boatyard Tip, The Benefits of Oil Analysis
Safety: BoatMend is for information only and does not replace a certified marine technician. You are responsible for your safety and your boat. Read the full disclaimer.
Last updated 2026-10-24
Related guides
How to Change the Oil and Filter on a 4-Stroke Outboard
Drain the old oil, swap the filter and refill with the right marine oil on your 4-stroke outboard. It is the most common service job, takes about an hour, and costs a fraction of the dealer price.
Marine Diesel Service: Oil Change, Fuel Filters and Bleeding Air
Change the oil and oil filter, replace the primary and secondary fuel filters, and bleed air from the fuel system on a Yanmar, Volvo Penta, Beta, Cummins or similar marine diesel. These three skills cover most routine diesel care and can get you out of trouble when the engine dies on a passage.
How to Change Lower Unit (Gearcase) and Sterndrive Oil
Drain and refill the gear oil in your outboard lower unit or sterndrive, and learn to spot water intrusion before it destroys the gears. It is a 30-minute job that protects a gearcase costing thousands to replace.
How to Check and Change Marine Transmission (Gearbox) Oil
Check, read and change the oil in the reverse gear behind your inboard diesel (ZF/Hurth, Kanzaki, Yanmar KM, Volvo Penta MS and similar). Learn what milky, burnt or gritty oil means, and why the oil cooler and its zinc matter.
Milky Engine Oil or Water in the Oil - What It Means and What to Do
Milky, creamy or rising engine oil usually means water is getting into the engine. Learn why you should stop running it right away, how to tell harmless condensation from a real leak, and which parts are the usual suspects: head gaskets, exhaust risers and manifolds, intake manifold gaskets, oil coolers and freeze cracks.
Four-Stroke Outboard Oil Level Rising or Smelling Like Gas: What It Means and What to Do
If the oil on your four-stroke outboard's dipstick keeps going up or smells like gasoline, fuel is probably getting into the crankcase. Learn how to check the level the right way, why lots of idling, trolling, short runs and cold water cause it, what you can do yourself, and when a fuel-system fault needs a dealer.
How to Check and Change Coolant in a Closed Cooling System
Check, test and change the coolant in a freshwater-cooled (closed cooling) inboard, sterndrive or diesel, and learn the heat exchanger basics that keep it working. Old coolant quietly eats hoses, pumps and engine passages, and many boats go a decade without a change.
How to Inspect a Used Boat Before You Buy
A step-by-step checklist for looking over a used boat, from paperwork and the hull ID number to the transom, engine, compression test, sea trial and trailer. Know what to check yourself, what the red flags mean, and when to pay a marine surveyor.