How to Change the Oil and Filter on a 4-Stroke Outboard
Drain the old oil, swap the filter and refill with the right marine oil on your 4-stroke outboard. It is the most common service job, takes about an hour, and costs a fraction of the dealer price.
Safety first: Warm oil can be hot enough to burn. Let the engine sit a few minutes after running, wear gloves, and keep your hands clear of the flywheel and belts. Never run the engine without cooling water.
Owners often ask
? How often should I change the oil on my four-stroke outboard?
This guide walks you through it. Still stuck? Ask the AI Mechanic about your engine.
Tools
Socket or wrench for the drain plug
Oil filter wrench (strap or cap type that fits your filter)
Oil drain pan and a short length of plastic tubing or a drain spout
Oil extractor pump (optional, for top-side draining)
Funnel
Flushing muffs (or a test tank) to run the engine out of the water, plus a garden hose
Torque wrench (recommended)
Rags, absorbent pads, gloves and safety glasses
Parts & supplies
Marine 4-stroke engine oil (NMMA FC-W rated, the grade your manual lists)
Oil filter for your exact model
New drain plug gasket or O-ring
Before you start
How often: most 4-stroke outboards call for an oil and filter change every 100 hours or once a year, whichever comes first, plus a first "break-in" change on new engines (often at 20 hours). This is typical; confirm the schedule in your owner's manual. If you store the boat for winter, change the oil before storage, not in the spring, so acids in old oil do not sit in the engine.
What you need to know first: look up your oil grade and capacity in the owner's manual (some newer engines list it on a label under the cowl). Do not guess the capacity: overfilling and underfilling can both damage the engine.
Use marine oil: buy oil labeled NMMA FC-W in the viscosity your manual lists. Automotive oil is not designed for the long high-load running and moisture an outboard sees. Many brands sell oil change kits with the oil, filter and drain gasket in one box.
2-stroke outboards do not have crankcase oil to change; they burn oil from a tank or premix.
Steps
0/12
Attach flush muffs (not the built-in flush port, which is for engine-off flushing on most outboards; run on the port only if your manual allows it), turn the water on fully, and run the engine at idle in neutral for 5–10 minutes. Mercury suggests the easiest time is right after you pull the boat out, while the engine is still warm. Warm oil drains faster and carries more dirt out with it. Shut it off, turn off the water, and wait a few minutes.
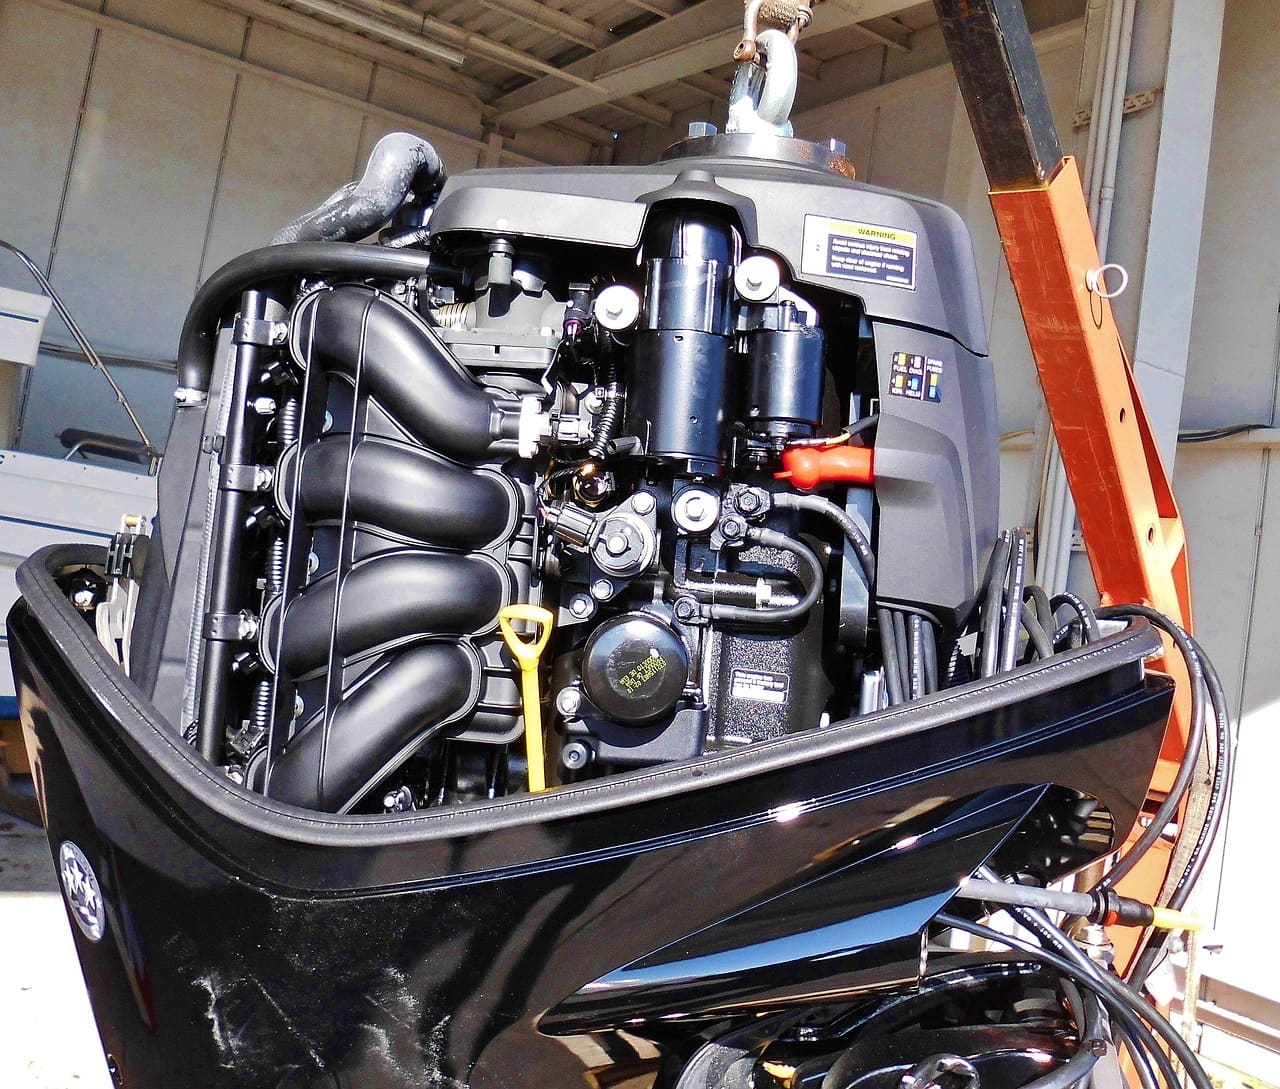
Most outboards drain best with the engine level and vertical. Some manuals have you tilt the engine up to reach the plug, then lower it to drain. Remove the top cowling.
The drain plug is usually low on the side of the midsection, sometimes inside a small rubber tube or behind a cover. The filter is usually on the side or front of the powerhead. Some engines use a top-side extractor tube instead; check your manual.
Put absorbent pads around the filter area to catch drips.
Place the pan under the drain and fit a piece of tubing or a spout so oil goes into the pan, not onto the bracket or deck. Remove the dipstick or oil fill cap so air can enter, then remove the drain plug. Let it drain completely.
Alternatively, use an oil extractor through the dipstick tube if your manual allows it.
Normal oil is dark. Warning signs:
Milky or foamy: water or coolant in the oil
Smells strongly of gasoline, or level was higher than before: fuel in the oil
Shiny metal flakes: internal wear
Any of these means stop and call a dealer before running the engine again.
Oil level rising and smelling of gas? Owners of 4-stroke outboards often find the dipstick reading above full between changes. That usually means gasoline is getting into the crankcase (fuel dilution), which is more common on engines that spend long hours idling or trolling and never get fully warm. Diluted oil protects poorly. Change the oil, note the hours, and have a dealer check the cause if the level climbs again.
Clean the plug and install a new gasket or O-ring. Do not reuse the old one. Tighten to the torque in your manual; a torque wrench prevents stripped threads in aluminum.
Turn the filter counterclockwise with the filter wrench. Keep a rag under it; it will drip. A trick from Massachusetts' clean boating program: slip a plastic bag over the filter before you unscrew the last turn, so the filter and its oil drop straight into the bag. Be careful not to hit sensors or wires near the filter.
Check that the old rubber gasket came off with the filter. If it stuck to the engine and you put the new filter on top of it, the doubled gasket can blow out and pump the oil overboard.
Wipe the filter mounting surface clean. Smear a thin film of fresh oil on the new filter's gasket. Screw it on by hand until the gasket touches, then tighten the amount stated on the filter or in your manual (usually a fraction of a turn more). Do not overtighten with the wrench.
Pour in a little less than the capacity listed in your manual, then wait a minute for it to settle. Reinstall the fill cap.
Water on, then start the engine and let it idle for a few minutes. Check the oil pressure indicator and look closely at the filter and drain plug for leaks. Shut it off.
Let it sit about 5 minutes with the engine level (vertical, not tilted). Pull the dipstick and wipe it, then pause a moment so the tube can vent before you reinsert it fully and read it again. Add a small amount at a time until it reaches the full mark. Do not overfill. Mercury says the dipstick, not the number in the manual, is the final word: the listed capacity is approximate because some oil always stays inside, and the most accurate reading is with the engine level, ideally with the boat floating at rest.
Wipe the engine down, reinstall the cowling, and log the date and engine hours. Take used oil and the filter to an auto parts store or recycling center; most accept them free.
Recycling centers have tanks for used motor oil. Pour it into the one marked for engine oil, not the cooking-oil bin. Photo: P Flannagan / Wikimedia Commons · CC BY-SA 2.0
If your engine or display has a maintenance reminder, reset it as your manual describes.
Common mistakes
Reading the dipstick with the engine tilted, or seconds after shutting it off. Both give a false reading; check with the engine vertical after it has settled.
Pouring in the full listed capacity in one go. Some old oil always stays in the engine, so filling "by the number" often overfills it.
Leaving the old filter gasket stuck to the engine. The doubled gasket can blow out and dump the oil.
Reusing the drain plug gasket, or cranking the plug down without a torque spec and stripping the aluminum threads.
Using automotive oil because it is cheaper. Use oil with the NMMA FC-W label in the grade your manual lists.
Ignoring an oil level that keeps rising and smells of gas. That is fuel dilution, not "extra oil", and it needs attention.
Running the engine on muffs with the water off, or revving it on muffs. Always water on first, and keep it at idle.
Changing the oil with the boat in the water and no plan for spills. Use a sealed extractor or a pan inside a bigger tray, keep absorbent pads ready, and never let oil drip into the bilge or overboard. A spill that reaches the water must be reported (National Response Center 1-800-424-8802).
When to call a pro
Oil is milky, smells of fuel, or has metal particles
The drain plug threads are stripped or the plug will not seal
The oil level rises between changes
The oil pressure warning stays on after the change
Tips
Buy two filters and keep one on board as a spare.
Write the date and hours on the new filter with a paint marker.
If you cannot read the dipstick clearly, check the level again after the engine has sat overnight.
Spray the drain area and bracket with corrosion inhibitor when done, especially in salt water.
Official references
We read these to write this guide. Your engine's own manual always wins.
Safety: BoatMend is for information only and does not replace a certified marine technician. You are responsible for your safety and your boat. Read the full disclaimer.