How to Wire a Marine Stereo, Speakers and Amplifier Safely
Install or fix a boat stereo the way that keeps it working and keeps your battery alive: marine-rated gear, a fused feed from the panel, a solid ground, a plan for the always-on memory wire, UV-proof speakers, and an amplifier fused right at the battery. Plus how to stop the stereo from messing with your VHF and compass.
Time
4 h
Shop would charge
$200-800
Applies to
All engines
Safety first: Turn off the battery switch and disconnect the battery negative before you touch any wiring. A big amplifier cable connected straight to the battery with no fuse can start a fire in seconds if it chafes through. Never mount a stereo or amplifier in a gasoline engine compartment or near fuel tank fittings unless it is rated ignition-protected. If you smell burning insulation, see smoke or a wire gets hot, switch the battery off, use your extinguisher if needed and call for help (USCG on VHF 16 or 911 in an emergency). Anything involving shore power or an inverter's AC side is a job for a marine electrician.
Owners often ask
- Why does my boat stereo keep draining the battery when it's off?
- Where should the fuse go for my boat's amplifier?
- My battery still drains with the stereo unplugged. What else could it be?
This guide walks you through it. Still stuck? Ask the AI Mechanic about your engine.
Tools
- Digital multimeter
- Wire stripper and a ratcheting crimper for insulated marine terminals
- Heat gun (for heat-shrink terminals and tubing)
- Screwdrivers and nut drivers
- Hole saw sized for your speakers (only for new speaker locations)
- Fish tape or a pull cord
- Cable ties and cushioned cable clamps
- Flashlight
Parts & supplies
- Marine-rated stereo (head unit), speakers and amplifier
- Tinned marine-grade copper wire in the sizes the stereo and amp makers specify
- Heat-shrink crimp terminals and butt connectors
- Fuse holder or breaker for the stereo circuit, and a marine-rated fuse holder for the amp feed at the battery
- Speaker wire rated for marine use
- Separate AM/FM antenna (optional)
Before you start
Boat audio lives in sun, spray, salt and vibration. Car stereos fail fast on boats, and badly wired stereos are a common cause of dead batteries and electrical gremlins.
What "marine-rated" means. Marine speakers and head units are built with UV-resistant plastics, sealed electronics and corrosion-resistant hardware. KICKER, for example, says its marine coaxial speakers use UV-treated cones and surrounds, sealed motors and terminal covers, grilles with a built-in drain, and 316L stainless hardware, and are tested to ASTM salt fog and UV standards. Look for similar claims and an IP water-resistance rating on any unit you buy. BoatUS points out that "marine" doesn't always mean waterproof: some units are only splash-resistant or sealed at the faceplate, with an open chassis behind it. For a head unit that will be out in the open, one BoatUS writer suggests looking for IPX7 (rated to survive a short dunking).
Know the pieces:
- Head unit (stereo): the radio/Bluetooth unit with the controls. Many have a remote at the helm.
- Speakers: cabin, cockpit or tower speakers. Tower speakers usually need an amplifier.
- Amplifier (amp): boosts the signal for bigger speakers or a subwoofer. It draws much more current than the head unit.
- Power wires: usually a switched power lead (often red), an always-on memory lead (often yellow), a ground (black) and sometimes a remote turn-on lead (often blue) for the amp. Colors vary, so read your unit's wiring diagram.
Plan the power. Decide which battery feeds the stereo. On a boat with a house battery and a start battery, the stereo belongs on the house side so a long afternoon of music can't leave you unable to start the engine.
Steps
Turn the battery switch off and disconnect the negative battery cable. Read the installation manuals for the head unit and amp: they give the fuse size, the wire size for power and ground, and the wiring diagram. Those numbers are the ones to use.
Pick a spot out of direct spray and sun if you can, such as under the helm overhang or behind a flip-up cover. Leave room behind it for the wiring and air. If the boat has a cabin or console, BoatUS suggests mounting the main unit inside and putting a wired remote at the helm; "black box" stereos with a small round remote are built for this. Check what's behind the panel before you cut, and strip and crimp the wire ends at the workbench before mounting, because the space behind a dash is tight. Keep it away from fuel lines and the engine compartment. 33 CFR 183.410 requires electrical parts on gasoline boats to be ignition-protected unless they're separated from fuel sources by a bulkhead, a deck or enough open space.
The cleanest way to power a head unit is from a spare breaker or fuse position on the boat's DC distribution panel. Federal rules for boat wiring (33 CFR 183.455) say every positive wire needs a fuse or breaker at its power source, or within 7 inches of it (or within 40 inches if the wire is inside a sheath or enclosure the whole way). The fuse also has to suit the wire size, not just the stereo. Use the fuse rating the stereo maker gives, and wire sized for it.
Don't tap into another device's wire, the bilge pump circuit or an ignition wire behind the dash.
Run the stereo's ground wire back to the DC negative bus bar (the ground bar near the panel), not to any random metal on the boat. Boats don't use the hull as a ground the way cars use the chassis. A loose or corroded ground is the number one cause of buzzing, popping and stereos that reset.
The always-on memory lead keeps your presets, clock and Bluetooth pairings. It also means the stereo draws a little current around the clock while it's "off." That's fine for a weekend, but over a few weeks at the dock it can flatten a battery, especially a small one. Options:
- Wire the memory and switched leads together to a circuit that the battery switch turns off. You'll lose presets when the switch is off, but the battery won't drain.
- Keep the memory lead on constant power through its own fuse and accept a small drain while you're using the boat, then turn the battery switch off when you leave.
- Check the stereo's settings: some units have power-saving or standby options and some feed power out to other devices.
Some stereos insist on having the memory lead connected. Your manual will say. If your battery keeps dying, measure the draw with the boat off (see the parasitic battery drain guide). If it still drains with the stereo unplugged, don't blame the stereo yet: owners often trace a mystery drain to other things wired around the battery switch, such as an automatic bilge pump that keeps cycling, a sterndrive's corrosion-protection unit, or a failing alternator diode.
An amplifier usually needs a heavy power cable run straight from the battery (or house bank), because it pulls far more current than a panel circuit can handle. That cable needs its own fuse holder at the battery end, within the distances in step 3. The fuse protects the cable: if the cable rubs through and shorts somewhere down the line, the fuse blows before the wire catches fire. Use a sealed, marine-rated fuse holder sized for the cable, with the fuse rating the amp maker gives (and never bigger than the cable can carry; see the wiring basics guide). Then:
- Don't just pile another ring terminal onto a battery post that already has several. BoatUS's electrical surveyor explains that stacked terminals may not make full contact, which creates resistance and heat that won't blow a fuse. Use a bus bar or terminal strip instead, and put an insulating boot over every positive terminal.
- Run the amp ground back to the battery negative or the main negative bus with wire of the same size as the power cable.
- Connect the amp's remote turn-on lead to the head unit so the amp shuts off with the stereo.
- Make sure you can cut power to the amp in a hurry. Owners often ask "if the amp starts to smoke, how do I turn it off?" when a shop has wired it straight to a battery. The battery switch or a dedicated breaker/switch on the amp cable should do it, so you're never reaching for a hot battery terminal.
- Mount the amp somewhere dry and ventilated, never in the bilge, and not in a gasoline engine compartment.
Route wires high and dry, away from the bilge, exhaust, steering and moving parts. Support them every foot or so with cushioned clamps or ties. Where wires pass through bulkheads, use grommets or chafe guard so edges can't cut the insulation. Use tinned marine wire and heat-shrink crimp connectors: plain copper and twist-on connectors corrode quickly on a boat. Label both ends of each wire.
For long runs through consoles and liners, BoatUS recommends an electrician's fish tape (non-conductive fiberglass types are safer), pulling steadily at the flattest angle you can, taping the wire to the tape in a slim, staggered bundle, and leaving a spare pull string in place for the next job.
Pick speaker spots with drainage and enough depth behind the panel. Speakers throw sound where they point, and on an open boat there's little for it to bounce off: BoatUS suggests mounting them high, near ear level and forward of the helm (sound from speakers behind you blows away underway), aimed toward where people sit, so everyone hears at least two speakers. Flush-mount speakers need the air space behind them that their instructions call for; box and tower speakers don't, but keep tower speakers clear of heads. Check what's behind before cutting a hole. Seal the speaker flange as the maker describes. Wire each speaker with the correct polarity (+ to +); a speaker wired backward sounds thin and weak in the bass. Keep speakers away from the steering compass and any heading sensor: speaker magnets can pull the compass off by many degrees. After installing, turn the stereo on and off while watching the compass on several headings. If it moves, the speaker is too close.
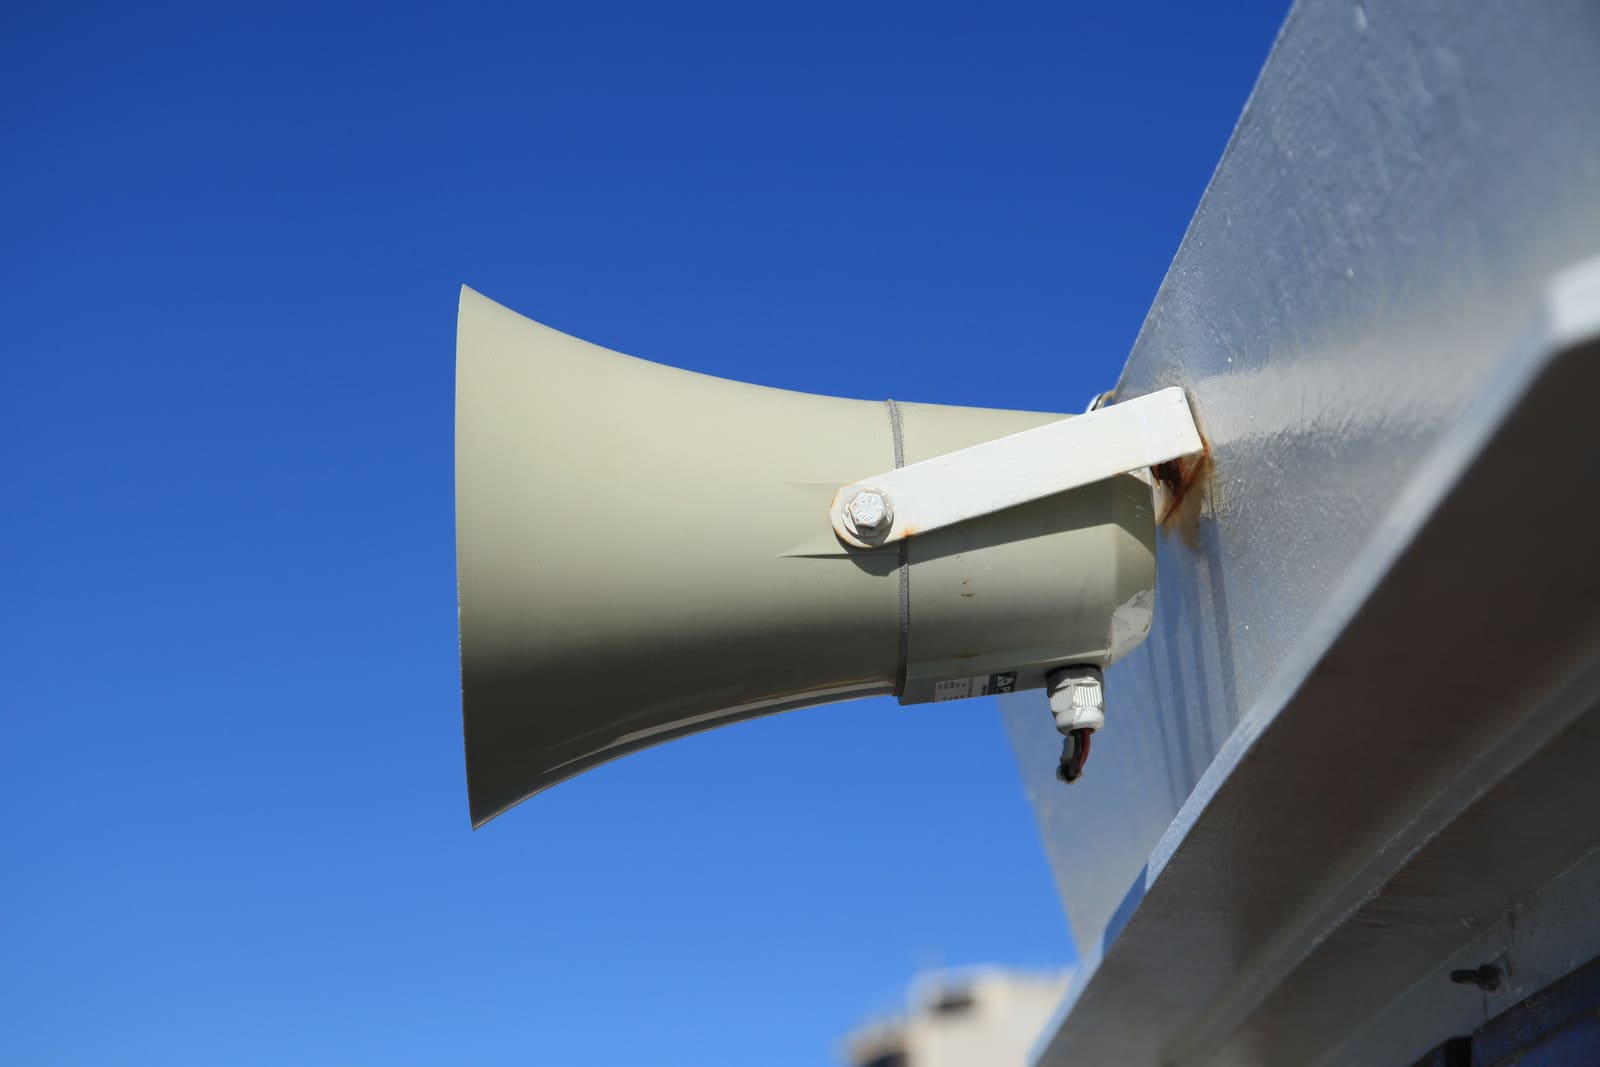
Photo: Frank Vincentz / Wikimedia Commons · CC BY-SA 3.0 Don't connect the stereo to your VHF antenna with a splitter. In a SAIL Magazine column, Gordon West explains that anything between your VHF radio and its antenna weakens the radio, and that many VHF antennas are built in a way that makes them poor at AM/FM anyway. A cheap separate AM/FM antenna hidden below deck works better and keeps your VHF at full strength. Many owners skip radio entirely and stream over Bluetooth.
Reconnect the battery negative and switch on. Check:
- The stereo turns on and off with its circuit, and keeps (or loses) presets the way you planned
- All speakers play, with balance and fade working
- The amp turns on and off with the stereo
- No buzzing or whine that changes with engine RPM (that usually points to a ground problem)
- Your VHF still receives and transmits clearly with the stereo playing (do a radio check)
- With everything off, the battery draw is what you expect (step 5)
Stereo freezes or reboots? A common forum complaint is a new head unit that locks up at power-on or resets every time the engine cranks. Cranking pulls the start battery's voltage down, and a stereo on that battery can drop out. Measure voltage at the stereo while someone cranks the engine, clean and tighten every connection on its power and ground, and consider moving it to the house battery. If it still freezes with steady voltage, contact the stereo maker's support.
Close the stereo cover or use the maker's UV cover. Turn the stereo's volume down before switching off so it doesn't blast at the next start. Rinse salt off speaker grilles with fresh water. Clear leaves and dirt from speaker drain holes. Turn the battery switch off when you leave the boat.
Look for chalky, cracked or faded speaker cones and grilles, loose or green-crusted connections, and chafed wires. In a season-long BoatUS torture test with salt spray, every unit kept working, but corrosion showed up on the backs of the units, on speaker mounting screws and on a USB port that had no rubber cap. Keep USB caps closed and check those spots. Tighten loose terminals, clean corrosion and redo any bad crimps. Speakers that sound fuzzy or rattle after years in the sun usually have a cracked surround; replace them as a pair.
Common mistakes
- No fuse at the battery on an amp power cable. If it shorts, the whole cable becomes a heating element.
- Wiring the memory lead straight to the battery, then finding a dead battery after two weeks at the dock.
- Grounding to a random metal part instead of the negative bus.
- Using car stereos and speakers that aren't built for UV and spray.
- Splitting the VHF antenna for AM/FM.
- Mounting speakers right next to the compass.
- Twisting wires together and taping them. Use crimp connectors and heat shrink.
- Running the stereo all day on the start battery of a single-battery boat.
When to call a pro
- Adding a big amplifier or several amps, or a second battery just for audio
- Your boat has no DC panel space or the panel wiring looks overloaded or melted
- Anything near gasoline engine or fuel tank spaces, or any AC power (inverter, generator, shore power)
- Fuses keep blowing or a wire gets hot
- Persistent engine noise in the speakers, or VHF trouble after the install
- Running wires through a tower, T-top or hull liner you can't access easily
Tips
- Take a photo of the back of the stereo and the panel before you disconnect anything, and save it in BoatMend.
- A small battery switch or labeled breaker just for the audio system makes it easy to turn off at the dock.
- If you only listen through your phone, a simple marine Bluetooth receiver and a pair of speakers may be all you need.
- Turn the bass down at high volume; it's what draws the most current and wears speakers fastest.
- Be a good neighbor: sound carries far over water, and many lakes and marinas have noise rules.
- Keep the volume low enough to hear horns, whistles and VHF calls underway. BoatUS reminds owners that keeping a proper lookout includes listening.
Official references
We read these to write this guide. Your engine's own manual always wins.
- eCFR – 33 CFR 183.455, Overcurrent protection (fuse at the source, 7 and 40 inch rules)
- eCFR – 33 CFR 183.410, Ignition protection
- KICKER – KM Marine Coaxial Speakers (UV treatment, salt fog and UV test standards, drain grilles)
- SAIL Magazine – Ask Sail, Stereo Trouble (don't split the VHF antenna for AM/FM)
- BoatUS Magazine – Avoiding Boat Electrical Mistakes (stacked battery terminals, insulated positive terminals)
- BoatUS Magazine – How To Install A Stereo (2014)
- BoatUS Magazine – Planning A Marine Stereo System (2026)
- BoatUS Magazine – Marine Stereo Survival Test (2018)
Safety: BoatMend is for information only and does not replace a certified marine technician. You are responsible for your safety and your boat. Read the full disclaimer.
Last updated 2026-10-24
Related guides
12-Volt Boat Wiring Basics: Circuits, Color Codes, Fuses and Wire Size
Learn how your boat's 12-volt system is laid out, what the ABYC wire colors mean, how fuses and breakers protect the wiring, why voltage drop and tinned wire matter, and how to read a wiring diagram, so you can troubleshoot smarter and know which jobs belong to a marine electrician.

Fuse Keeps Blowing? How to Troubleshoot a Boat Fuse Block or Breaker Panel
Work through a blown fuse or tripping breaker the safe way: confirm it, tell a short from an overload, isolate the device or wire at fault, replace a worn breaker or panel switch with the same rating, and label every circuit, without ever fitting a bigger fuse.
Battery Goes Dead While the Boat Sits - How to Find a Parasitic Drain
If your boat battery is flat every time you come back, something may be quietly drawing power while you are away. Learn how to tell a bad battery from a drain, find the circuit with a multimeter and the fuse panel, and fix the usual culprits without disabling your bilge pump.
How to Use a 1-2-Both Battery Switch and Run Two Batteries
Learn what the 1, 2, Both and Off positions really do, a simple routine that keeps one battery ready to start the engine, how to check that both batteries are charging, and when an automatic charging relay makes life easier. Rewiring high-current cables is a job for a marine electrician.
Set Up Your VHF Radio: MMSI, DSC, GPS Hookup and Radio Checks
Get a free or low-cost MMSI number, program it into your DSC radio, connect your GPS so a distress alert sends your exact position, check the antenna, and learn the Channel 16 rules and the right way to do a radio check.

How to Find and Fix Corroded Electrical Connections on a Boat
Track down the green crust and loose terminals behind flickering lights, dead gauges and slow cranking with a simple voltage-drop test, then remake the connection the marine way: tinned wire, a proper crimp, adhesive-lined heat shrink and a protective coating.