How to Use a 1-2-Both Battery Switch and Run Two Batteries
Learn what the 1, 2, Both and Off positions really do, a simple routine that keeps one battery ready to start the engine, how to check that both batteries are charging, and when an automatic charging relay makes life easier. Rewiring high-current cables is a job for a marine electrician.
Time
45 min
Shop would charge
$250-800
Applies to
Outboard, Sterndrive (I/O), Gas inboard, Marine diesel
Safety first: Batteries can deliver hundreds of amps and give off explosive hydrogen gas while charging. Never lay a wrench or metal tool across battery terminals, and keep sparks and flames away. Never turn the battery switch to OFF while the engine is running: it can damage the alternator or the outboard's charging parts. If a battery is hot, swollen, hissing or smells like rotten eggs, or a cable is hot or melting, stop, turn the engine off, ventilate and call a marine electrician. On the water in trouble, call TowBoatUS or Sea Tow, or VHF 16 / 911 in an emergency.
Owners often ask
- How should I use my 1-2-Both battery switch?
This guide walks you through it. Still stuck? Ask the AI Mechanic about your engine.
Tools
- Digital multimeter
- Flashlight
- Masking tape and a marker (for labels)
- Insulated wrenches (only if you tighten terminals)
- Safety glasses
Parts & supplies
- Labels for each battery and switch position
- Non-conductive terminal cover for each positive terminal
- Nylon-insert lock nuts for threaded battery terminals (if wing nuts are fitted)
- Automatic charging relay or battery combiner (optional upgrade, installed per its instructions)
Before you start
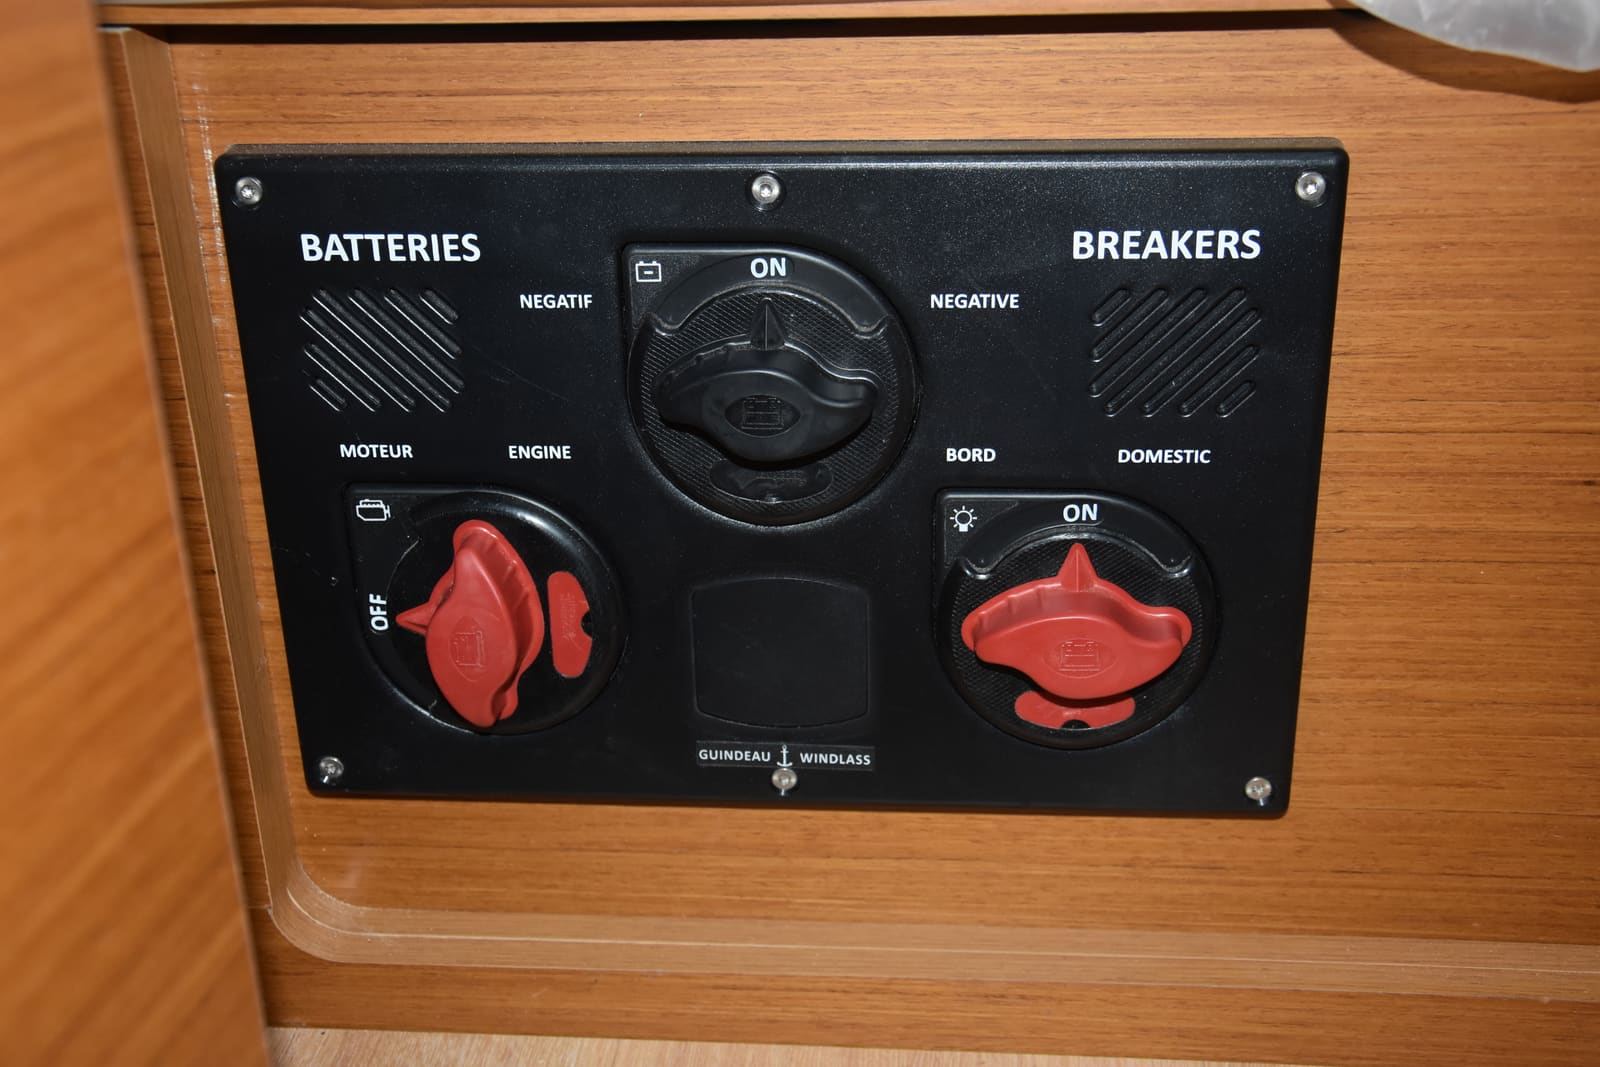
A two-battery setup gives you a spare: one battery (often called the starting or engine battery) is kept charged to start the engine, and the other (the house battery) runs the fish finder, stereo, lights and trolling motor. The battery switch decides which one is connected to the boat.
A typical rotary selector switch has four positions:
- OFF: both batteries disconnected from the boat.
- 1: only battery 1 is connected.
- 2: only battery 2 is connected.
- BOTH (or ALL, 1+2): the two batteries are tied together, as one bigger battery.
On most simple setups the engine's starter and its charging output both run through this switch, so whatever battery is selected is the one that gets charged while the engine runs. Some boats instead have two separate on/off switches (one per battery), a dual-circuit switch, or an automatic charging relay. Find out which you have before following any routine.
Steps
Open the battery compartment and figure out which battery is "1" and which is "2" by following the cables from the switch. Label each battery and the switch: for example, "1 = Start" and "2 = House." Note the type of each battery (starting, deep-cycle or dual-purpose, and flooded, AGM or lithium). Do not touch the terminals with tools while you trace cables.
Look for a small automatic charging relay (ACR), battery combiner or isolator near the batteries, and check your boat's wiring diagram if you have one. If your boat has one of these devices, it charges both batteries automatically and you mostly use the switch for on and off. If you are not sure, a marine electrician can tell you in a few minutes.
Some newer boats have a dual-circuit switch instead of a 1-2-Both dial. Blue Sea Systems describes it this way: in ON, the start battery feeds only the engine circuit and the house battery feeds only the house circuits, so running the stereo can't flatten the starting battery. A "Plus" version adds a COMBINE position to tie the batteries together for an emergency start. On its own, a dual-circuit switch only charges the house battery when you select COMBINE, which is why it is usually paired with an automatic charging relay.
Turn the switch to the starting battery (for example, 1) before you turn the key. Starting on a fresh, dedicated battery is the whole point of having two.
With a simple switch and no charging relay, the alternator charges only the selected battery. Many owners move the switch to BOTH once the engine is running so both batteries charge, then back to a single battery before they shut down. Perko notes that running on BOTH may not fully charge both batteries, so an occasional full charge with a shore charger still helps.
When you move the switch with the engine running, turn it so it never passes through OFF. On a typical dial the order is OFF, 1, BOTH, 2, so going 1 to BOTH to 2 avoids OFF. Check the order on your switch.
Owners often ask whether turning from one position to the next drops power for a moment. Many selector switches are "make before break" (the new contact closes before the old one opens), but not all are. Look for it in the switch's label or instructions; if you can't confirm it, make your changes with the engine off.
When you are anchored, drifting or fishing with the engine off, select the house battery (for example, 2) and run your accessories from it. BoatUS warns that when the batteries are tied together, the accessories drain both, and you can end up without enough power to start. Do not sit at anchor on BOTH.
When you are ready to go, switch back to the starting battery and start the engine.
Disconnecting the battery while the alternator is charging can cause a voltage spike that damages the alternator diodes, the voltage regulator or an outboard's rectifier/regulator. Some switches include an "alternator field disconnect" (AFD) feature to protect certain alternators, but it must be wired in to work, and it is not a reason to do it. Blue Sea Systems notes that an AFD only works on alternators with an external regulator, so it does nothing for most outboards or for alternators with a built-in regulator. Make "engine off, then switch off" a habit and tell your crew.
If the starting battery is too weak to crank, turn the engine key off, select BOTH (or the house battery) and try again. Once the engine is running, charge as usual and have the weak battery load tested soon: a battery that went flat once often fails again.
Turn the switch to OFF to stop small drains from flattening the batteries. Before you do, find out whether your automatic bilge pump is wired directly to the battery (it should keep working with the switch off) or through the switch. BoatUS recommends wiring bilge pumps and high-water alarms directly to the battery with their own fuse so they stay powered when the battery switches are off. If yours goes through the switch, a boat left in the water with the switch off has no automatic bilge protection: have it rewired.
With the engine off and the boat rested for a few hours, a fully charged 12-volt lead-acid battery reads about 12.6 volts across its posts. Then start the engine (in the water, or with cooling water supplied: flush muffs or a test tank for an outboard, not the built-in flush port unless your manual allows running on it), set the switch the way you normally run, and bring the engine to a fast idle. Measure each battery again: a battery that is being charged reads noticeably higher, typically somewhere around 13.5 to 14.5 volts (check your engine manual for its charging spec).
If one battery stays at resting voltage while the engine runs, it is not being charged in that switch position. Find out why before your next trip.
An automatic charging relay (ACR) or battery combiner connects the two batteries only while a charging voltage is present, then separates them when charging stops. BoatUS describes this as better than an old-style diode isolator, which drops the voltage reaching the batteries by about half a volt or more (Blue Sea Systems puts the diode drop at about 0.7 volts). On outboard boats this matters even more: Blue Sea explains that an outboard uses the same cable to charge the battery and to draw starting current, and a diode isolator blocks current flowing back the other way, so an isolator is the wrong choice there. With an ACR you no longer have to remember to move the switch to charge. It must be sized and wired to the maker's diagram, so have it installed by someone qualified if you are not confident with high-current wiring.
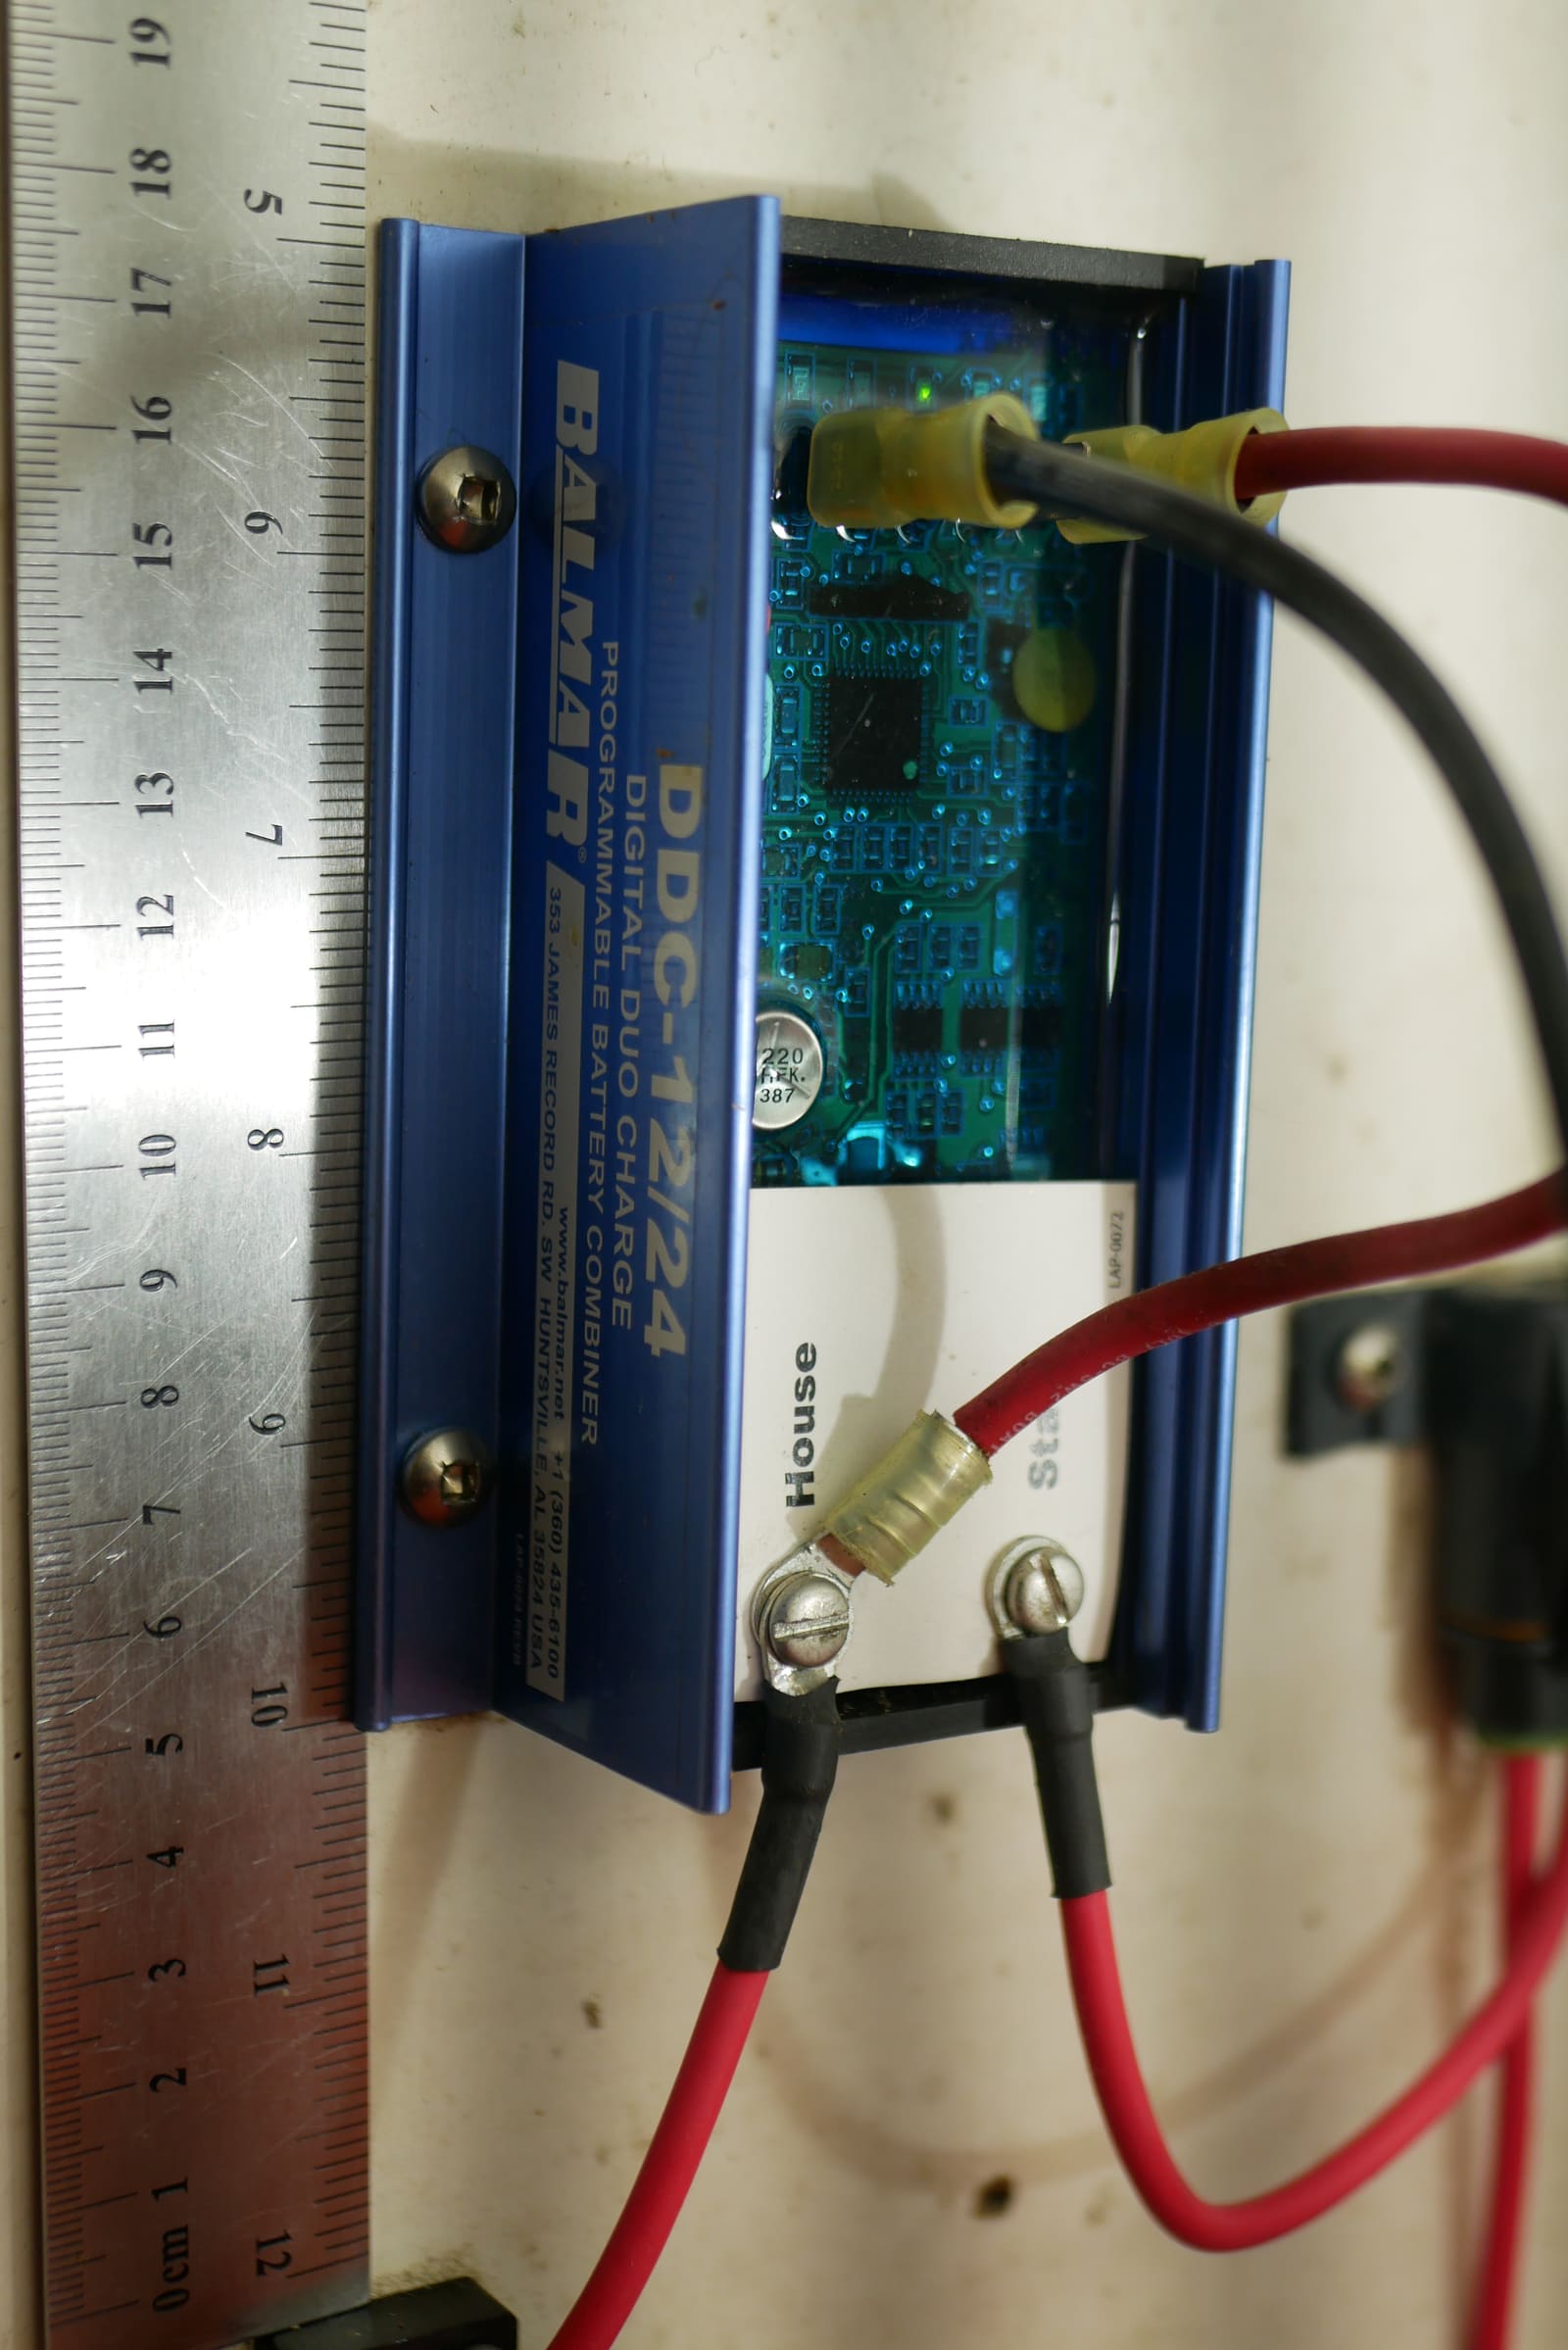
A battery combiner joins the house and starting batteries only while they're being charged. Photo: WindBorneListener / Wikimedia Commons · CC0 - Do not mix battery chemistries (flooded, AGM, gel, lithium) in the same bank or on a charger set for one type. One will be overcharged. Lithium batteries need their own charging setup.
- Secure every battery in a tray or box with a strap, and fit a non-conductive cover over each positive terminal, as Mercury recommends.
- Use the threaded terminals and replace wing nuts with nylon-insert lock nuts, which do not vibrate loose.
- Keep both negative cables connected to the common engine ground. A second battery with no proper negative connection will not start the engine or charge.
- Have aging batteries load tested; a resting voltage alone does not prove a battery is healthy.
Tape a short card next to the switch: "Start on 1. Never OFF with engine running. House on 2 when engine is off." A guest who flips the switch to OFF to "save the battery" while the engine runs can cost you an expensive repair.
Common mistakes
- Leaving the switch on BOTH all the time, then finding both batteries flat after a day at anchor.
- Turning the switch to OFF, or through OFF, with the engine running.
- Switching OFF when leaving the boat without knowing the bilge pump is wired through the switch.
- Not connecting the negative of the second battery to the common ground.
- Mixing an old battery with a new one, or AGM with flooded, in the same bank.
- Using a car battery, which is not built for pounding and vibration.
- Adding a second battery with undersized cables, no fuse, or more than four cable ends stacked on one terminal (ABYC's limit, per BoatUS).
- Trusting a 12.6-volt reading as proof a battery is good without a load test.
- Replacing a worn switch with a cheap non-marine one. On a gasoline boat, a switch in or near the engine or fuel compartment must be ignition protected (made so it can't spark fuel vapor); marine switches such as Perko's are labeled that way. Check the rating before you buy.
- Hooking a battery up backward after a swap. Mercury warns that reversed connections can damage the rectifier or regulator, tachometer, engine computer and boat electronics. Check the fuse or fusible link first, and if it blows again, have a dealer inspect the engine before you use it.
When to call a pro
- Installing or rewiring a battery switch, a second battery, an ACR, an isolator or a battery charger: these are high-current circuits that can start fires
- Any hot, discolored or melted cable, a burning smell, or a fuse that keeps blowing
- A battery that is swollen, cracked, hissing, very hot or smells of rotten eggs (explosion risk): ventilate, keep sparks away
- Converting to lithium batteries
- The engine does not charge either battery (alternator, regulator or rectifier problem)
- Anything involving shore power or an inverter
Tips
- Put the switch where you can reach it quickly in an emergency, and make sure everyone knows where it is.
- A cheap battery monitor or voltmeter at the helm shows at a glance which battery you are on and how charged it is.
- Before storage, fully charge both batteries and keep them on a smart maintenance charger, or bring them home.
- A portable jump pack is a handy backup on a single-battery boat, but keep it charged and stowed dry, and clip it on with the engine key off. It does not replace a healthy, dedicated starting battery.
Official references
We read these to write this guide. Your engine's own manual always wins.
- BoatUS – Got Juice? Lessons Learned From Your Battery
- BoatUS – 12 Volt Electrical Systems
- BoatUS – Double Duty (backup bilge pump and high-water alarm)
- Perko – Help Guides, Wiring a Battery Switch
- Mercury Marine – Maintenance Made Easy, Battery Basics
- Blue Sea Systems – Alternator Field Disconnect
- Blue Sea Systems – Battery Isolators and Automatic Charging Relays
- Mercury Marine – Owner FAQs (reversed battery connections)
- Blue Sea Systems – Dual Circuit Battery Switch
Safety: BoatMend is for information only and does not replace a certified marine technician. You are responsible for your safety and your boat. Read the full disclaimer.
Last updated 2026-10-25
Related guides

Marine Battery Care: Test, Charge and Store for Winter
Check your boat battery's health, charge it the right way for its type (flooded, AGM or lithium), and store it so it is ready in spring. Most "boat won't start" calls start with a neglected battery.
Engine Won't Start or Won't Crank - Troubleshooting Guide
Find out why your boat engine will not turn over or will not fire, starting with the simple things owners miss most, like the kill switch lanyard and battery switch. Many no-starts are fixed at the ramp in minutes without a tow.
How to Test and Clean Your Bilge Pump and Float Switch
Make sure your bilge pump actually moves water overboard, both on the manual switch and automatically through the float switch. A working bilge pump is one of the most important safety systems on any boat that stays in the water.
Shore Power Safety: Cords, Inlets, Burned Plugs and Electric Shock Drowning
An owner's inspection routine for your shore power cord, plugs, boat inlet, galvanic isolator and ground-fault protection, plus the right way to plug in and the facts about Electric Shock Drowning. This guide is for looking and testing only; any electrical repair belongs to an ABYC-certified marine electrician.

How to Test and Fix Your Boat's Navigation Lights
Learn which navigation lights your boat must show and when, then test them and fix the usual culprits such as corroded sockets, loose pole-light plugs and blown bulbs. Working lights are legally required at night and in poor visibility and are how other boats see which way you are heading.