Ice Makers and Drinking-Water Dispensers on Boats: Cleaning, Filters and Winterizing
Keep onboard ice and drinking water clean and tasting good. Sanitize and descale the ice maker, change filters, keep the condenser breathing, fix common faults, and drain and bypass everything before freezing weather.
Time
1 h 30 min
Shop would charge
$150-450
Applies to
All engines · Cabin cruiser, Yacht
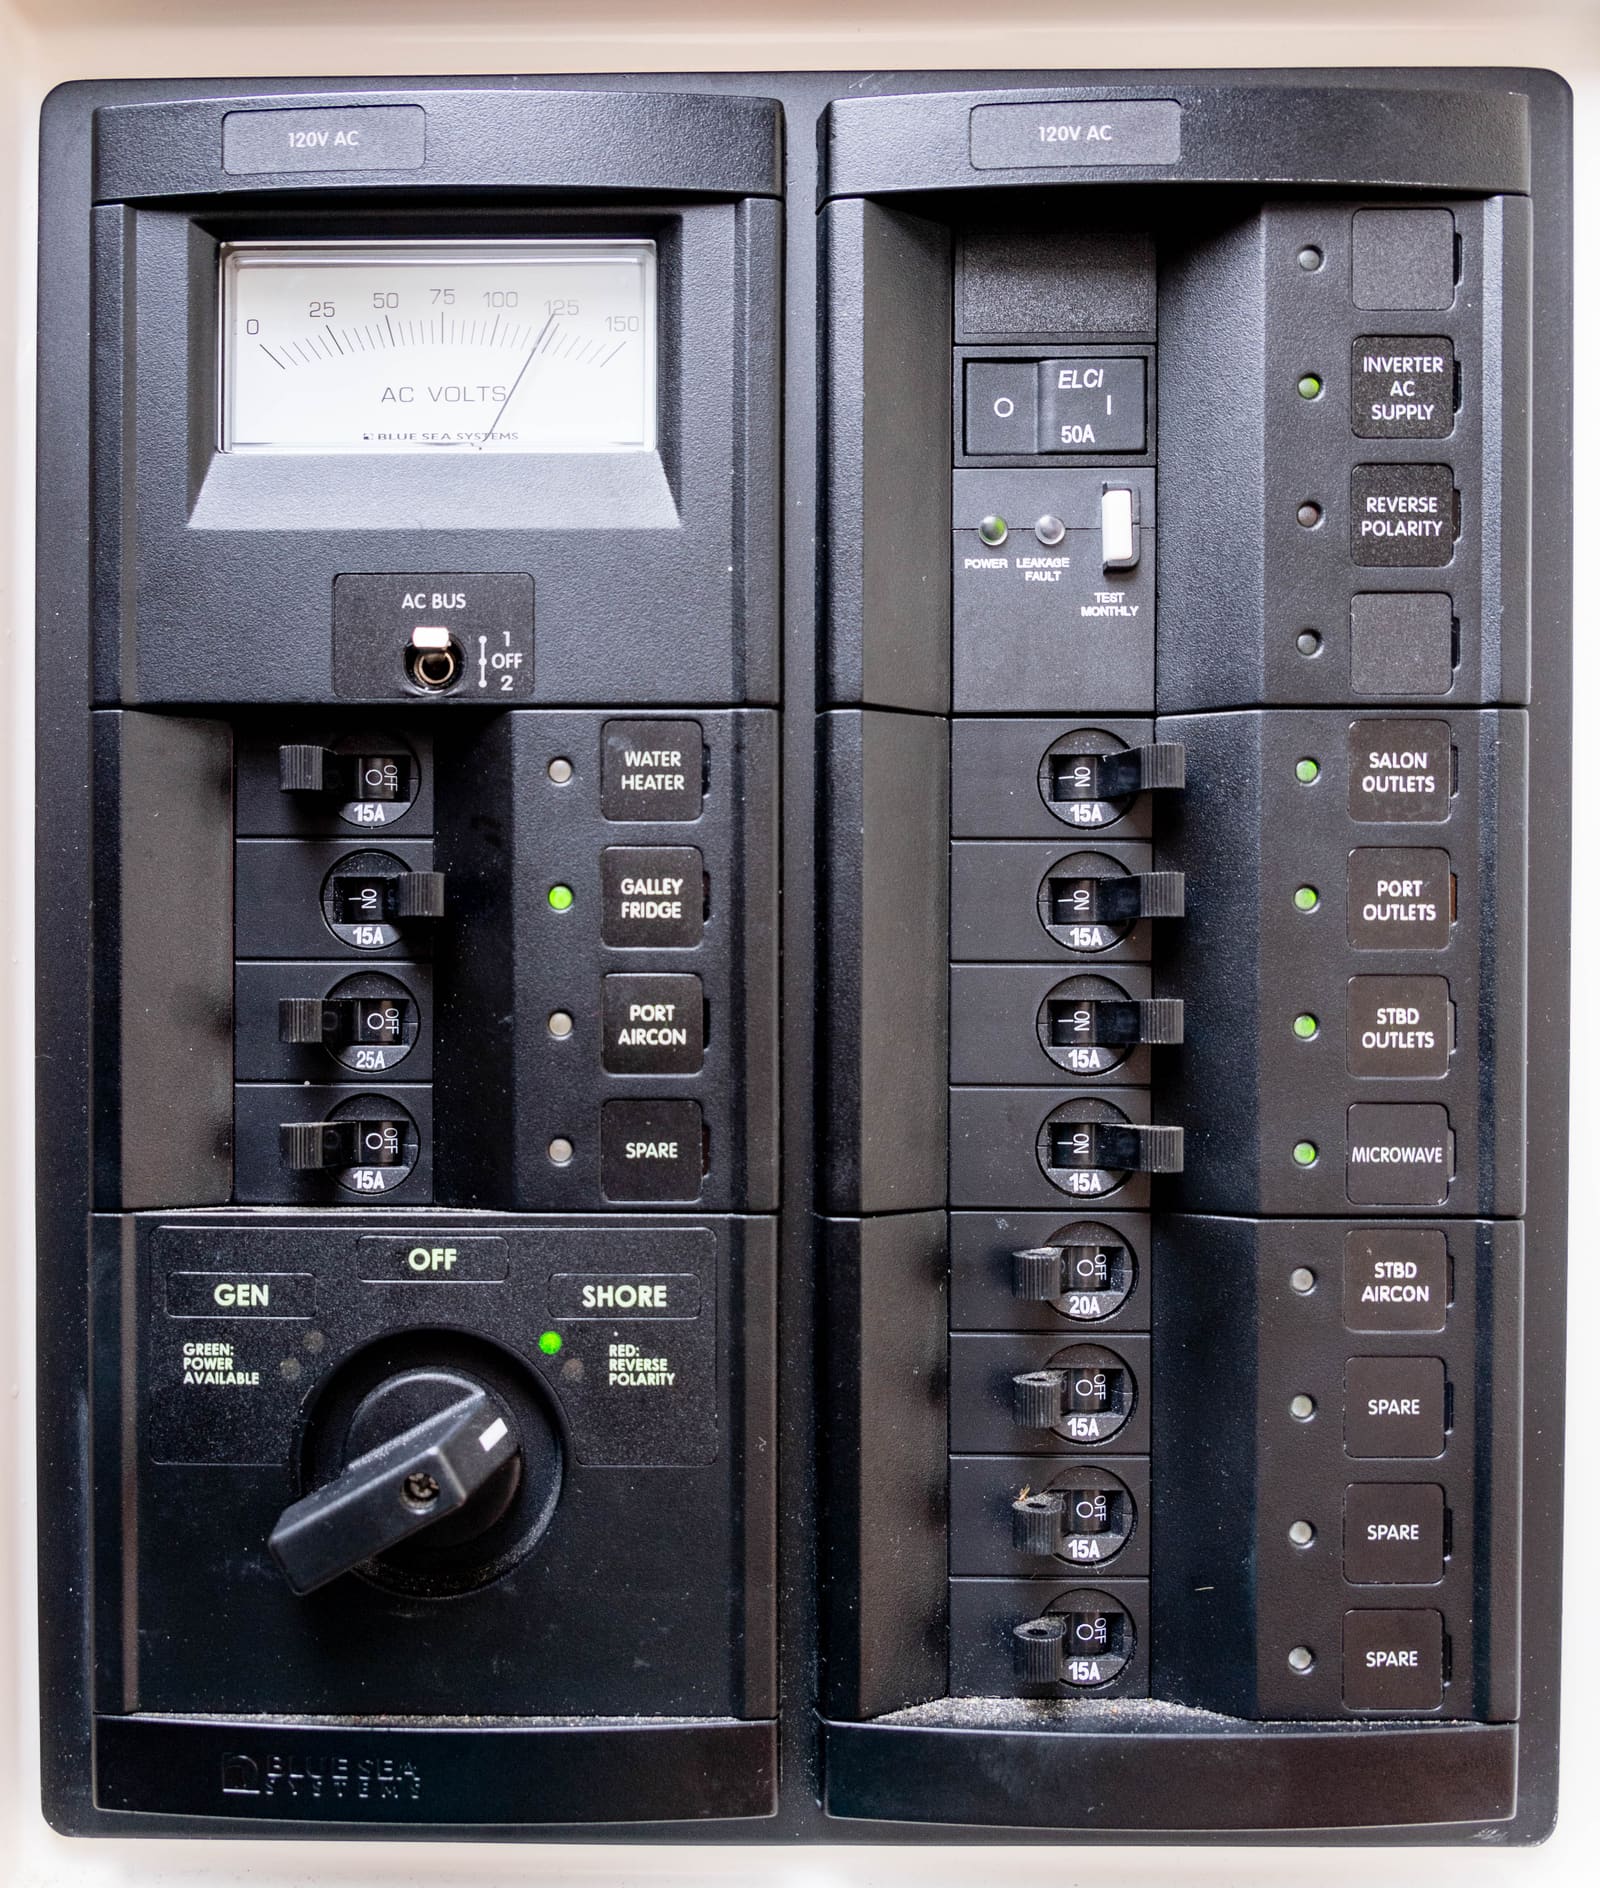
Safety first: Most built-in marine ice makers run on 120- or 230-volt AC from shore power, a generator or an inverter. Switch off the AC breaker (and unplug the unit if it has a plug) before cleaning inside, changing parts or pulling it out of its cabinet. Shore power can kill: if you see burned wiring, a tripping breaker or a shock, stop and call a marine electrician. Wear gloves and glasses when using ice machine cleaner, and never mix cleaner and sanitizer or bleach. Ice and water are food: if you're unsure the water is safe, don't drink it or make ice with it.
Owners often ask
- Why does the ice from my boat ice maker taste or smell bad?
- How do I winterize the ice maker and water filter on my boat?
This guide walks you through it. Still stuck? Ask the AI Mechanic about your engine.
Tools
- Screwdrivers and a small adjustable wrench
- Soft cloths, sponges and a soft brush or vacuum with a brush attachment
- Bucket and towels
- Multimeter (for checking supply voltage)
- Low-pressure air source, only if your maker allows blowing out lines
Parts & supplies
- Ice machine cleaner approved by your ice maker's manufacturer
- Replacement water filter cartridge(s) for your ice maker and drinking-water faucet
- Food-safe sanitizer recommended in the manual
- Stainless steel cleaner (for stainless fronts)
- Non-toxic propylene glycol (pink) antifreeze for the rest of the freshwater system
Before you start
Know your setup. Look behind or under the unit and find:
- Ice maker type: a built-in cube or clear-ice maker plumbed to the freshwater system, a nugget-ice machine, or a countertop unit you fill by hand.
- Water feed: a small line from the boat's pressurized freshwater system, usually with a shutoff valve, an inline filter, and a solenoid (fill) valve on the ice maker.
- Drain: many built-in units have a drain line (to a sump, gray-water tank or overboard), sometimes with a small drain pump. Some compact marine units don't: Raritan describes its Icerette as needing no drain hookup, venting from the front so it can be built in, and as a manual-defrost unit with a built-in door-prop feature. Know which kind you have before you look for a drain that isn't there.
- Power: the AC breaker that feeds it, and whether it can run on the inverter.
- Drinking-water faucet or dispenser: often a separate cold-water tap at the galley sink with its own under-sink filter, or a bottled-water dispenser.
Find the model and serial number (U-Line puts its serial tag inside the unit) and get the user and service manual. Cleaning and winterizing steps differ a lot between models, so the manual wins wherever it differs from this guide.
Why boats are harder on these units. BoatUS notes that the water line is often tucked behind the unit where it stays warm, so water stagnates and grows odors, especially in the filter. Long idle periods, warm cabins, tight cabinetry and boat water tanks all add up.
Steps
Ice and dispensed water are only as clean as your tank. If the tank water tastes or smells off, clean and sanitize the freshwater system first (see the water tank cleaning guide). BoatUS notes that a good drinking-water filter greatly improves taste and removes many impurities, and that an ultraviolet (UV) unit can kill viruses.
With a multimeter, confirm the outlet or supply has the right voltage when the unit runs. An ice maker draws a lot of power for many hours, which can quickly drain batteries through an inverter. Check the nameplate wattage and plan to run it on shore power or the generator, or only briefly on the inverter. Dometic notes that long cable runs, shared circuits and corroded connections cause voltage drop that makes refrigeration work harder; the same applies to ice makers.
- Dump the ice bin every few days when you're using it, so water keeps moving (BoatUS advice). Old ice picks up odors.
- Discard the first batch after start-up, cleaning or a filter change.
- Keep the scoop out of the bin, and wash it regularly.
- Leave the unit off and the door open if you won't use it for a few days or more, to stop odor and mold.
Most makers suggest replacing filters about once a year, or sooner if flow drops, cubes get small or hollow, or the taste changes; check your filter's label. Shut off the water supply and relieve pressure, put a towel under the housing, then swap the cartridge as its instructions say. Inspect the housing O-ring and seat it correctly; most housings are hand-tightened only. Flush water through the new filter as directed, and write the date on the housing.
With the power off, empty the bin and let any ice melt. Wash the bin, scoop and interior surfaces with mild soap and warm water, rinse, then sanitize with the product the manual recommends, and rinse again if the label says to. U-Line advises against putting parts in a dishwasher unless the manual allows it, and against harsh or abrasive cleaners on the interior.
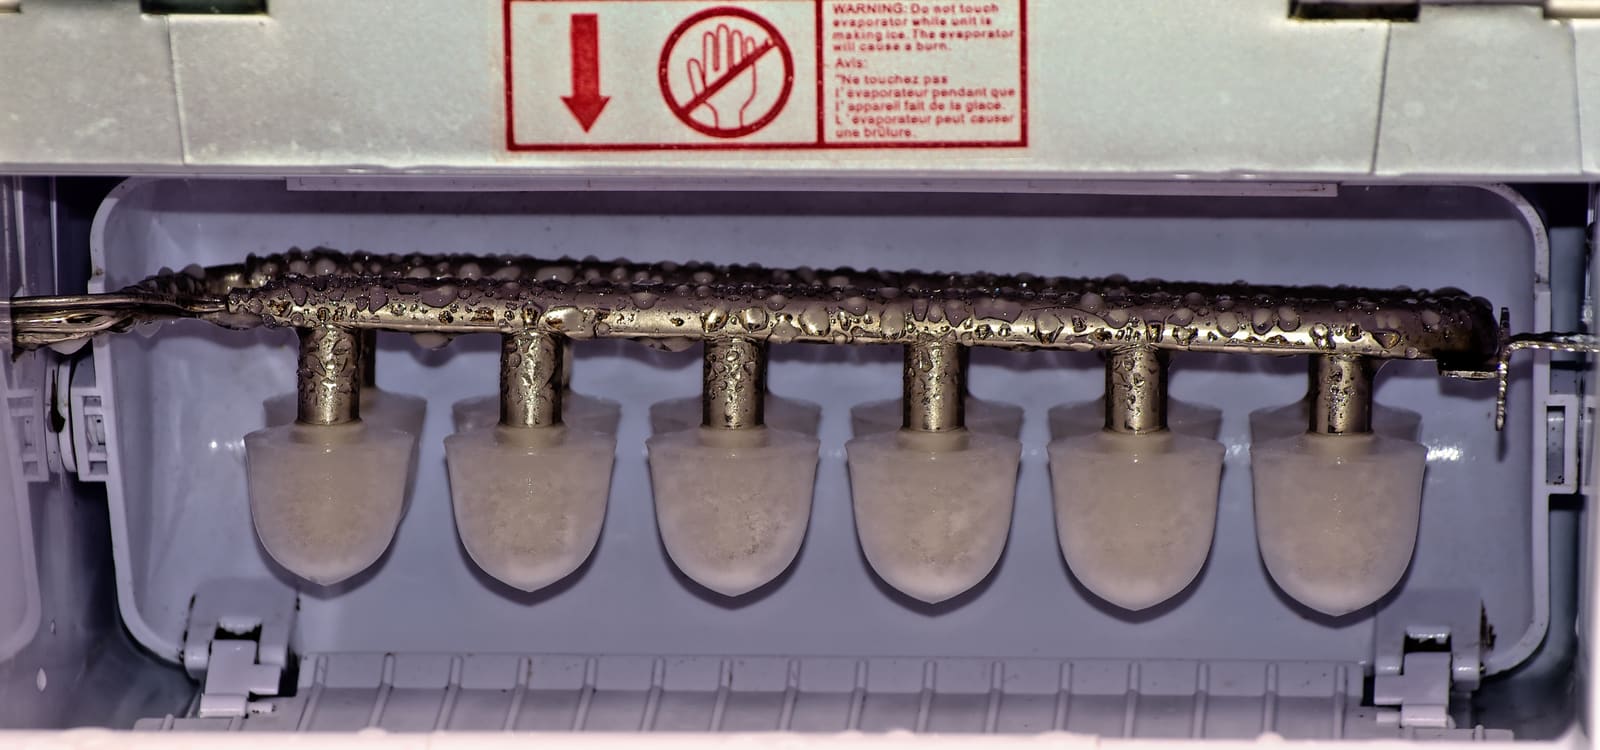
Photo: Pannet / Wikimedia Commons · CC BY-SA 4.0 Minerals in the water leave scale on the evaporator (the cold plate or fingers where ice forms), the water pump and the valves. U-Line's clear-ice and nugget machines have a cleaning reminder; others just make less ice or cloudy cubes. Run the maker's cleaning cycle with the ice machine cleaner it approves, follow every step, and throw away the ice from the first harvest afterward (U-Line says the first harvest for clear-ice units, and the first 10 minutes of ice for nugget units). Using the approved cleaner also protects your warranty. Don't touch the evaporator while the machine is running.
Like a fridge, an ice maker dumps heat through a condenser, usually behind a front grille. Dometic notes that when heat is trapped in tight cabinetry, cooling drops and components wear faster. With the power off, vacuum or brush dust and lint from the condenser grille every few months, and make sure nothing is stowed against the vents.
If your unit has a drain line, pour a little clean water into the bin and make sure it drains away freely. A slow drain causes overflowing water, puddles and musty smells. Clean the drain fitting, make sure the hose has a steady downhill run with no sags, and check any drain pump and its float. Find where the drain ends (sump, gray tank or through-hull) and confirm it's clear.
- Run the faucet for a minute after the boat has sat idle to flush stagnant water from the line.
- Change its filter on the maker's schedule, the same way as in step 4.
- Clean the spout and aerator; scale and slime collect there.
- For bottled-water dispensers, clean and sanitize the reservoir and spigots when you change bottles, following the dispenser's instructions.
Work from simplest to hardest:
- No ice at all: Is the unit on and the bin-full arm or sensor free? Is the freshwater pump on and the tank not empty? Is the supply valve open? A clogged filter or frozen fill line also stops it.
- Small, hollow or few cubes: low water flow (old filter, low pump pressure, kinked line), scale, or a hot cabin and blocked condenser.
- Cloudy, smelly or bad-tasting ice: stale water in the line, an old filter, a dirty bin or tank water that needs treating. Clean and sanitize, change the filter, dump the bin.
- Water on the floor: a blocked drain, loose fill fitting, or a cracked line (often after a freeze).
- Breaker trips or unit won't power up: stop and have a marine electrician check it.
Freezing water cracks lines, valves and filter housings. BoatUS warns that ice can crack plastic fittings, pumps and valves in water systems, and that many insurance policies exclude freeze damage unless you buy that coverage.
- Turn off the ice maker and its breaker, empty the bin, and clean and dry it.
- Close the ice maker's water supply valve.
- Drain the line as the manual says. On many units this means disconnecting the line at the fill (solenoid) valve and letting it drain, and some makers allow blowing it out with low-pressure air. Drain the unit's internal reservoir or pump if it has one.
- Remove filter cartridges and leave the housings empty and drained, or bypass them, before antifreeze goes through the boat's plumbing.
- Only run pink propylene glycol antifreeze into the ice maker if its maker allows it. Otherwise keep the ice maker's supply valve closed while the rest of the freshwater system is winterized.
- Leave the door propped open so it dries.
Flush the freshwater system until all antifreeze is gone and the water tastes clean. Fit new filters, reconnect the ice maker's line, open the valve and check every fitting for drips. Turn the unit on, sanitize if the manual calls for it, and discard the first batches of ice.
Common mistakes
- Leaving the ice maker running in an empty, closed-up boat for weeks.
- Mixing ice machine cleaner with bleach or sanitizer.
- Forgetting the ice maker line and filter when winterizing the rest of the water system.
- Pushing antifreeze through a filter cartridge, then drinking water through it in spring.
- Building the unit into a tight cabinet without the ventilation gap the maker requires.
- Running an ice maker on the inverter overnight and waking up to flat batteries.
When to call a pro
- The breaker trips, wiring is hot or burned, or you get a shock
- The compressor runs but no ice forms after cleaning and a new filter (possible refrigerant problem). Check the nameplate for the refrigerant type: many newer units use isobutane (R-600a). Raritan, for example, uses it in its Icer-Ette Model 88, and EPA lists R-600a in the highest flammability class (A3). The sealed refrigerant circuit is never a DIY job, and you should never drill, bend or puncture tubing behind the unit.
- Leaks inside cabinetry you can't reach, or water damage under the unit
- A cracked fill valve or line after a freeze
- Installing a new ice maker, filter system or UV unit, or adding an AC circuit for one
Tips
- Write the filter-change date on the housing and set a reminder in BoatMend.
- A small shutoff valve right at the ice maker makes filter changes and winterizing much easier.
- If you only use the boat on weekends, turn the ice maker on when you arrive and off when you leave.
- Keep a bag of store-bought ice for the first day out after a long layup while the unit restarts.
Official references
We read these to write this guide. Your engine's own manual always wins.
- BoatUS – The Care and Feeding of Your Boat's Water Systems
- U-Line – Tips and Tricks to Keep Your Ice Making Product in Optimal Condition
- BoatUS – How to Winterize Boat Plumbing
- Dometic – Cold Drinks, Warm Days, expert advice for better fridge performance
- Raritan Engineering – Icer-Ette Model 88 marine ice maker (product page)
- US EPA – SNAP, Substitutes in Household Refrigerators and Freezers (R-600a safety class)
Safety: BoatMend is for information only and does not replace a certified marine technician. You are responsible for your safety and your boat. Read the full disclaimer.
Last updated 2026-10-25
Related guides
How to Keep Your Boat Fridge, Freezer or Icebox Cold (and Off Your Batteries' Back)
Most boat fridge problems are not a dead compressor: they are trapped heat, low voltage, leaky seals or too much frost. Learn the owner checks for air-cooled, water-cooled and keel-cooled units, how to estimate power draw, and how to store the system for winter.
How to Clean and Sanitize Your Boat's Freshwater Tank and Lines
Get rid of slime, stale taste and smells in your boat's drinking water system. Scrub the tank through the inspection port if you can, sanitize the tank and every line with the right dose of plain bleach, then flush until the water tastes clean again.
How to Winterize (and Recommission) Your Boat's Freshwater System
Protect the tank, pump, water heater, faucets and showers from freeze damage with non-toxic antifreeze, then flush and sanitize everything in the spring so the water is clean again. A cracked pump or split fitting is a common, avoidable winter repair bill.
Freshwater Pump Troubleshooting: Cycling, Won't Shut Off or No Water
When the pressure water pump keeps cycling at night, runs nonstop or sputters air, the cause is usually simple: an empty tank, a dripping fixture, a clogged strainer, air in the lines or a tired accumulator. Work from the cheapest checks to the pressure switch and pump, and learn the basics of replacing a pump.
Running a Boat Generator at the Right Load: Switching Sequence, Balancing and Avoiding Wet Stacking
Get more life out of your marine generator by starting and stopping it with the AC loads off, switching sources in the right order, keeping it loaded enough to avoid wet stacking and carbon buildup, and moving small loads to the inverter. Includes a simple monthly exercise routine.
Boat Inverters and Inverter/Chargers: Sizing, Safe Use and What a Pro Must Install
An inverter turns battery power into 120-volt household current, which makes it as dangerous as shore power and a serious fire risk if it is fused or wired wrong. Learn how to size one realistically, what a safe installation looks like, the owner checks to do, and the mistakes (like backfeeding) that hurt people.
Shore Power Safety: Cords, Inlets, Burned Plugs and Electric Shock Drowning
An owner's inspection routine for your shore power cord, plugs, boat inlet, galvanic isolator and ground-fault protection, plus the right way to plug in and the facts about Electric Shock Drowning. This guide is for looking and testing only; any electrical repair belongs to an ABYC-certified marine electrician.