Testing Engine Coolant: Test Strips, Refractometer or Lab Analysis
Coolant can look perfect and still be worn out. Learn how to test the coolant in a closed-cooled inboard, sterndrive, diesel or generator with test strips, a refractometer or a mail-in lab kit, what each result tells you, and when the answer is a coolant change or a call to a mechanic.
Time
20 min
Shop would charge
$40-150
Applies to
Gas inboard, Sterndrive (I/O), Marine diesel
Safety first: Take coolant samples only from a cold engine. A warm cooling system is under pressure and can spray scalding coolant when you open the cap. Engine coolant (ethylene glycol) is poisonous and tastes sweet to children and pets: wear gloves, wipe up every drop, and never squirt leftover sample into the bilge or overboard. If testing turns up oil in the coolant, coolant in the oil, or a coolant level that keeps dropping, don't keep running the engine and hoping; get a mechanic to look at it.
Owners often ask
- My coolant looks clean and green. Do I still need to test or change it?
- Test strips or refractometer: which is better for checking boat engine coolant?
- Do I need to drain my diesel's coolant and put in winter antifreeze?
This guide walks you through it. Still stuck? Ask the AI Mechanic about your engine.
Tools
- Coolant test strips made for your type of coolant
- Refractometer with a coolant scale (optional, more precise)
- Floating-ball tester or hydrometer (cheapest freeze-protection check)
- Clean syringe, turkey baster or pipette for drawing a sample
- Clean rag and a cup of distilled water for rinsing tools
- Nitrile gloves and safety glasses
- Notebook or the BoatMend log
Parts & supplies
- Lab coolant sample kit (bottle, label, mailer), if you send a sample out
- Premixed coolant of the type your engine manual specifies, for topping up after sampling
Before you start
Why test at all. BoatUS points out that coolant can look bright and new while its corrosion-fighting additives are used up or the 50/50 mix is off, so looking at it isn't enough. The additives keep the coolant alkaline. As the glycol slowly breaks down with heat and age it forms acids, and the additives neutralize them; BoatUS calls that reserve "reserve alkalinity." Once it's gone, the coolant turns acidic and starts corroding the engine from the inside. Testing tells you where you are before that happens.
Which engines. This applies to any engine with a closed (freshwater) cooling system: many sterndrives and gas inboards, almost all inboard diesels, and most generators. Raw-water-cooled engines have no coolant to test.
Three ways to test, from simplest to most detailed:
- Floating-ball tester or hydrometer. Cheap; shows freeze protection only.
- Refractometer. A few drops on a prism give an accurate reading of how much glycol is in the mix.
- Test strips. Show the mix strength and, depending on the strip, pH and additive condition. BoatUS says they're the only simple method that also checks the additives.
- Lab analysis. A mail-in sample checked by a lab for several things at once, including contamination.
Know your coolant type first. Look at the engine manual and any tag near the fill cap. Strips, refractometer scales and lab interpretation depend on the coolant chemistry, and BoatUS warns that color says nothing reliable about chemistry.
Steps
A good routine: test in spring before the season, and again if the engine ever overheats, loses coolant or has cooling-system work. Test before you top up, so the sample shows what the engine has really been running on. The engine must be cold, ideally sat overnight.
Open the pressure cap on the heat exchanger or coolant tank slowly, to the first stop, then remove it. Draw the sample there rather than from the recovery bottle, which can hold stale coolant that isn't circulating. Use a clean syringe or baster. For a lab sample, fill the lab's bottle to the line straight from the syringe, cap it, and wipe it clean. Rinse your tools in distilled water afterwards so you don't contaminate the next test.
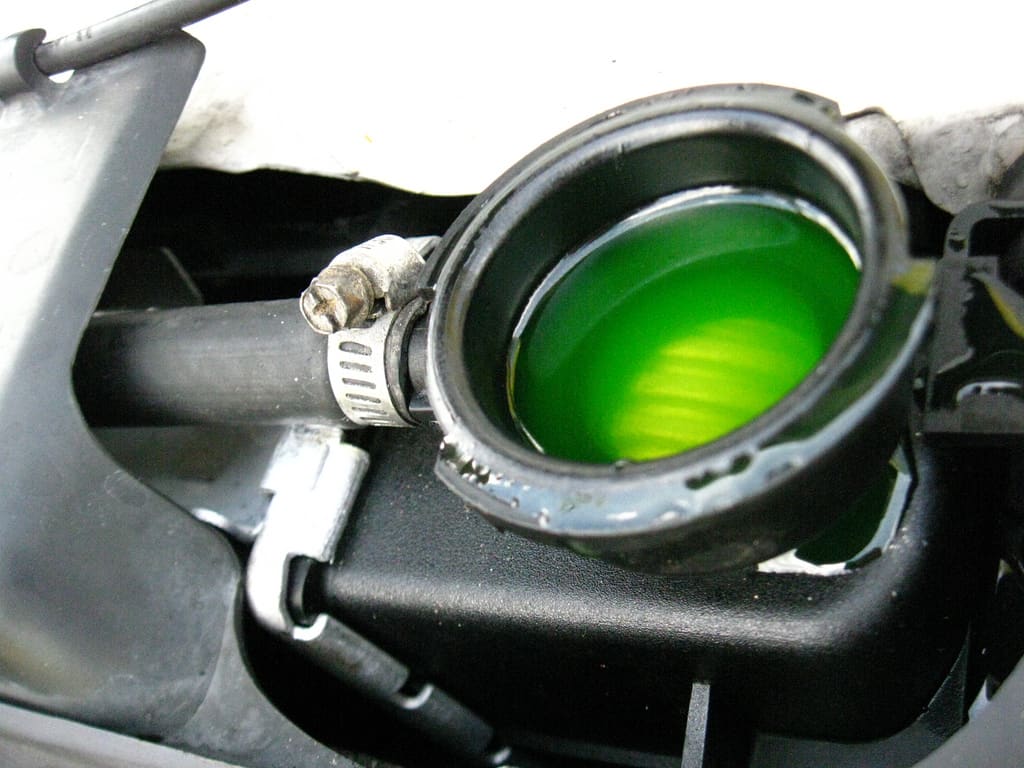
Draw the sample at the filler neck or pressure cap of a cold engine, not from the overflow bottle. Shown on a car; on a boat the cap is usually on the heat exchanger or coolant tank. Photo: EvelynGiggles / Wikimedia Commons · CC BY 2.0 Pour a little sample into a clear cup and hold it up to light.
- Clear, any color: good start, but keep testing.
- Rusty or muddy: corrosion or sediment inside; plan a flush and change.
- Oily film, sludge or a "chocolate milk" look: possible oil getting in; stop and get a pro (see the closed cooling coolant guide).
- A smell of fuel or exhaust: also a reason for a mechanic.
BoatUS explains the ball tester: squeeze the bulb, draw coolant into the tube, tap off any air bubbles, and count how many balls float; the chart on the tester converts that to protection. A hydrometer works the same way with a float or needle. These are fine for a quick check but tell you nothing about the additives. Practical Sailor adds two cautions: check a hydrometer first in plain water (if it doesn't read correctly, replace it), and know that oil floating in the sample or dirt settling in it will throw the reading off.
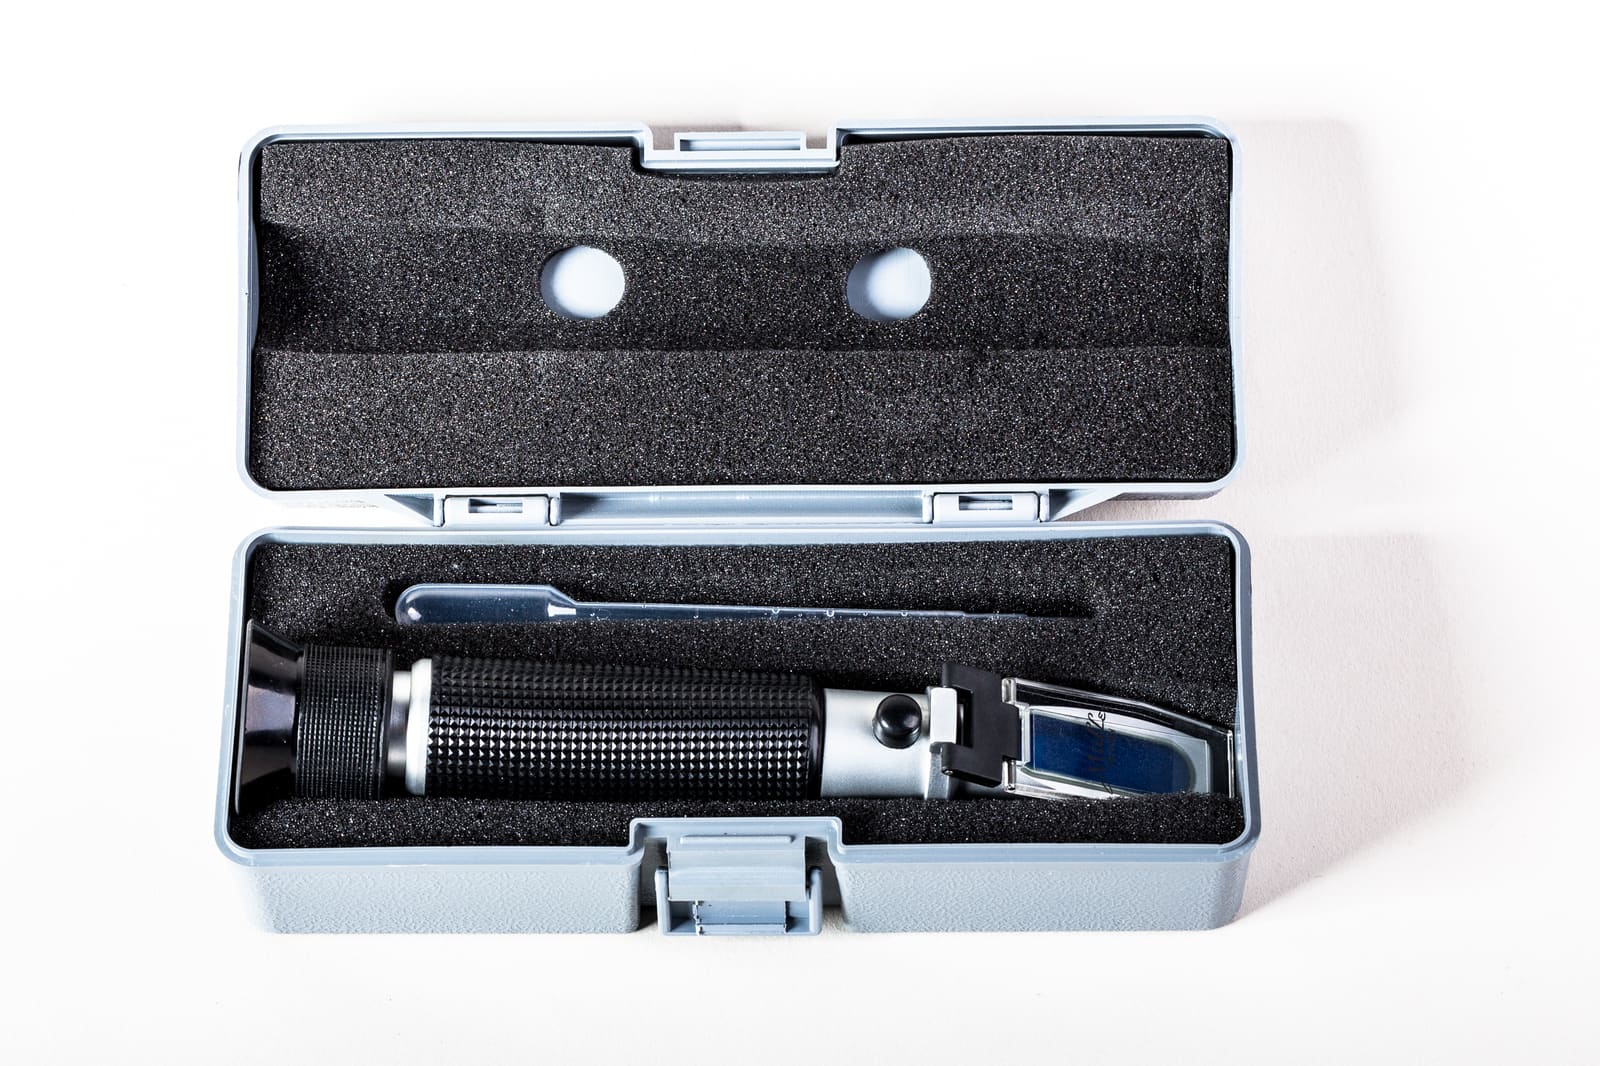
Put two or three drops on the prism, close the cover, point it at a bright light and read where the light and dark areas meet on the scale. BoatUS notes refractometers need no batteries and many have extra scales for other fluids. Read the scale that matches your coolant type. Most engines want about a 50/50 mix (typical; confirm in your manual). Wipe the prism clean with distilled water afterwards. Practical Sailor notes that many pocket refractometers have a small calibration screw; checking that distilled water reads zero now and then keeps the tool honest.
Use strips made for your coolant type and within their date. Dip as the package says, wait the stated time, and compare colors in good light. BoatUS says strips show concentration plus pH and alkalinity. Write the readings down; a reading that drifts toward the "change" zone over a couple of years is as useful as a single result.
- Freeze protection or glycol too low: usually water has been added over time. If additives still read good, your manual may allow adjusting with concentrate; if additives are also low, change the coolant.
- Glycol too high: BoatUS explains too much antifreeze cools worse, and very strong mixes can gel. Partly drain and refill with the correct premix, or change it.
- pH or additives in the warning zone: the protection is wearing out. Plan a full change soon (see the closed cooling coolant guide).
- Everything good: log it and test again next season.
Mail-in labs go further than strips. Blackstone, for example, says it checks coolant for pH, freeze point, specific gravity, nitrites and hydrocarbons (oil or fuel contamination), and accepts coolant in its normal sample kit. Caterpillar's S·O·S program tests oil, coolant and fuel, says its labs handle equipment from a variety of manufacturers, marine included. Check with the lab how to order a kit and where to send it. Fill in the form completely: engine make and model, hours, coolant type, when it was last changed, and why you're sampling.
- pH and nitrites (or other additive levels): whether the coolant still protects the metal.
- Freeze point and specific gravity: the mix strength, like your refractometer.
- Hydrocarbons: oil or fuel in the coolant, which points to a leak between systems. Take that to a mechanic right away; common suspects include an oil cooler or head gasket.
- Other items some labs report, such as dissolved solids or corrosion products. Ask the lab what a high number means for your engine.
As with oil analysis, the trend over several samples matters more than one number. Sample at the same point and the same time of year each time.
Change it when your manual's interval comes up, or sooner if testing shows worn-out additives, low pH, the wrong mix that you can't correct, rust or contamination. Typical intervals (confirm in your manual): BoatUS gives about 5 years or 1,000 hours for modern extended-life coolants and about 2 years for older-style coolants, and Northern Lights tells its generator owners to replace the coolant every 2 years. Practical Sailor says change intervals for heavy-duty coolants run from about five years to thousands of hours, the high figures being for land-based engines, and suggests the more conservative 1,000-hour figure for marine engines. The change itself is in the closed cooling coolant guide.
No need to swap it for "winter antifreeze." Practical Sailor points out that if the test shows the glycol content is right, the coolant in a closed system stays in over winter; it already protects against freezing. The pink propylene-glycol antifreeze sold for winterizing water systems is not an engine coolant and doesn't belong in the closed side of the engine.
Westerbeke says a good-quality antifreeze mixed 50/50 with distilled water doesn't need an extra coolant additive, because the antifreeze already contains what's needed to prevent pitting. Some heavy-duty diesels do call for a supplemental additive and specific strips to measure it; add one only if your engine manual says so. Never mix coolant types to "freshen up" old coolant.
Top up what you removed with the correct premix, refit the pressure cap firmly, and wipe up drips. Record the date, engine hours, readings and any lab report in BoatMend so you can see the trend next year.
Common mistakes
- Judging coolant by its color.
- Sampling a warm engine, or sampling the overflow bottle instead of the system.
- Using strips made for a different coolant type, or old strips left open in a damp locker.
- Reading the wrong refractometer scale.
- Topping up with tap water or straight concentrate after every test, so the mix slowly drifts.
- Ignoring a lab note about oil or fuel in the coolant.
- Testing once and never again; the value is in the trend.
When to call a pro
- Oil, fuel or sludge in the coolant, or milky oil on the dipstick
- Coolant level that keeps dropping with no visible leak, or white exhaust smoke
- A lab report flagging contamination or rapid additive loss
- The engine overheats after a coolant change
- You can't find all the drain points to do the change the test calls for
Tips
- Keep a small sealed testing kit (strips, syringe, gloves) aboard with your spares.
- Label the fill cap with the coolant type and the date and hours of the last change.
- Sample the generator too; it often gets forgotten and runs long hours.
- If you already send oil to a lab, ask whether it can test coolant from the same engine.
Official references
We read these to write this guide. Your engine's own manual always wins.
- BoatUS – The Chemistry Of Boat Engine Coolant
- Caterpillar – S·O·S Fluid Analysis Services
- Blackstone Laboratories – Fuel and Coolant Testing
- Westerbeke – Maintenance and Use FAQs (antifreeze)
- Southern Boating – Top Ten Generator Tips
- Practical Sailor – Engine Coolant Replacement
- Practical Sailor – Finding the Right Mix of Antifreeze
- Northern Lights – Top 10 Generator Maintenance Tips & Tricks
Safety: BoatMend is for information only and does not replace a certified marine technician. You are responsible for your safety and your boat. Read the full disclaimer.
Last updated 2026-10-26
Related guides
How to Check and Change Coolant in a Closed Cooling System
Check, test and change the coolant in a freshwater-cooled (closed cooling) inboard, sterndrive or diesel, and learn the heat exchanger basics that keep it working. Old coolant quietly eats hoses, pumps and engine passages, and many boats go a decade without a change.
Engine and Gearbox Oil Analysis: How to Take a Clean Sample and Read the Report
A lab oil analysis is like a blood test for your engine, transmission or lower unit. Learn how to pull a clean sample, what the lab measures, what wear metals, coolant, sea water and fuel in the oil can mean, and why the trend over several samples matters more than any one number.
Engine Overheating - Troubleshooting Guide
Work through the most likely causes of a hot engine or overheat alarm, from a blocked water intake to a worn impeller or stuck thermostat. Acting fast and in the right order can save your engine and often gets you home without a tow.
How to Test and Replace the Engine Thermostat
Find, test and replace the thermostat that controls your engine's operating temperature. A stuck thermostat can make an engine overheat or run too cold. On most outboards and many sterndrives it is a one-hour job with basic tools.
Diesel Heat Exchanger Service: Zincs, End Caps, Tube Cleaning and Pressure Testing
Your diesel's heat exchanger moves engine heat into the seawater, and it slowly fills with scale, broken zinc pencils and impeller pieces. Learn how to check the zincs, open the end caps, clean the tubes safely, and when to have the core removed, descaled and pressure-tested by a shop.
Marine Generator Routine Maintenance and CO Safety
Keep an Onan, Kohler/Rehlko, Northern Lights, Westerbeke or similar marine generator reliable with regular checks of oil, raw-water cooling, fuel, exhaust and the start battery, plus a monthly run under load. Generator exhaust is a leading source of carbon monoxide on boats, so safety checks come first.

How to Keep a Boat Maintenance Log and Organize Your Receipts
Set up a simple maintenance log that records the date, engine hours, work done, parts and who did it, and keep receipts and photos organized. Good records help with warranty and insurance claims, show buyers the boat was cared for and reveal wear patterns before something fails.