Watermaker Care: Pre-Filters, Flushing, Pickling and Production Checks
Keep a reverse osmosis watermaker making good water for years by changing pre-filters on time, flushing or pickling the membrane whenever it sits, staying out of dirty harbor water and checking every batch with a TDS meter before it goes in the tank.
Time
1 h
Shop would charge
$200-600
Applies to
All engines · Yacht, Sailboat, Cabin cruiser
Safety first: A watermaker runs at very high pressure and is plumbed to its own seacock. Shut the unit off and let the pressure drop before you open any housing or fitting, and close the intake seacock before you work on the low-pressure side. Never send water to your drinking tank until a test shows it is good. If a high-pressure hose bursts or water is coming in that you cannot stop, put on life jackets and call USCG on VHF 16 or 911, then Sea Tow or TowBoatUS.
Owners often ask
- Should I pickle my watermaker or just flush it with fresh water when the boat sits?
- What TDS reading is good enough to send watermaker water to my tank?
This guide walks you through it. Still stuck? Ask the AI Mechanic about your engine.
Tools
- Pocket TDS (total dissolved solids) meter
- Clean bucket or jug (for flushing or pickling, if your system uses one)
- Filter housing wrench
- Rubber gloves and safety glasses
- Flashlight or headlamp
- Notebook or log sheet
Parts & supplies
- Replacement pre-filter cartridges in the sizes your manual lists
- Spare charcoal (carbon) filter, if your fresh-water flush has one
- Storage or pickling compound approved by your watermaker's maker
- Cleaning chemicals approved by your watermaker's maker (only if the manual calls for a cleaning)
- O-ring lubricant approved for the filter housings
Before you start
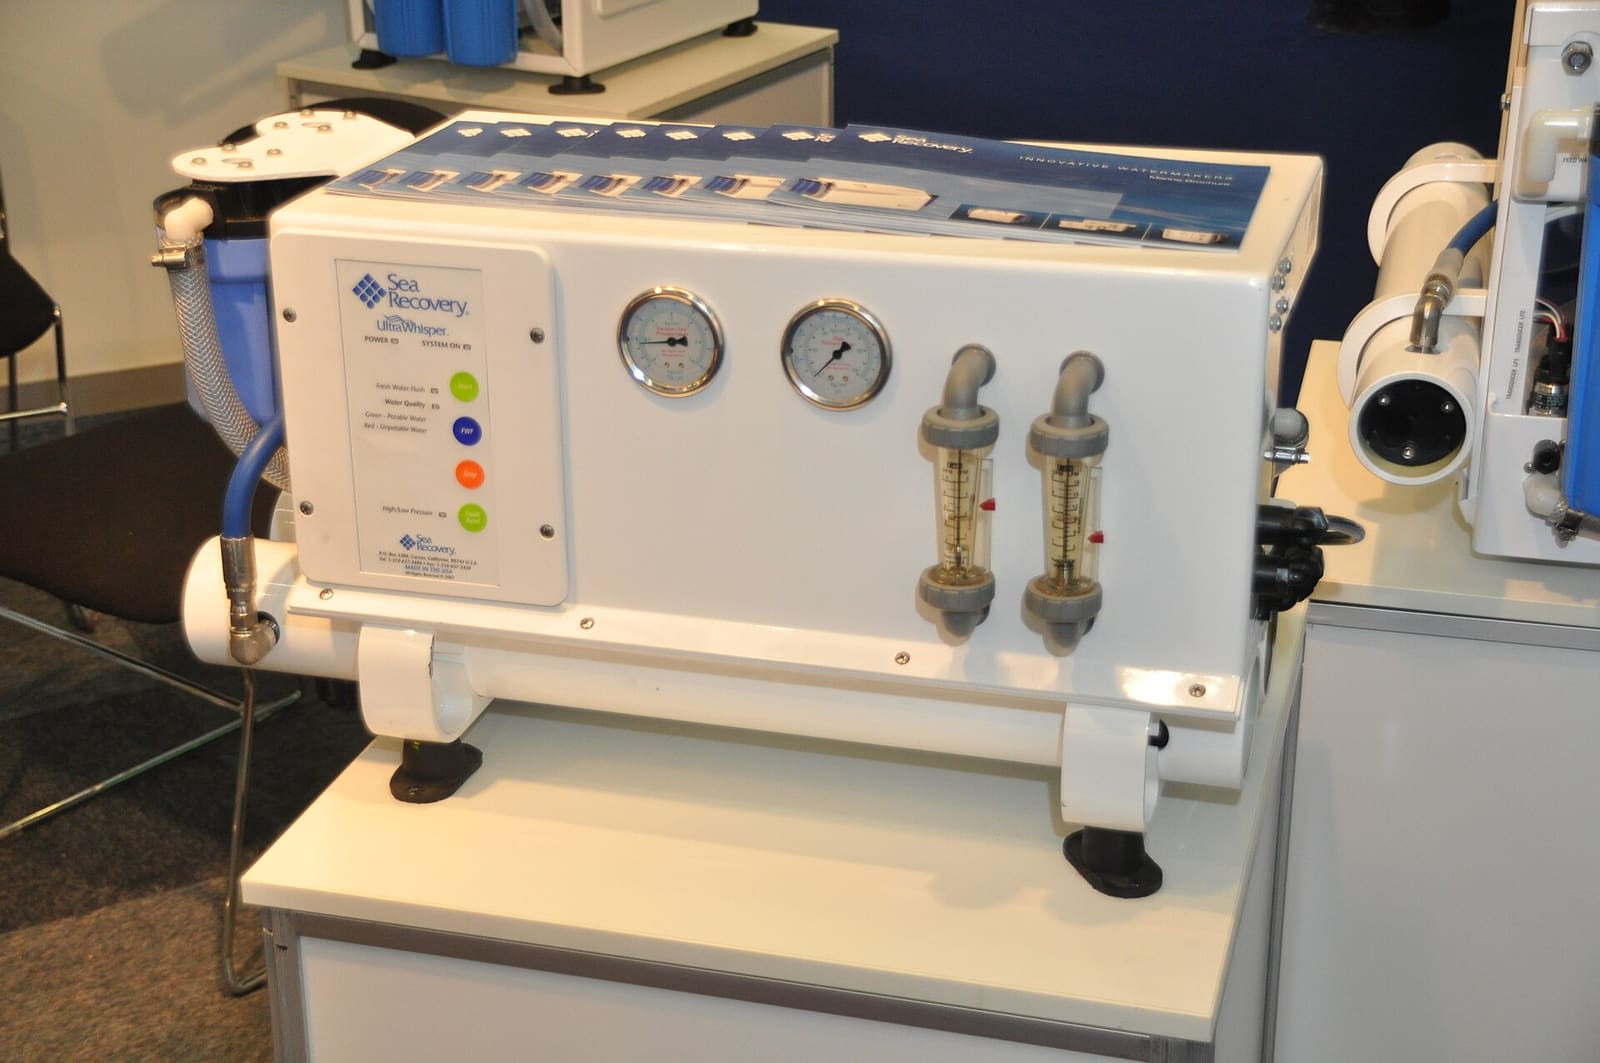
A reverse osmosis (RO) watermaker uses a low-pressure pump to push seawater through pre-filters, then a high-pressure pump to force it against a membrane. Southern Boating describes roughly 10 percent of the feed coming through as fresh "product" water; the rest carries the salt overboard as brine.
The membrane is the expensive heart of the system. Southern Boating puts the life of a well-kept membrane at around five years, and longer on boats that use theirs often and maintain it carefully. Most damage comes from three things: oil and fuel, chlorine, and letting the membrane sit with seawater in it.
Find your owner's manual before you begin. Every brand (Spectra, Village Marine, Katadyn, Schenker, Sea Recovery and others) has its own flush, storage and cleaning procedure, and many use parts that the wrong chemical will damage. This guide explains the routine; your manual has the exact steps and chemicals.
Practical Sailor sums up the big rule: the more you use a watermaker, the less maintenance it needs. A unit run almost every day needs little more than new pre-filters.
Steps
Run the watermaker offshore or in a clean anchorage where the water looks clear or blue. Do not run it in a marina, a crowded harbor, near a fuel dock, near a visible sheen or in muddy, stirred-up water. Southern Boating lists silty, oily or polluted harbor water as a "don't," and oil can ruin a membrane fast. A Sea Recovery manager quoted by Power & Motoryacht says you can make water in dirty, silty conditions if you must, but you will go through pre-filters much faster, so carry spares.
Open the intake seacock fully before starting, and make sure the brine overboard valve is open too. Clean the sea strainer at the intake if it has weed or shell in it. Southern Boating says most makers want a strainer there and that it should be cleaned as part of your regular routine.
Spectra adds that the watermaker should have its own through-hull (sharing one with other equipment can cause permanent damage), that the intake hoses should be checked regularly for vacuum leaks or signs the feed pump is sucking air, and that you should not run the unit in heavy weather if the intake could lift out of the water.
Start the unit the way your manual describes and let the pressure come up slowly. Note the feed pressure, the high pressure, the product flow and the run time in a log. Practical Sailor recommends at least simple gauges and flow meters you can see. A steady log lets you spot trouble early: falling feed pressure points to clogged pre-filters, and falling product flow at normal pressure can point to a fouled membrane or cold water.
Before the product water goes to your tank, divert it to a sink or a glass and test it. Many units have a salinity probe that dumps bad water overboard automatically, but a hand-held TDS meter is a cheap second check.
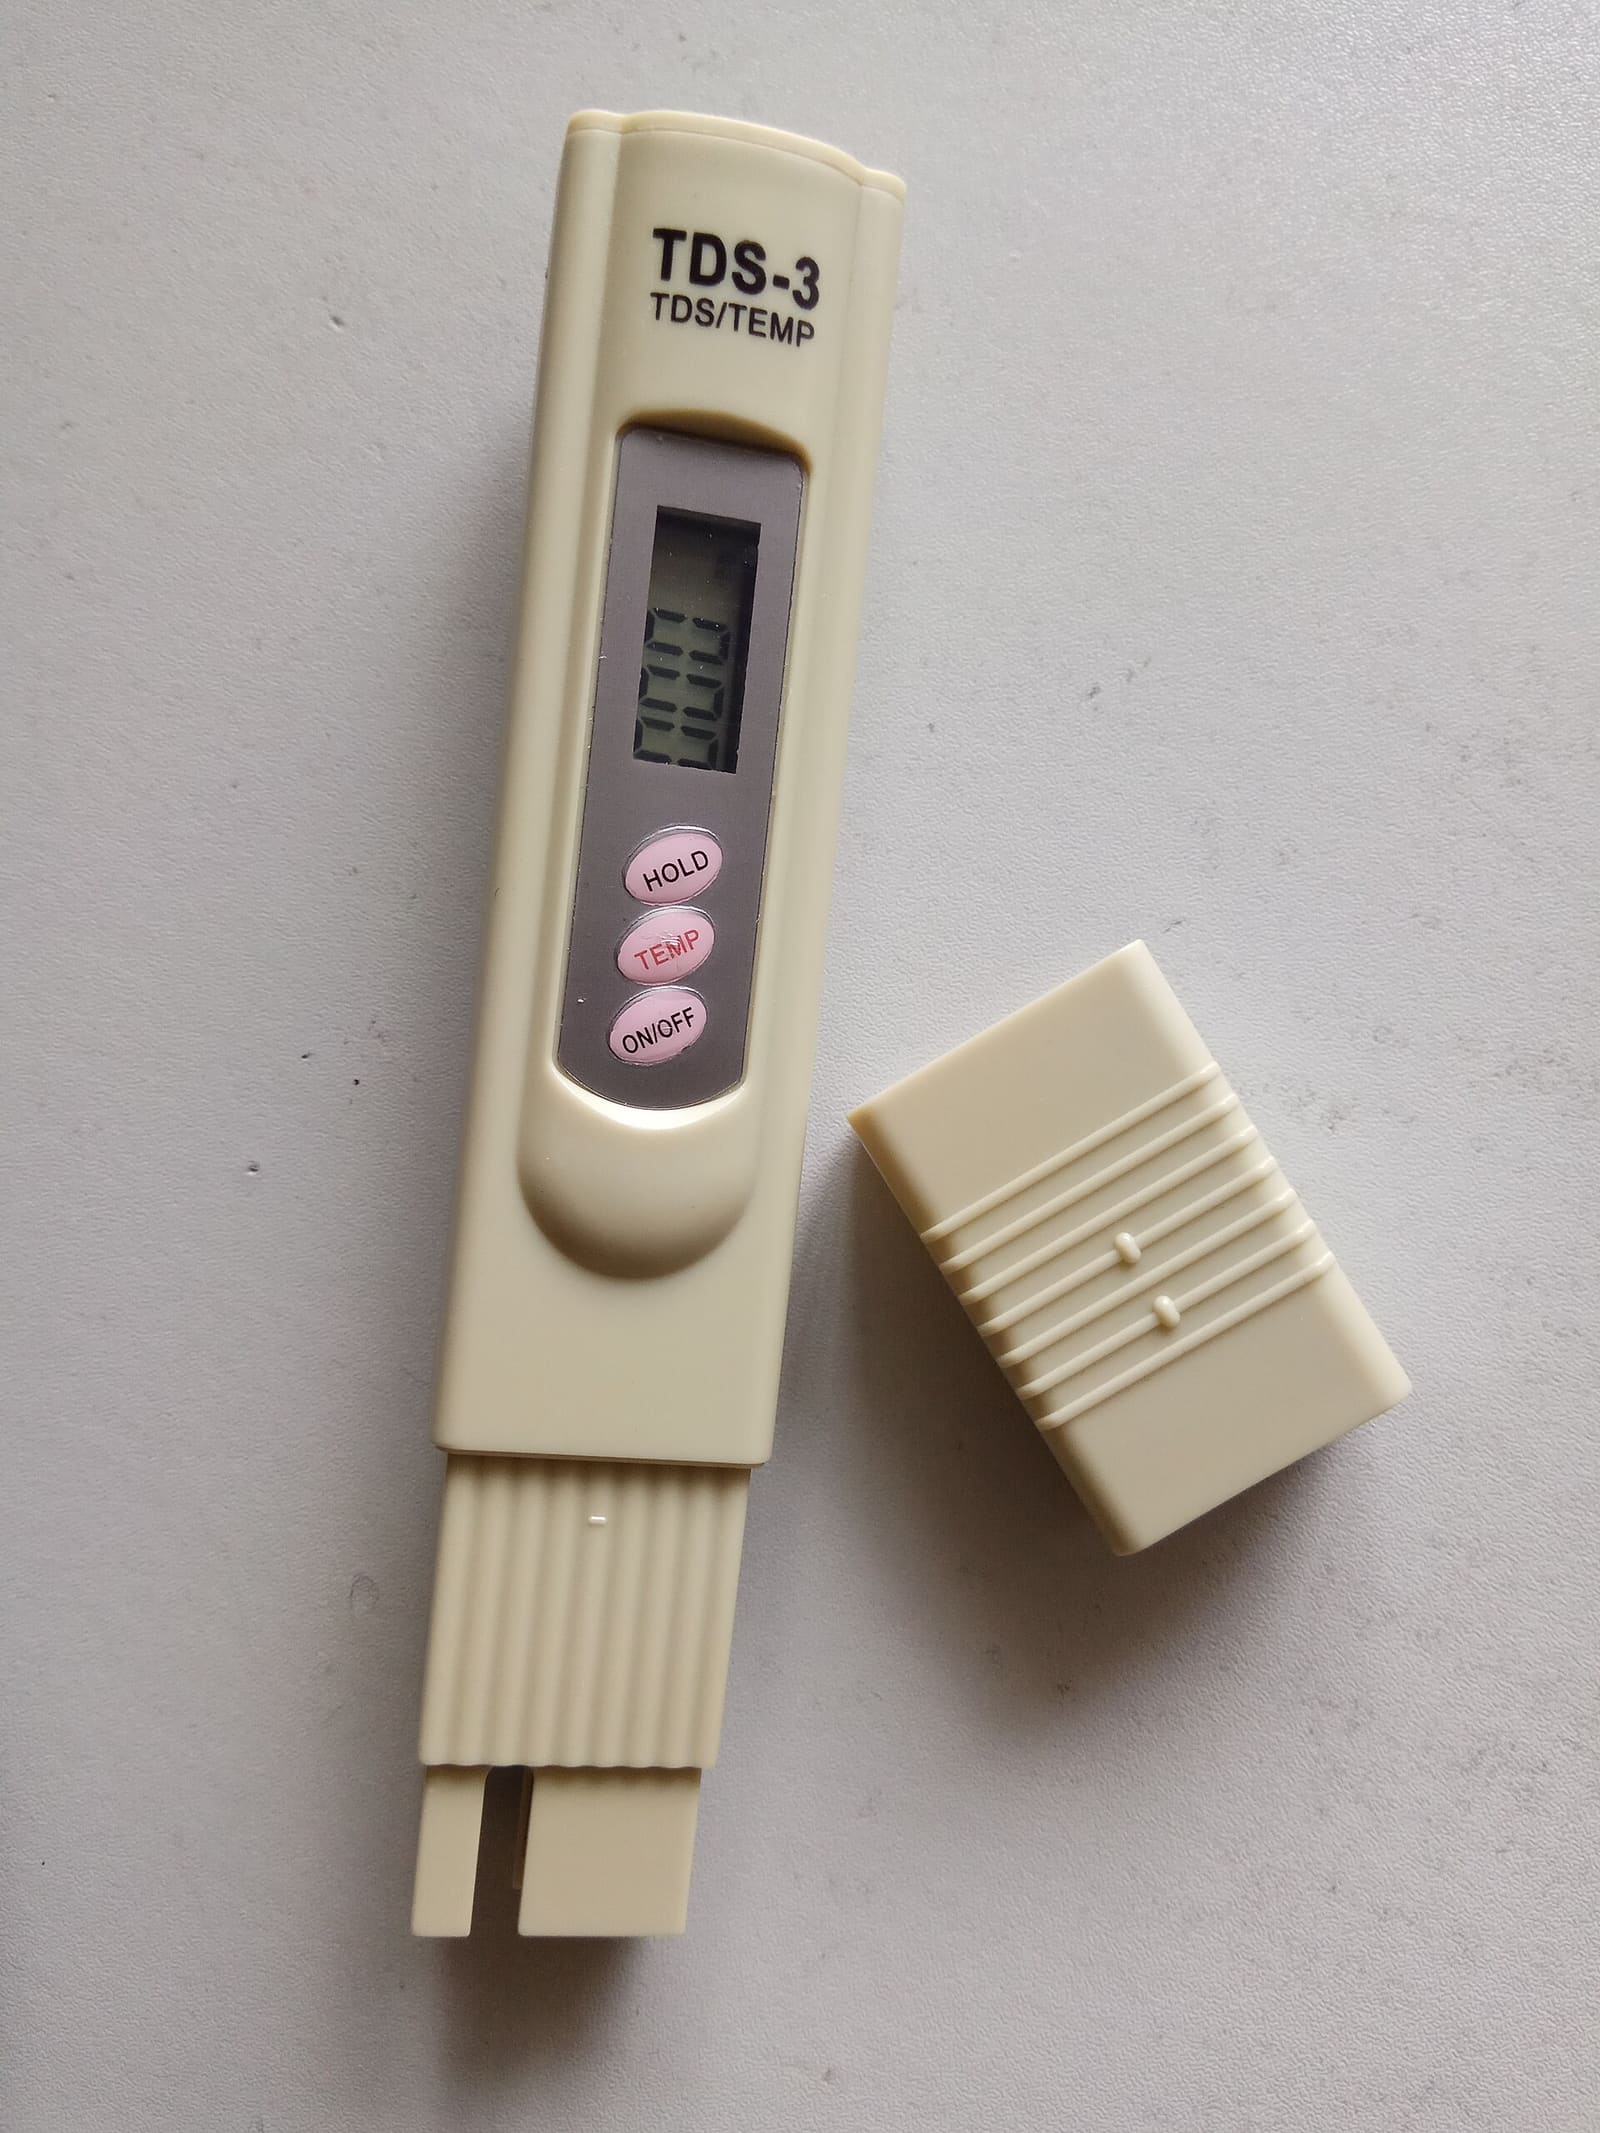
Photo: Dqwyy / Wikimedia Commons · CC0 1.0 For reference, the US EPA's non-enforceable secondary standard for total dissolved solids in drinking water is 500 mg/L (roughly 500 ppm on most meters); above that, water can taste salty. Your manual will give a target for your unit. Two habits help: give the system time after start-up before you judge it (the first water is often saltier), and check your meter against a known sample now and then, since cheap meters vary.
Most systems use two pre-filters, often a coarser one followed by a 5-micron one. Southern Boating notes that as they clog, feed pressure and output drop. Power & Motoryacht reports Sea Recovery's guidance to replace pre-filter elements and oil-water separators when system pressure falls below 10 psi on their AquaMatic units; your maker's number may differ. To change them:
- Shut the unit off and close the intake seacock.
- Open the housing, remove the old cartridge and wipe out the bowl.
- Check the housing O-ring, lightly lubricate it with an approved product, and fit the new cartridge.
- Open the seacock and check for leaks on the next start.
Do not wash and reuse pre-filter cartridges. Spectra explains that washing opens up the filter's pores, which then lets larger particles through to the pumps, valves and membrane. Use the filter grade your maker specifies. The Sea Recovery manager in Power & Motoryacht says their recommended commercial pre-filters last about five times longer than standard ones.
When you are done making water, flush the system with fresh water so seawater does not sit in the membrane and pumps. Many units have a manual or automatic flush that pulls water from your tank. Southern Boating's key warning: the flush water must be free of chlorine, which can quickly ruin a membrane. Use water the watermaker made whenever you can. If your tanks hold dock water, the flush line usually needs a charcoal filter to strip the chlorine; replace that filter on your maker's schedule.
Do not add bleach or tank treatments to a tank that feeds the watermaker's flush, and never pickle or clean with a chemical your maker does not approve. If you shock the water tanks (see water tank cleaning), isolate the flush line until the tank is fully rinsed and the chlorine is gone.
A membrane left with stagnant water in it can grow bacteria. Practical Sailor says a watermaker that is not used regularly must either be flushed with fresh water about every five days or pickled. Some units have an automatic mode that does this; Practical Sailor notes that relying on it means leaving the battery system on around the clock with shore power or solar to keep up, and that any electronic system can fail. If you rely on auto-flush, make sure the tank will not run dry while you are away.
For a longer layup, use the storage (pickling) compound your maker sells or approves and follow the manual exactly. The basic idea is to flush the system with fresh water, then circulate the storage solution through the membrane and leave it filled. Practical Sailor says pickling must be repeated about every six months while the unit stays unused, and that each chemical pickling shortens membrane life a bit, which is why owners who are on the boat often prefer regular flushing.
Chemical compatibility really matters here. Spectra, for example, says that because of the plastics in its units, owners should use only its own storage chemical or a good propylene glycol with no ethyl alcohol added; a common storage chemical from other makers (sodium metabisulfite) will permanently damage its membrane end plugs and pump. Spectra also says never to put chemicals through the system while it is pressurized (open the pressure relief valve as the manual shows). Other brands use different chemicals, so always check yours.
Practical Sailor points out that you cannot store a watermaker on fresh-water flushes alone where it may freeze. In cold climates, follow your manual's winterizing steps; some makers want the membrane removed and stored indoors. Never let a membrane dry out either, since Southern Boating warns that drying drastically shortens its life.
After pickling, follow the manual's start-up steps: flush the storage chemical out (usually by running with the product going overboard for a set time), check for leaks and pressure, and test the water before you send any to the tank.
Cleaning is not routine. Consider it when product flow has dropped and TDS has risen even though the pre-filters are new, the water temperature is normal and the pressure is right. Use only the cleaning chemicals your maker lists, in the order they give. If one cleaning does not bring the numbers back, the membrane may be at the end of its life.
Do not assume the membrane is always to blame. Spectra says that on its units, poor water quality or low output as the system ages usually comes from a worn feed pump head or a high-pressure pump due for a rebuild, not the membrane. Its manuals include technical bulletins with tests to find the cause, which is one more reason to keep a log.
Southern Boating notes that some high-pressure pumps need oil changes and seal replacement at set hours, while others can go thousands of hours or need no oil at all. Check your manual and log the hours. Look for drips around the pump and hoses every time you run it, and keep the unit and its surroundings dry. Southern Boating recommends soap and water or a mild glass cleaner on the outside, not harsh chemicals.
Common mistakes
- Making water in the marina or next to the fuel dock and getting oil into the membrane.
- Flushing with chlorinated dock water and no charcoal filter.
- Leaving the boat for a few weeks with seawater sitting in the membrane.
- Using a generic pickling or cleaning chemical that attacks parts of the unit.
- Trusting a cheap TDS meter that has never been checked, or testing right after start-up.
- Running the pump against a closed seacock or a clogged strainer.
- Letting the auto-flush drain the water tank dry while the boat sits.
- Rinsing out and reusing pre-filter cartridges to save money.
When to call a pro
- Product water stays salty or flow stays low after new pre-filters and a proper cleaning
- A high-pressure hose, fitting or pump is leaking, or the pressure will not build
- The unit trips its breaker, smells hot or shows error codes you cannot clear
- You need the membrane replaced, the unit winterized for freezing weather, or a new install (it needs its own seacock, brine overboard and a dedicated electrical circuit)
- You are not sure the water is safe to drink; a dealer can test it properly
Tips
- Keep a short laminated card next to the unit with your start, flush and shutdown steps so guests do not guess.
- Carry at least one full set of spare pre-filters and a spare charcoal filter offshore. Spectra's suggested spares also include a spare feed pump head and a seal and O-ring kit; your manual lists the parts for your unit.
- Plumb a test tap or sink diverter if you do not have one, so you can check water before it reaches the tank.
- Run the watermaker regularly while you cruise rather than in long, rare sessions; it is easier on the membrane.
- Write the date on each filter housing when you change the cartridge.
Official references
We read these to write this guide. Your engine's own manual always wins.
- Practical Sailor – Installing and Maintaining a Watermaker
- Southern Boating – Watermaker Maintenance
- Power & Motoryacht – Caring for Sea Recovery AquaMatic Watermakers
- Spectra Watermakers – Frequently Asked Questions (care and maintenance)
- US EPA – Secondary Drinking Water Standards (total dissolved solids)
Safety: BoatMend is for information only and does not replace a certified marine technician. You are responsible for your safety and your boat. Read the full disclaimer.
Last updated 2026-10-25
Related guides
How to Inspect and Clean a Raw-Water (Sea) Strainer
The sea strainer is the cheap screen that keeps weeds, shells and plastic out of your engine, generator and A/C pumps. Learn how to clean it safely with the seacock closed, reseal the lid so it can't suck air, spot a cracked bowl before it floods the boat, and winterize it.
How to Inspect and Exercise Seacocks, Through-Hulls and Hose Clamps
Check every hole in your hull below the waterline, work each seacock open and closed, and inspect the hoses and clamps attached to them. A single failed fitting or hose is one of the most common reasons boats sink at the dock.
How to Clean and Sanitize Your Boat's Freshwater Tank and Lines
Get rid of slime, stale taste and smells in your boat's drinking water system. Scrub the tank through the inspection port if you can, sanitize the tank and every line with the right dose of plain bleach, then flush until the water tastes clean again.
Freshwater Pump Troubleshooting: Cycling, Won't Shut Off or No Water
When the pressure water pump keeps cycling at night, runs nonstop or sputters air, the cause is usually simple: an empty tank, a dripping fixture, a clogged strainer, air in the lines or a tired accumulator. Work from the cheapest checks to the pressure switch and pump, and learn the basics of replacing a pump.

How to Winterize (and Recommission) Your Boat's Freshwater System
Protect the tank, pump, water heater, faucets and showers from freeze damage with non-toxic antifreeze, then flush and sanitize everything in the spring so the water is clean again. A cracked pump or split fitting is a common, avoidable winter repair bill.
Winter Layup Master Checklist (Step-by-Step, With Links to Each Job)
One ordered checklist for putting any boat away for winter, from booking storage and treating the fuel to winterizing the engine, water systems, head and batteries, then blocking, covering and securing the boat. Each step links to the detailed BoatMend guide for that job.