Shore Power Cord Ends: How to Judge a Cord, and When to Replace the Plug or the Whole Cord
Burned blades, a hot plug or a cracked locking ring don't always mean a brand-new cord, but sometimes they do. Learn how to inspect a shore power cord and its ends, decide between a replacement end and a new cord, what a proper sealed marine connector looks like, which parts of the job are safe for an owner and when the work belongs to an ABYC-certified electrician, plus the habits that make cord ends last.
Time
1 h
Shop would charge
$100-600
Applies to
All engines
Safety first: Shore power is 120 or 240 volts AC, enough to kill, and a damaged cord near water can also put current into the water around the dock. Never inspect, clean or touch a cord end that is plugged in at either end. Turn the boat's main breaker off, then the pedestal breaker, then unplug the dock end first. If a cord or plug has fallen in the water, don't reach for it: switch off the pedestal breaker first. If you see smoke, flames or melted plastic, keep people away, turn power off at the pedestal if you can do so safely, and call 911; for an emergency afloat, call the Coast Guard on VHF 16. Never swim near boats or docks with shore power. Anything behind the boat's inlet, and any job you're not certain of, belongs to an ABYC-certified marine electrician.
Fuel smell, water coming in, CO alarm or smoke? Stop, get everyone in life jackets and call USCG on VHF 16 or 911. For a tow: Sea Tow or TowBoatUS.
Owners often ask
- The plug on my shore power cord is burned. Can I just replace the end or do I need a new cord?
- Why did my shore power plug burn when the breaker never tripped?
This guide walks you through it. Still stuck? Ask the AI Mechanic about your engine.
Tools
- Flashlight or headlamp and a magnifier
- Clean dry rag
- Digital multimeter with a continuity (beep) setting
- Soft brush and a small amount of fresh water for salt deposits (cord unplugged at both ends)
- Phone camera
Parts & supplies
- Replacement locking ring or weather boot that fits your connector, if only that part is damaged
- Listed marine replacement plug or connector of the same amp rating and configuration, only if you decide to re-end the cord
- New marine shore power cordset of the right rating and length, if the cord fails inspection
- Dust caps for the cord ends
Before you start
Why cord ends fail: Captain Frank Lanier, a marine surveyor writing in Practical Sailor, says overheating and corrosion are the main causes of shore cord problems. Loose or corroded connections create resistance, resistance makes heat, and the heat makes the connection worse until the plug chars. It's most common on boats that run big loads for hours, like water heaters and air conditioning. Plugging and unplugging under load adds arcing damage to the blades, as BoatUS explains.
Why the breaker didn't trip: Steve D'Antonio, writing in Cruising World, points out that breakers protect against overloads and short circuits, not against a high-resistance connection. A loose or corroded plug can cook itself while drawing a perfectly normal current, so the breaker never notices. He also names a common cause: a plug pushed into a twist-lock outlet without the final twist, which leaves the blades barely touching. Your eyes and hands are the only protection against this kind of failure.
What this guide covers: how to judge a cord and its two ends, and how to decide what to replace. Our shore power safety guide covers the plug-in routine and electric shock drowning; shore power inlet upgrade covers the boat's inlet and newer connector systems; ELCI retrofit covers whole-boat shock protection.
Know your cord: most US boats use either a 30-amp, 125-volt cord (three conductors) or a 50-amp cord (four conductors, 125/250 volts). The dock end is a plug that twists into the pedestal; the boat end is a connector that plugs into the boat's inlet. Both use a locking twist-in design and a threaded locking ring that seals the joint. The number and shape of the blades tell you which type you have; the rating is printed on the plug body. Some boats use a less common 50-amp, 125-volt three-conductor cord instead; it looks similar but is not interchangeable with the four-conductor 50-amp type, so always read the rating on the old plug before buying a replacement.
Steps
Main breaker on the boat off, pedestal breaker off, then unplug the dock end first and the boat end second. Practical Sailor's surveyor also says to make sure a generator or inverter can't feed the boat's AC panel while you work. Lay the cord out straight on a dry dock or deck.
With a dry rag, feel the cord from end to end. Cuts, cracks, flattened or crushed spots, tape repairs, splices or stiff, discolored sections mean the cord is done, whatever the ends look like. Practical Sailor says to always replace cords with chafe, cracks, split insulation or tape repairs. A cord that has been run over, pinched in a hatch or chewed by chafe isn't worth re-ending.
Under a good light, look at the blades, the pins and the plastic face around them:
- Good: bright metal blades, clean light-colored plastic, no gaps or cracks.
- Warning: brown or black around one blade, blue or rainbow-colored metal, pitted or green-crusted blades, softened or blistered plastic.
- Replace now: melted plastic, a blade that's loose or sunk into the face, a burned hole.
BoatUS has long advised replacing a cord at the first sign of wear on the cord or pitting on the plug blades, and its fire-claim files show most AC electrical fires start somewhere between the marina pedestal and the boat's inlet.
The locking ring holds the connector in the inlet and keeps water out. Look for cracks, broken threads or a ring that won't spin. Check the rubber boot or sealing flange around the plug body, and the point where the cord enters the plug: the jacket should be gripped firmly, with no copper or inner insulation showing. Practical Sailor says industry standards call for shore cords with molded-on plugs that have sealing flanges or proper weatherproof boots.
Practical Sailor's surveyor points out that by the time discoloration shows on the face of a plug or inlet, the damage behind it is usually greater. Heat travels back along the copper and bakes the insulation inside the plug body, where you can't see it.
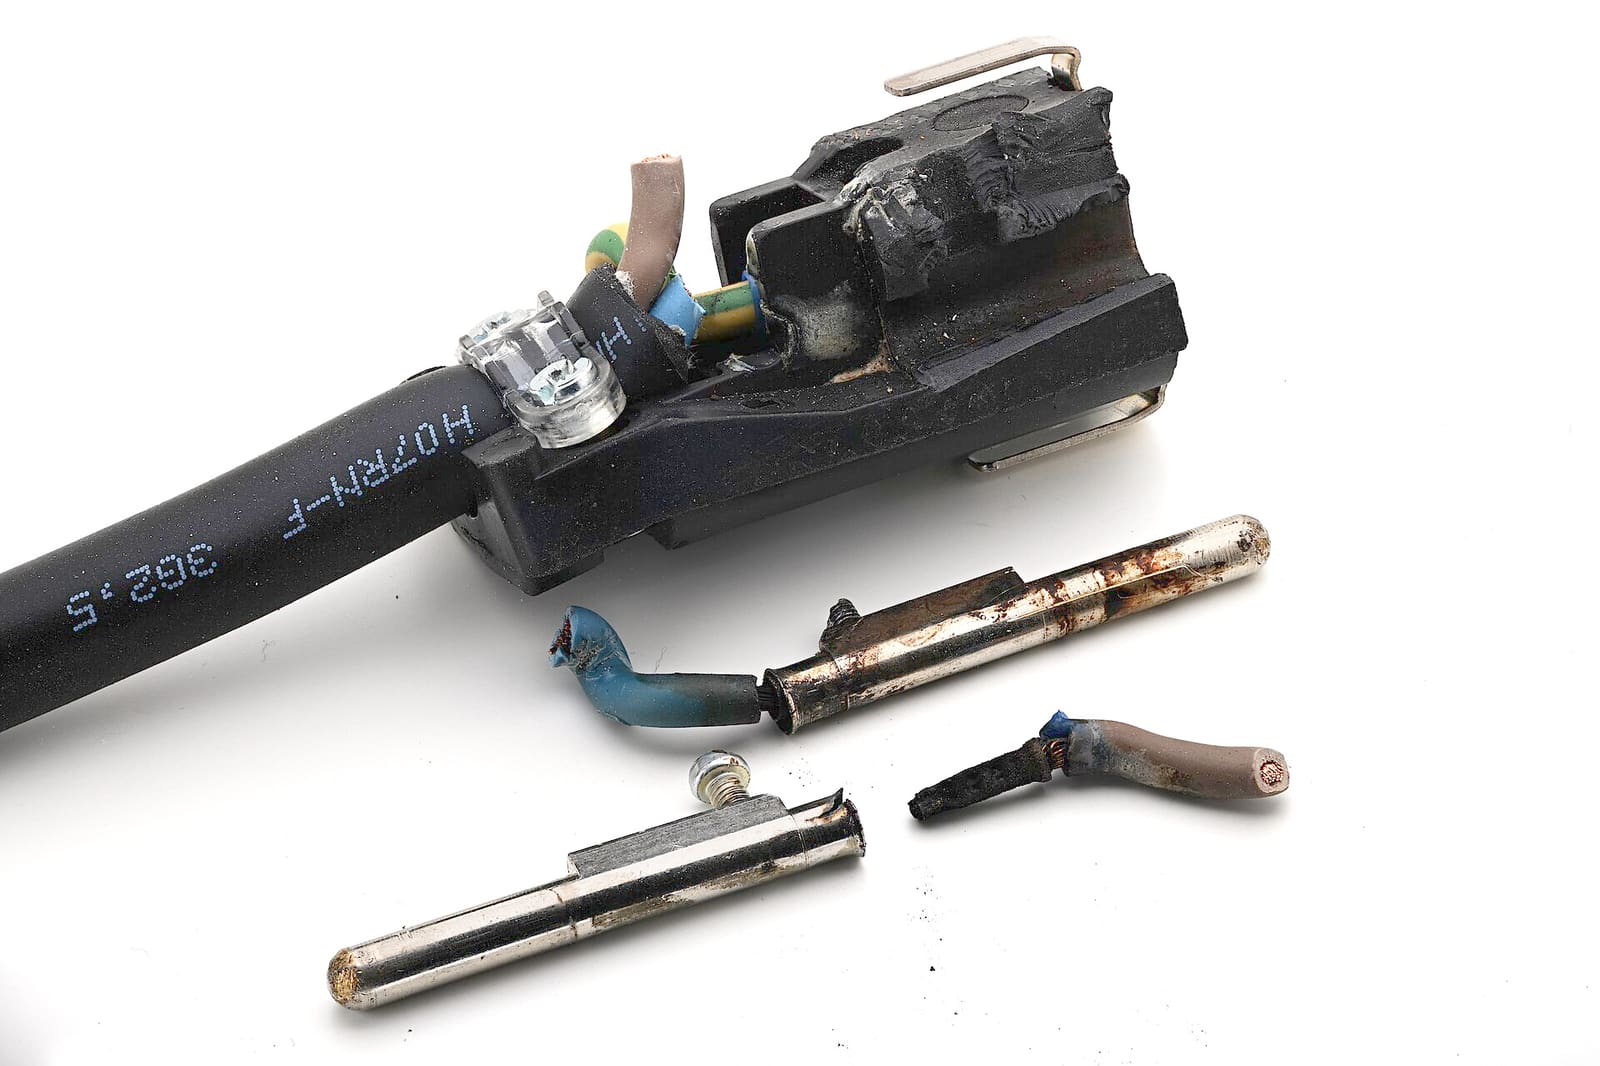
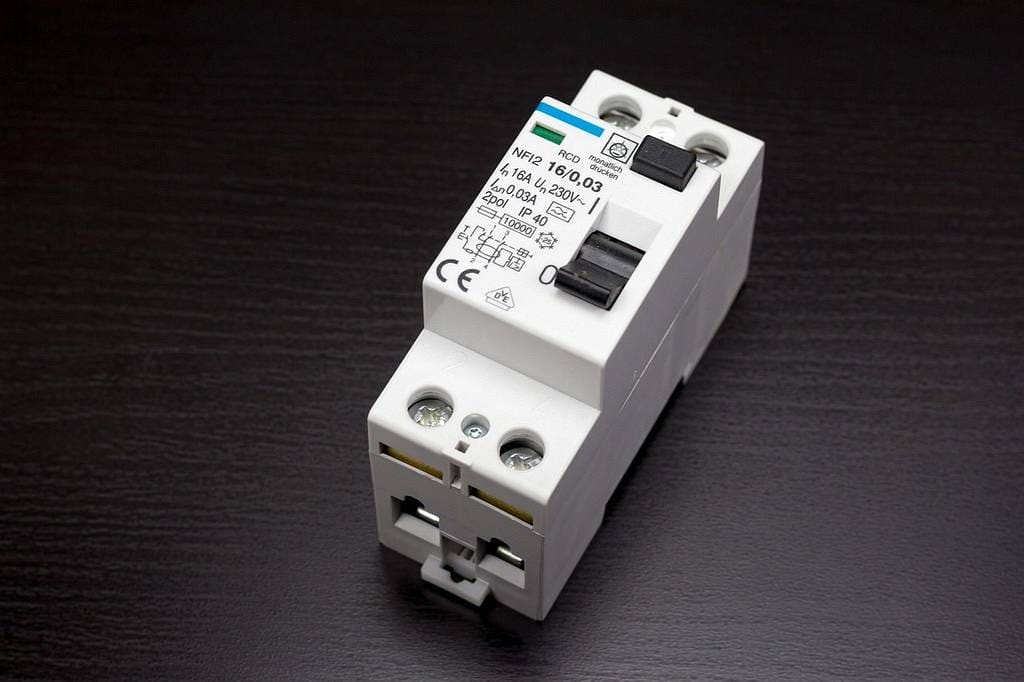
A household plug, not a marine one, but the same failure: a small brown mark on the outside can hide charring and baked wire inside. Photo: Phiarc / Wikimedia Commons · CC BY-SA 4.0 So a darkened blade isn't a cleaning job. Treat it as a heat-damaged end and decide in Step 7 what to replace.
Once the cord passes a visual check and is back in use, run your normal loads for an hour or so, then carefully feel each end and the boat inlet with the back of your hand (don't unplug anything under load). Warm can be normal; hot is not. If one end is noticeably hotter than the other, that end, or what it plugs into, has a poor connection. See the heat check in the inlet upgrade guide.
Replace the whole cord if any of these apply:
- The jacket has damage anywhere along its length (Step 2).
- Both ends show heat damage.
- The cord is old and stiff, or the jacket near the damaged end is hard, discolored or cracked.
- The cord or plug has been submerged in salt water for any length of time.
- You don't know the cord's history (a used boat's cord, a dock find).
A replacement end may be reasonable when the cord is in good condition, only one end is damaged, and the damage is limited to the plug itself. BoatUS has noted that some upgraded connector systems are sold so you can refit your existing cord with a new end. Even then, the wire behind a burned end must be cut back until the copper is bright and the insulation is soft and undamaged; if you can't get there and still have enough length, buy a new cord.
Whichever you choose, check what it plugs into. Practical Sailor warns that many owners replace a charred plug or cord only to burn the new one, because the boat's inlet or the dock receptacle was also damaged. A burned boat-end connector means the boat's inlet needs inspection by an electrician; a burned dock-end plug means the marina needs to look at the pedestal outlet.
- Same rating and configuration: a 30-amp end for a 30-amp cord, a 50-amp end for a 50-amp cord, with the same blade layout. Never fit a smaller-rated end, and never fit a household plug.
- Marine and listed: buy a listed marine shore power plug or connector, with a sealing collar or weather boot and a locking ring. Practical Sailor notes the ABYC calls for locking, weatherproof, grounded connectors.
- Fits the cord: the cord grip must clamp the jacket of your cord size snugly.
- A sealed molded cordset is the simplest fix: a new factory cord with molded ends has no field connections to work loose. That's why a whole new cord is often the better buy when the price difference is small.
- Upgraded connector systems: some systems use larger contact areas and different locking designs and come with a matching boat inlet; see the inlet upgrade guide before mixing systems.
Fitting a field-replaceable end to a cord that is completely unplugged is a job some skilled owners do, following the connector maker's instructions exactly. But the consequences of a small mistake are serious: a swapped neutral and ground, a strand of copper touching the wrong terminal, or a screw left loose can energize metal on the boat, cause electric shock in the water or start a fire. Our advice:
- If you have never wired a 120-volt plug and tested it, have an ABYC-certified marine electrician do it.
- 50-amp (125/250-volt) ends, any work on the boat's inlet or the wiring behind it, and any pedestal work are electrician jobs. The marina owns the pedestal; report a damaged outlet rather than fixing it.
- If you do it yourself, follow the maker's strip lengths, terminal assignments and tightening instructions to the letter, and keep the instruction sheet with the cord.
With the cord unplugged at both ends, use the meter's continuity setting to check that each pin on one end connects only to its matching pin on the other end, and that no two conductors are connected to each other. Any doubt, any wrong result, or any wiring color you don't recognize: don't use the cord, and have an electrician test it. After it's back in use, watch the boat's AC panel for a reverse-polarity warning and do the heat check from Step 6.
A cracked or missing ring is one of the easiest fixes. Practical Sailor calls replacement rings an inexpensive part; they slip over the end with some effort, and warming the ring or using a little non-petroleum lubricant helps. Thread the ring fully home every time you plug in so the connector can't wiggle and the seal stays closed. If the threads on the boat's inlet are broken, that's an inlet repair.
- Turn power off at the pedestal before plugging or unplugging, every time.
- Support the cord so its weight doesn't hang on the boat end, and keep it off walkways and out of the water.
- Don't leave the cord plugged into the pedestal when the boat is away. Practical Sailor warns the loose end can fall into the water.
- If a plug does go in the water, switch the pedestal off before retrieving it, then rinse it with fresh water and dry it thoroughly (Practical Sailor's advice), and inspect it closely before reuse. Cruising World adds that a field-wired plug (one with screws you can open) has to be opened, washed, dried and reassembled, which is a job for whoever is qualified to re-end it. A plug that sat in salt water should be replaced.
- Push each end fully in and twist until it locks, at the pedestal as well as the boat, then thread the locking ring home. Secure the cord to the boat so its weight doesn't pull on the connector.
- Fit dust caps, coil the cord loosely without kinks, and store it dry and out of the sun.
Note the cord's rating, length, purchase date and any end replacement (who did it and when) in BoatMend, with photos of both ends. Check both ends every time you unplug; Practical Sailor's surveyor suggests at least monthly for boats that stay plugged in.
Common mistakes
- Cleaning a discolored blade and calling it fixed, when the damage is inside.
- Replacing a burned cord but not checking the boat inlet or the dock outlet it was plugged into.
- Splicing or taping a damaged cord instead of replacing it.
- Fitting a cheap household or non-marine plug, or a lower-rated end, to "make it fit."
- Cutting the burned end off but not cutting back far enough to bright copper and soft insulation.
- Plugging or unplugging with the breakers on, which arcs and pits the blades.
- Leaving the locking ring loose or missing, or pushing a plug into the pedestal without giving it the locking twist.
- Assuming a cord is fine because the breaker never tripped.
- Using a cord with an end replaced by someone you don't know, without having it tested.
When to call a pro
- Any burn mark or heat damage on the boat's inlet, or a boat-end connector that has burned
- 50-amp cords, and any work behind the inlet or on the boat's AC panel
- Reverse-polarity warnings, ELCI or pedestal trips, or any tingle from metal on the boat or ladder
- A re-ended cord you can't confidently test
- A pedestal outlet that is loose, burned or cracked: report it to the marina and use another outlet
Tips
- Buy the shortest cord that reaches with a little slack. Long piles of extra cord are trip hazards and collect heat.
- Keep a second, known-good cord aboard if you travel between marinas.
- Look at the cord ends whenever you unplug to leave the dock; that's when early discoloration is easiest to catch.
- Ask your insurer whether they offer a discount or rebate for upgraded shore power connectors.
Official references
We read these to write this guide. Your engine's own manual always wins.
- Practical Sailor – Keeping the Shorepower System Safe
- Practical Sailor – Ensuring Safe Shorepower
- BoatUS – Plugging For Safety
- BoatUS – Analyzing Onboard Fire Claims
- BoatUS – Avoid Electric Shock Drowning
- Cruising World – Monthly Maintenance, Shore Power (Steve D'Antonio)
- Electric Shock Drowning Prevention Association – Preventing ESD
Safety: BoatMend is for information only and does not replace a certified marine technician. You are responsible for your safety and your boat. Read the full disclaimer.
Last updated 2026-10-26
Related guides
Shore Power Safety: Cords, Inlets, Burned Plugs and Electric Shock Drowning
An owner's inspection routine for your shore power cord, plugs, boat inlet, galvanic isolator and ground-fault protection, plus the right way to plug in and the facts about Electric Shock Drowning. This guide is for looking and testing only; any electrical repair belongs to an ABYC-certified marine electrician.
Shore Power Inlet and Cord Upgrades: Burned Plugs, Better Connectors and Safe Adapters
Why shore power plugs and boat inlets overheat and burn, how to spot an inlet that needs replacing, what newer connector designs offer, and how to choose, size and care for cords and adapters. You inspect and buy the right cord; an ABYC-certified marine electrician replaces the inlet and its wiring.
ELCI Retrofit: Adding Whole-Boat Shock Protection to an Older Boat
What an ELCI (equipment leakage circuit interrupter) is, why ABYC now requires one on new boats with shore power, what a retrofit involves and costs, and what to do when one trips. You plan, test and troubleshoot; an ABYC-certified marine electrician does the wiring.
Galvanic Isolator: Why Shore-Powered Boats Need One and How to Tell If It's Working
A galvanic isolator (or an isolation transformer on bigger boats) keeps stray DC current from the marina's ground wire from eating your anodes, drive and running gear, without cutting the safety ground. Learn what it does, the owner-level checks you can do, what failure looks like, and why the actual meter test is usually a job for a marine electrician.
Isolation Transformer vs. Galvanic Isolator: Which Does Your Boat Need?
Understand how a galvanic isolator and an isolation transformer each protect a boat on shore power, when the heavier, pricier transformer is worth it (stray-current marinas, aluminum boats, liveaboards), and what to ask the ABYC-certified electrician who installs it.

Electrical Safety at Your Private Dock or Boat Lift: GFCI, Shock Drowning and Annual Checks
Lights, outlets, lift motors and de-icers at a home dock put household current right next to the water, and a hidden fault can kill a swimmer without any warning. Learn the owner checks you can do safely, the protection your dock should have, the no-swimming rule, and which jobs must go to a licensed electrician.
How to Check, Mount and Replace Boat Fire Extinguishers
A monthly five-minute check of every fire extinguisher aboard, plus how the 2022 Coast Guard rule changes affect you, where to mount them, and when to recharge or replace. A boat fire spreads in seconds, and an extinguisher with a dead gauge, missing pin or expired date will not help you or pass a boarding.