Jet Ski Impeller and Wear Ring Replacement (What's Involved)
Know when your PWC's impeller or wear ring is worn out, how to check it yourself, and what replacing them really involves: pulling the pump, special tools, the right clearance, fresh seals and the correct pump lube. Most owners do the diagnosis and leave the pump work to a dealer or jet-pump shop.
Time
4 h
Shop would charge
$300-1000
Applies to
Jet ski / PWC · Jet ski / PWC
Safety first: The impeller is a sharp, heavy steel blade that can start spinning the moment the engine cranks. Remove the lanyard or key fob and disconnect the battery before you put fingers or tools near the intake, nozzle or driveshaft. Never reach into the pump with anyone on the craft. After any pump work, check the hull for water before and during the first ride. If water is coming into the hull, the craft won't stay level or you smell fuel, get to shore and call for a tow (Sea Tow / TowBoatUS, or the USCG on VHF 16 or 911 in an emergency).
Owners often ask
- My jet ski revs high but won't get up to speed. Is it the wear ring?
- Can I replace my jet ski impeller myself?
This guide walks you through it. Still stuck? Ask the AI Mechanic about your engine.
Tools
- Flashlight and phone camera
- Notebook or the BoatMend log (top speed and RPM history)
- Feeler gauge set
- Socket set, extensions and hex keys
- Impeller removal tool and shaft holding tool specific to your make and model
- Torque wrench
- Plastic scraper and clean rags
- Gloves and safety glasses
Parts & supplies
- Wear ring (and impeller, if damaged) specified for your exact model and year
- Pump rebuild kit as needed (bearings, seals, O-rings)
- Pump oil or grease specified in your service manual
- Sealant and thread locker specified in your service manual
Before you start
Inside your PWC's jet pump, a stainless steel impeller spins inside a close-fitting wear ring (also called a liner). The gap between the blade tips and the ring is tiny on purpose. SBT, a PWC parts rebuilder, explains it well: the tight gap forces water out the back instead of letting it slip around the blade tips. As sand, grit and stones pass through, they wear the blade edges and the inside of the ring. The gap grows, water recirculates, and the engine revs without the craft going faster.
Symptoms of a worn impeller or wear ring:
- Cavitation: the engine revs up but the craft is slow to respond, especially in turns or chop
- Slow hole shot: it takes longer to get up on plane, or it "bogs" or surges from a stop
- Lower top speed with the same or higher RPM than before
- Vibration or a new whine or buzz from the pump
- Rarely, overheating, if the pump is so worn it doesn't feed enough cooling water on models that use it
First, rule out the easy stuff. Debris in the grate or rope wrapped on the shaft causes the same symptoms. So can a learning key, slow or eco mode, or a supercharger due for service on some models. Work through the jet pump debris guide first.
Is this a DIY job? Checking is easy. Replacing usually means pulling the pump out of the hull, which needs model-specific tools, the service manual's clearance and torque specs, sealants and new seals. Many owners do the diagnosis, then take the craft (or just the pump) to a dealer or jet-pump shop. This guide explains each step so you know what you're paying for, and so experienced DIYers know what to expect.
Steps
Track top speed (GPS or the craft's display) and top RPM on a calm day with the same load and fuel. When the craft is new or freshly serviced, write them down in BoatMend. A slow drop in speed with RPM staying the same or climbing is the classic sign of wear.
Put the craft on its trailer on level ground. Remove the lanyard or key fob and disconnect the battery. Rinse the pump area with fresh water so you can see clearly. Tilting the craft (on a proper stand or with the trailer's tongue lowered) gives a better view up through the grate.
Look up through the intake grate and in through the nozzle. Remove weeds, line and plastic with a blunt hook, not your fingers. SBT points out that fishing line wrapped around the driveshaft in front of the impeller can melt from friction and fuse in place, so it may need to be cut away in pieces. If the grate is clean and the shaft area is clear, the problem is inside the pump.
Have a Sea-Doo with iDF? Some recent Sea-Doo models have iDF (Intelligent Debris Free), which Sea-Doo describes as a push-button system on the handlebars that briefly runs the pump in reverse to clear a clogged intake without getting in the water. Use it the way your owner's manual describes when weeds or a bag clog the grate on the water. It's meant for intake debris; if performance doesn't come back, a stone wedged against the wear ring or a damaged impeller still needs the checks below.
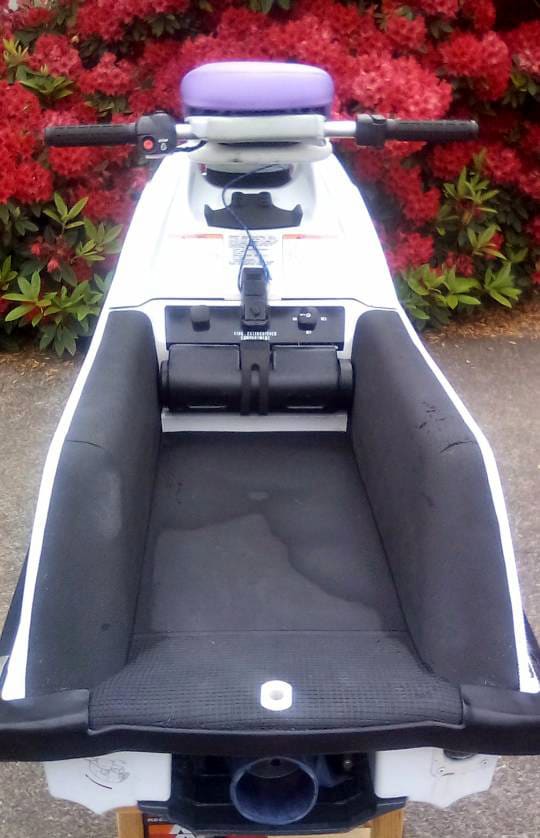
Photo: Hyperduc / Wikimedia Commons · CC BY-SA 4.0 Sea-Doo's pre-season checklist says to inspect the wear ring and impeller for deep scratches, nicks or unusual grooves. Use a flashlight and photograph the blades through the grate and nozzle. Look for:
- Chipped, bent or rolled blade edges (rock damage)
- A dull, rounded leading edge (sand wear)
- Deep grooves or gouges in the wear ring
- A gap between blade tips and ring that looks bigger than it used to, or uneven around the circle
Impros, an impeller repair shop, notes that even slight visible damage to an impeller can change performance a lot.
- Small dings, ring looks fine: some impellers can be dressed or professionally repaired.
- Worn or gouged wear ring, impeller OK: the wear ring is the usual fix and is the cheaper part. Sea-Doo lists wear rings among normal wear items (like filters and gaskets) that need replacing over time even with proper care.
- Damaged or worn impeller: repair (reshaping, welding and balancing at a specialist) or replace.
- Uneven gap or shaft play: bearings or the driveshaft may be worn; a new wear ring alone won't fix it.
Order parts for your exact make, model and year. Impellers come in different designs and pitches matched to each engine, so swapping in a "close enough" impeller can hurt performance or overrev the engine.
The exact steps differ by brand and model; follow your service manual. In general, SBT describes the sequence as:
- Disconnect the steering and reverse cables from the nozzle and reverse gate
- Mark how the driveshaft coupler lines up, if your model has one
- Remove the pump mounting bolts or nuts in the hull tunnel
- Slide the pump straight back out of the tunnel, breaking the old seal without prying on finished surfaces
On some models the ride plate and intake grate come off first. Have a clean bench ready and keep fasteners in labeled bags.
Most PWC impellers thread onto the pump shaft. Removing one needs a tool to hold the shaft and a tool that fits the impeller's splines or flats; brands use different tools and some threads can be very tight after years in salt water. Don't use a pipe wrench on the blades or clamp the shaft in a vise without the right adapter. This is where most DIY pump jobs stall: if you don't have the right tools, stop here and take the pump to a shop.
With the impeller back in the housing (or using the method in your manual), measure the gap between the blade tips and the wear ring with a feeler gauge at several points around the circle. Compare with the limit in your service manual; it varies by pump design and size, so don't use a number from a forum. SBT notes that a gap that's tight on one side and loose on the other points to a bent shaft or worn bearing, not just a worn ring.
Wear rings are pressed or bonded into the housing. Removing one often means pressing it out, or carefully cutting it without scratching the housing bore. The new ring has to go in fully seated and square. SBT warns that a ring that goes in cocked will wear unevenly again almost immediately. Some shops machine or replace the whole housing.
While the pump is apart, check the pump shaft bearings and seals for roughness, play or water in the lubricant. Many pumps have bearings in a housing filled with a specific oil or grease and sealed with O-rings and a cap (often called the cone or cover). Use only the lubricant type and amount in your service manual, replace the O-rings, and don't overfill. Milky or watery lube means a seal is leaking and the bearing kit should be replaced. Also check the driveshaft seal and boot where the shaft passes through the hull; a leaking shaft seal lets water into the hull.
Install the impeller with any thread locker the manual calls for and torque it to spec with the holding tool. Spin it by hand: it should turn freely without touching the ring. Clean the old sealant off the hull and pump mating surfaces, apply new sealant where the manual specifies, line up the coupler or driveshaft splines and slide the pump home. Torque the mounting fasteners in the order and to the values in the manual. Reconnect the steering and reverse cables, then check that the nozzle turns fully left and right and the reverse gate works, with the engine off.
Reconnect the battery. Don't "test" the pump by starting the craft on the trailer: Sea-Doo says never to run the engine out of the water, because even closed-loop cooled models need the ride plate submerged to shed heat. Before the first ride, launch the craft and let it sit in the water for a few minutes, then open the seat or engine cover and look for water coming in around the pump and driveshaft. Start it and check the pilot (cooling) water stream. On a short, gentle test ride, check steering and reverse, then compare hole shot, top speed and RPM with your baseline. Check the hull for water again after the ride. Log the work, parts and new numbers in BoatMend.
Common mistakes
- Replacing the impeller when the wear ring was the problem, or the other way around. Measure first.
- Guessing at the replacement impeller. Match make, model, year and pitch.
- Forcing the impeller off without the right tools, which damages the shaft, splines or blades.
- Ignoring uneven clearance. It means bearing or shaft trouble, not just a worn ring.
- Reusing old O-rings and seals, then finding water in the hull on the first ride.
- Using the wrong pump lube, or overfilling the bearing housing.
- Skipping the after-ride hull check following pump work.
- Assuming a reverse "blast" clears everything. Owners often find that reverse or a debris-clearing feature pushes out weeds but not a small stone wedged between the impeller and the wear ring. That jam can cause cavitation or a problem only at certain RPM, so look up through the grate with a light (lanyard out, battery off).
- Riding in shallow, sandy water right after the repair, which wears the new parts fast.
When to call a pro
- You don't have the brand-specific impeller and shaft tools or the service manual
- The impeller is chipped, cracked, bent or worn at the tips
- The clearance is uneven, or there's play in the pump shaft
- The wear ring is bonded or seized in the housing
- Water is getting into the hull at the pump or driveshaft
- The craft is under warranty (check what's covered first; wear items often aren't)
- Performance doesn't come back after the debris check and the obvious fixes
Tips
- Avoid shallow water. Yamaha's beaching tips say to stop the engine in about 3 feet of water when coming to shore and push back out to at least that depth before starting, so sand and pebbles aren't sucked into the jet intake. Sea-Doo gives the same advice: never start the craft in less than about three feet of water, or it can suck up rocks, sand and debris that damage the impeller and pump or clog cooling lines.
- Ask your dealer whether a tougher wear ring (stainless or stainless-lined) is offered for your model if you often beach or ride in sandy, shallow water.
- A damaged stainless impeller can often be repaired and rebalanced by a specialist for less than a new one. Impros notes that if the diameter is worn too far, a new impeller is usually cheaper than saving it.
- Rinse the pump with fresh water after every salt water ride, as Yamaha's maintenance list recommends.
- Keep a photo of each blade's edge in BoatMend at the start of every season so you can spot new damage.
Official references
We read these to write this guide. Your engine's own manual always wins.
- Sea-Doo – Prepping Your Sea-Doo for Summer Fun (inspect wear rings and impeller)
- Sea-Doo – Maintenance Tips and FAQs (wear items)
- Yamaha WaveRunners – Maintenance Matters (check for debris in the jet pump, wash the pump)
- Yamaha WaveRunners – How to Beach your WaveRunner (stop engines in about 3 feet of water)
- Sea-Doo – Can you run the motor of your Sea-Doo out of the water? (start in at least 3 feet of water)
- SBT – Cavitating and Won't Accelerate? Pulling the Pump and Fixing the Wear Ring and Impeller
- Impros – FAQs (impeller repair, balancing, worn impeller diameter)
- Impros – Impeller Service Pricing (repair levels for rock damage and worn diameter)
- Sea-Doo – iDF (Intelligent Debris Free) pump system
Safety: BoatMend is for information only and does not replace a certified marine technician. You are responsible for your safety and your boat. Read the full disclaimer.
Last updated 2026-10-24
Related guides
Jet Ski and Jet Boat Pump Care: Clearing the Intake Grate and Checking the Impeller and Wear Ring
Clear weeds, rope and rocks from the intake grate of a Sea-Doo, Yamaha WaveRunner, Kawasaki Jet Ski or jet boat, and learn to spot a damaged impeller or worn wear ring. A clogged or worn pump is the usual reason a jet craft revs high but goes slow.
Jet Ski Saltwater Care: Flushing, Rinsing, Corrosion Protection and Storage
A simple after-every-ride routine for Sea-Doo, Yamaha WaveRunner and Kawasaki Jet Ski owners who ride in salt or brackish water. Flush in the right order, rinse the pump, hull and engine bay the gentle way, spray anticorrosion only where it belongs, and keep anodes, the battery and the trailer from rotting away.
Jet Ski Taking On Water: Find the Leak and Drain It Safely
A little water in a personal watercraft's hull after a ride is normal; a lot is not. Learn how to tell the difference, drain the hull, and track the leak from the easy causes (drain plugs, seat and hatch seals, loose hose clamps) to the serious ones (driveshaft seal, exhaust, hull cracks), and when to stop riding.
How to Winterize a Jet Ski or PWC (Sea-Doo, Yamaha WaveRunner, Kawasaki)
Get your personal watercraft ready for the off-season by flushing and draining the cooling and exhaust system, stabilizing fuel, changing oil, fogging, and storing the battery. Doing it yourself takes an afternoon and helps avoid freeze damage, corrosion and spring no-starts.
How to Change the Oil and Filter on a Four-Stroke Jet Ski (PWC)
Pump the old oil out through the dipstick tube, swap the filter, refill and check the level the way your model requires. A yearly oil change (or at the hours your manual lists) is the single most important service for a four-stroke Sea-Doo, Yamaha WaveRunner or Kawasaki Jet Ski.
Jet Ski Won't Start or Won't Beep: A Step-by-Step Check
Most personal watercraft that refuse to start have a simple cause: the key or lanyard, a weak battery, a blown fuse, a security lock or a flooded engine. Work through these checks from the cheapest to the most involved and learn what each result means for Sea-Doo, Yamaha and Kawasaki models.