How to Find Soft Spots and Wet Core in a Fiberglass Deck
Tap, press and meter your deck to find wet or rotting core before it spreads, track down the leaking hardware that let the water in, and decide whether a small DIY injection repair will do or the deck needs a pro to recore it.

Time
2 h
Shop would charge
$500-5000
Applies to
All engines · Sailboat, Cabin cruiser, Yacht, Center console, Fishing boat, Bowrider / runabout, Pontoon
Safety first: A deck with rotten core can be much weaker than it looks, especially around cleats, stanchions, chainplates and the mast. Don't load suspect hardware hard (docking in a blow, towing, hanging off a stanchion) until it has been checked. Wear gloves, eye protection and a respirator when sanding fiberglass or mixing thickened epoxy, and work with acetone only in fresh air away from any flame. If a soft area is next to a chainplate, the mast step or a structural bulkhead, stop and get a surveyor or rigger to look before you sail.
Owners often ask
- My deck feels spongy around a stanchion base. Is the core rotten, and can I fix it myself?
- A surveyor said my deck shows high moisture meter readings. How worried should I be?
This guide walks you through it. Still stuck? Ask the AI Mechanic about your engine.
Tools
- Plastic-faced mallet, small phenolic hammer or the handle of a big screwdriver
- Chalk, a grease pencil or painter's tape for marking
- Phone camera and a notebook (or your BoatMend log)
- Pinless (capacitance) moisture meter, borrowed or owned (optional)
- Flashlight and a mirror for looking under the deck from inside
- Drill and small bits (only if you go on to a test hole or repair)
Parts & supplies
- Marine epoxy resin and hardener (for small repairs only)
- Colloidal silica or high-density epoxy filler
- Acetone for cleanup and drying (follow the label)
- Bedding sealant for any hardware you rebed
- Gelcoat or deck paint to seal repair holes from the sun
Before you start
What "core" means. BoatUS notes that nearly all sailboats built in the 1980s or later have a cored deck, and many power boat decks, cockpit soles and hatch lids are built the same way. It's a sandwich: a top fiberglass skin, a core of end-grain balsa, plywood or foam, and a thinner bottom skin. BoatUS notes that the deck's stiffness comes from that core. When water gets in through a fastener hole, wood core soaks it up, rots and lets go of the skins, and the deck starts to feel spongy.
How water gets in. Almost always from above, through anything screwed or bolted through the deck: stanchion bases, cleats, chainplates, genoa tracks, windlass bolts, hatch frames, deck fills and old screw holes. BoatUS points out that every bedding compound breaks down eventually, and that freezing water in a wet core keeps pushing the layers apart each winter.
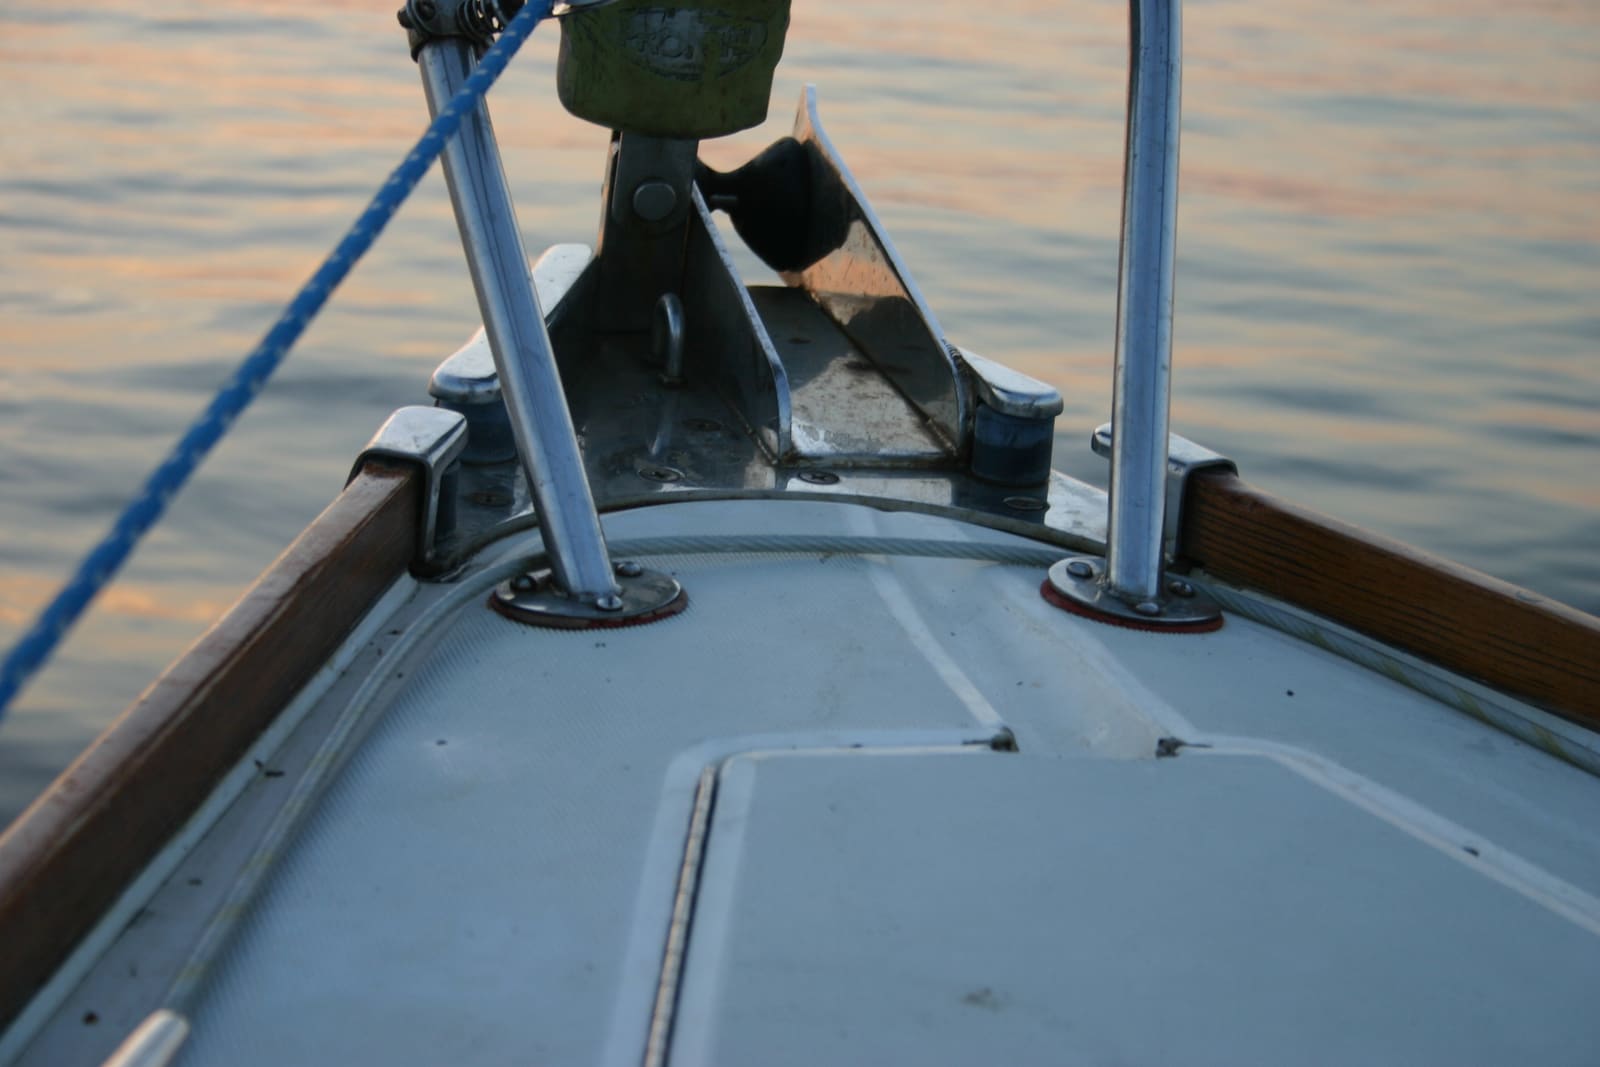
Every bolt in a foredeck like this one passes through the core. When the sealant under a base plate fails, that hole is where the water starts.
Foam core isn't a free pass. Sailing Magazine points out that it's a myth that foam cores can't be damaged by water: balsa, plywood and foam can all take on water. Balsa soaks it up and breaks down fastest. Builders often use plywood under high-load spots such as chainplates, the mast and winch bases, so those areas can rot too. The same article's advice once you find a wet area: seal every fitting around it right away. That stops more water getting in and also starves the core of the oxygen that rot needs, which slows the damage until you can fix it properly.
When to check. At spring commissioning, after any new leak inside the cabin, before you buy a used boat, and before adding new hardware. Typical; confirm with your surveyor.
Pick a dry day. Do the tap and meter tests after the deck has been dry and out of the sun's direct heat for a while. Dew, rain or even sweat on the surface throws off a moisture meter.
Steps
Walk every part of the deck, cockpit sole and cabin top in soft shoes. Shift your weight from foot to foot. Healthy cored deck feels firm. A spot that gives, flexes or creaks underfoot is a soft spot. Mark each one with chalk or tape.
Tap with a plastic-faced mallet or a screwdriver handle in a grid, a few inches apart. BoatUS describes a solid "thunk" as healthy core and a dull, flat thud as a sign of trouble. Pay the most attention to the ring around every piece of hardware, since that is where water enters. Outline the dull-sounding area with chalk so you can see its size and shape.
Look for gelcoat cracks radiating from a fitting, a fitting that sits lower than the deck around it, rust or brown stains weeping from a seam, and sealant that is cracked or pulled away. Then go below with a flashlight. Water stains on the headliner, a damp locker, or a dark, stained bulkhead right under the soft area all point to the leak above it.
A pinless moisture meter is useful for mapping how far water has spread, but treat its numbers as relative. Surveyor Bill Sandifer (Good Old Boat) explains that the meter's "fiberglass" scale reads far lower than its "wood" scale, that readings change from one meter to the next, and that surface water and paint can fool it.
How to use one well:
- First find an area you believe is dry (away from any hardware) and note that reading as your baseline.
- Move the meter in a grid toward the suspect fitting. A clear jump above your baseline is what matters, not a single number.
- Outline the high readings with chalk. This map is what a repair person needs.
- Don't panic over one "wet" reading on a dewy morning. Retest when the deck is dry.
A meter does not tell you whether the core is rotten or just damp. Only a tap test, a test hole or a surveyor's judgment adds that.
The wet area almost always surrounds a fitting. Note which hardware sits in or at the edge of each wet zone. If you can't tell, run a garden hose gently over one fitting at a time while a helper watches below (see /guides/deck-hardware-rebedding). Water can travel inside the core before it shows, so the drip below may be some distance from the leak.
Whatever you decide about the core, the fitting that let the water in has to be removed and rebedded properly, or the problem keeps growing. BoatUS's method is to remove the fitting, clean off all old sealant, dig the core back from each hole, fill the hole with thickened epoxy, then redrill and rebed so the bolts pass through solid epoxy instead of bare wood. The full how-to is in /guides/deck-hardware-rebedding. Until you can do it, tape over the fitting with good tape as a temporary cover.
Use your chalk outlines to decide what you have:
- A ring of an inch or two around one fitting: usually handled while rebedding (step 6).
- A small soft patch, roughly one or two square feet: Practical Sailor treats this as a reasonable DIY injection repair.
- Larger areas, several fittings in a row, or a deck that bounces: this means recoring, usually a pro job.
- Anything at the mast step, chainplates or a bulkhead: structural; call a surveyor or rigger.
Sometimes the core is dry but the top skin has come unstuck from it (delamination). In one Epoxyworks repair, drilling a few small test holes showed dry balsa with an air gap under the skin, which changed the whole plan. Drill a small hole from the top (or better, from underneath where the hole won't show) into the middle of the soft area. Dark, wet, mushy or smelly wood on the drill bit means wet core. Dry, light-colored wood with a gap means delamination.
For a small area, Practical Sailor's approach is:
- Drill small holes through the top skin only, spaced a few inches apart, including at the highest and lowest points of the soft area.
- Dry the core completely before adding resin. Epoxy will not bond to wet core, and Practical Sailor says regluing a damp core is "doomed to failure." Gentle heat (a hair dryer, never a torch) until no more moisture comes out, and acetone injected to help carry water out, are their tools.
- Inject epoxy into the high holes and work it down until it shows at the low holes, then tape the low holes.
- Put light weight on the area (with plastic underneath) while it cures.
- Seal the holes with gelcoat or deck paint. Bare epoxy breaks down in sunlight within months.
Owners often find the core won't fully dry with this method. If it stays wet, stop: the core needs to come out.
SAIL's Don Casey describes this for a wet patch around a single opening (like the mast partners): dig out the wet core back from the hole as far as you can reach, vacuum the debris, rough up the inside of both skins, wipe with acetone, and fill the cavity with epoxy thickened with colloidal silica, a little at a time so it doesn't overheat while curing. This only works where you have an existing hole to reach in from.
For large areas, Casey says it's usually less work and a better result to remove one skin, replace the core and relaminate. BoatUS calls extensive core repair beyond most DIYers. Get quotes from a fiberglass shop, and ask whether they will cut from the top (needs new nonskid) or from inside (needs headliner removal). Prices vary widely with size and access.
Photograph your chalk map and meter readings, note which fittings you rebedded, and store it in your BoatMend boat log. Re-tap the same spots each spring. A soft spot that is growing means water is still getting in.
Common mistakes
- Smearing sealant around the outside of a leaking fitting. It may stop the drip for a while but traps water in the core. Pull the fitting and rebed it.
- Trusting one moisture meter number. Readings are relative; compare to a dry baseline on the same boat, on a dry day.
- Injecting epoxy into wet core. It won't bond and you will have sealed the water in.
- Using a grease gun to force resin under the skin. Practical Sailor warns the pressure can split off skin that wasn't delaminated. Go slow with a syringe.
- Leaving repair holes or bare epoxy exposed to the sun.
- Ignoring a soft spot at a stanchion or chainplate. These carry big loads; a rotten deck can let the hardware pull out.
When to call a pro
- The soft area is bigger than a couple of square feet, or the deck visibly bounces underfoot
- Soft or wet core around chainplates, the mast step, a windlass or a structural bulkhead
- You are buying the boat: a marine surveyor's moisture and tap survey is cheaper than a recore surprise
- Your drill test shows black, mushy core spreading well beyond the fitting
- Any water is getting into the boat faster than a slow drip, or a fitting has started to pull out
Tips
- When you add new hardware, follow the BoatUS method: oversize the hole, fill it with thickened epoxy, then drill the bolt hole through the epoxy. It keeps water out of the core for good.
- Re-check sealant around every through-deck fitting each spring; replacing a fitting's bedding early is cheap.
- A borrowed meter plus a careful tap test is enough for an owner. If you are spending real money, let a surveyor interpret it.
Official references
We read these to write this guide. Your engine's own manual always wins.
- BoatUS – Inspecting Older Sailboats (deck core and tap testing)
- BoatUS – Rebedding Deck Hardware (Dealing With Cored Decks)
- Good Old Boat – Moisture Meters (surveyor Bill Sandifer)
- Practical Sailor – Boat Clinic, Minor Repair to Cored Decks
- SAIL – Soft Step (Don Casey on wet balsa core)
- Epoxyworks – Delamination Repair
- SAILING Magazine – Delamination Repair (Richard Reichelsdorfer, 2020)
Safety: BoatMend is for information only and does not replace a certified marine technician. You are responsible for your safety and your boat. Read the full disclaimer.
Last updated 2026-10-26
Related guides
How to Find and Fix Leaking Deck Hardware (Rebedding Cleats, Stanchions and Tracks)
Track down the cleat, stanchion base or track that is dripping into the cabin, then remove it, seal the deck core and bed it again with the right sealant so the leak stops for years instead of weeks. Catching it early protects the deck core from rot.

How to Check a Boat for Transom and Stringer Rot
Many older fiberglass boats have wood inside the transom, stringers and deck, and water that gets in slowly rots it. Learn the tap test, the flex test, how to read a moisture meter and the other warning signs, and why a rotten transom or stringer is a structural job for a pro, not a weekend patch.

Stress and Spider Cracks in Fiberglass, Cosmetic or Structural?
Learn what causes spider, stress and hairline cracks in your boat's gelcoat, how to tell cosmetic crazing from a structural problem with a simple tap and flex check, and when a gelcoat repair is enough or a pro is needed.

How to Fix Leaking Hatches and Portlights
Find out whether a leaking deck hatch or portlight is failing at the gasket, the lens or the frame, then fix it with the right seal or sealant. Learn when crazed or cracked acrylic needs a new lens and what never to put on plastic windows.
Marine Sealants Explained: 5200, 4200, 4000UV, Polysulfide, Silicone and Butyl Tape
Pick the right sealant before you bed a cleat, a through-hull, a window or a transducer. The wrong goo either leaks in a year or glues a part on so hard you damage the boat getting it off.

How to Inspect a Used Boat Before You Buy
A step-by-step checklist for looking over a used boat, from paperwork and the hull ID number to the transom, engine, compression test, sea trial and trailer. Know what to check yourself, what the red flags mean, and when to pay a marine surveyor.

How to Prepare Your Boat for an Insurance or Condition Survey
Get ready for a marine survey your insurer or lender asked for: what a SAMS or NAMS surveyor looks at, the common findings you can fix beforehand (hose clamps, seacocks, bilge, fire extinguishers, wiring), the paperwork to have ready, and how to handle the recommendations afterward.