How to Inspect and Repack Boat Trailer Wheel Bearings
Check, clean and repack your trailer's wheel bearings so a seized hub does not leave you stranded on the highway. Boat trailers get dunked in water every launch, which makes their bearings fail far more often than those on dry utility trailers.
Time
2 h
Shop would charge
$100-250
Applies to
All engines
Safety first: Never get under or put your hands near a trailer held up only by a jack. Chock the wheels on the other side and use jack stands. If a hub is smoking, too hot to touch or the wheel wobbles on the road, pull over well off the highway, turn on your hazards and call a roadside service such as BoatUS Trailer Assist or your auto club. Do not keep driving on it: a failed bearing can let the wheel come off.
Owners often ask
- How often should I grease or repack my trailer wheel bearings?
This guide walks you through it. Still stuck? Ask the AI Mechanic about your engine.
Tools
- Floor jack rated for your trailer
- Jack stands (never work under a trailer on a jack alone)
- Wheel chocks
- Lug wrench
- Channel-lock pliers or large adjustable pliers
- Needle-nose pliers
- Flat screwdriver and a small hammer
- Seal puller or a wooden dowel
- Seal driver or a flat block of wood
- Manual grease gun (not air-powered)
- Parts-cleaning solvent, a tub and a stiff brush
- Nitrile gloves, safety glasses and plenty of rags
Parts & supplies
- Marine-grade wheel bearing grease of the type your axle maker approves
- New grease seals (one per hub)
- New cotter pins (never reuse old ones)
- Replacement bearings and races (cups) if any show wear
- New dust caps or bearing protectors if the old ones are dented
Before you start
Trailer wheel bearings are the rollers inside each hub that let the wheel spin on the axle spindle. Each hub usually has an inner and an outer bearing, a grease seal on the back, and a dust cap or bearing protector on the front. They matter more than most owners think: BoatUS says almost one in four calls from members broken down at the roadside with a trailer is about failed bearings.
How often: a full inspection and repack once a year is the typical schedule for boat trailers (Dexter, a major axle maker, lists 12 months or 12,000 miles). Do it more often if you launch in salt water or tow long distances. Not every source agrees: Mercury's trailer advice says that with bearing protectors fitted, a repack every three to five seasons is a good idea. The safe middle ground is to follow your axle maker and still do the wobble, spin and heat checks below every season. Confirm the interval in your axle or trailer manual.
Know your hub type:
- Standard dust cap: must be pulled and repacked by hand.
- Bearing protector (such as Bearing Buddy): a spring-loaded cap with a grease fitting that keeps light pressure on the grease so water is less likely to get in.
- Grease-through spindle (such as Dexter E-Z Lube): a fitting on the end of the spindle lets you push fresh grease through the bearings.
- Oil-bath hub: a cap with a clear window and a fill plug; the bearings run in oil, not grease. Don't pack these with grease. Check the oil level and look for milky oil (water) through the window, and top up only with the oil type the axle maker names (Dexter specifies a hypoid gear oil, filled to the mark on the cap). BoatUS adds that oil hubs suit trailers that are used often; on a trailer that sits for months the oil settles to the bottom and the upper parts can rust.
Protectors and grease-through spindles make top-ups easy, but they do not replace pulling the hub and looking at the bearings. Dexter says so plainly. Dexter also notes that its ordinary (non-E-Z Lube) hubs are not designed to be submerged, and that their bearings should be repacked after each immersion. If your trailer goes in the water and has plain dust caps, that is a strong reason to upgrade the hubs.
Adding grease is not changing grease. A trailer shop interviewed by BoatUS compares it to engine oil: topping up a quart is not an oil change. Old grease still has to come out once a year.
Signs of a failing bearing: grinding or rumbling noise, a hub that is much hotter than the others after a drive, grease slung all over the inside of the wheel or onto the boat's hull and the trailer frame near the wheel, a dust cap that pops off on its own (heat and pressure building inside), or a wheel that rocks when you grab the top and bottom of the tire.
Steps
On the way home from a drive, or after a short tow, carefully touch each hub with the back of your hand. They should feel warm, all about the same. One hub much hotter than the rest points to a bearing, brake or tire problem on that wheel. On trailers with brakes, a dragging brake shoe or pad is a common cause of one hot hub, so check the brake as well as the bearing when you take it apart.
Park on flat, hard ground with the trailer hitched to the tow vehicle. Chock the wheels on the side you are not working on. Loosen the lug nuts a little, jack under the axle or frame where your trailer manual says, and set a jack stand under the axle before removing the wheel.
Grab the tire at the top and bottom and rock it. There should be no clunk or noticeable play. Spin the wheel by hand and listen. It should turn smoothly and quietly. Roughness, clicking or grinding means the bearings need replacing, not just new grease. Then remove the wheel.
Tap around the edge of the cap with a screwdriver and small hammer, or use pliers to work it off. Look at the grease inside. It should look like clean grease. Milky, gray or watery grease means water got in. Rust or black, gritty grease means the bearings are likely damaged.
Straighten and pull the cotter pin and throw it away. Remove the nut retainer (if fitted), the spindle nut and the washer. Wiggle the hub slightly and the outer bearing will slide forward. Catch it with your fingers so it does not fall in the dirt.
Slide the hub straight off the spindle. On trailers with brakes, the drum comes with it; if it hangs up on the brake shoes, stop and check your brake manual. Lay the hub face-down on rags and push or tap the old grease seal out from the inside using a dowel or seal puller. The inner bearing comes out with it. The seal is not reusable.
Wash the bearings, the inside of the hub and the spindle in parts solvent with a brush. Let the bearings air dry. Do not spin a dry bearing with compressed air; it can damage it and is a real injury risk. Wipe the spindle clean and look for scoring, rust or a blue heat tint.
Check each roller and the cage. Look at the races (the shiny rings pressed into the hub) under good light. Replace the bearing and its matching race as a set if you see:
- Pitting, rust spots or flaking
- Blue, brown or gold heat discoloration
- Cracks, chipped rollers or a bent cage
- Grooves or a rough feel
Replacing races takes a drift and care. If you are not comfortable, take the hub to a trailer shop.
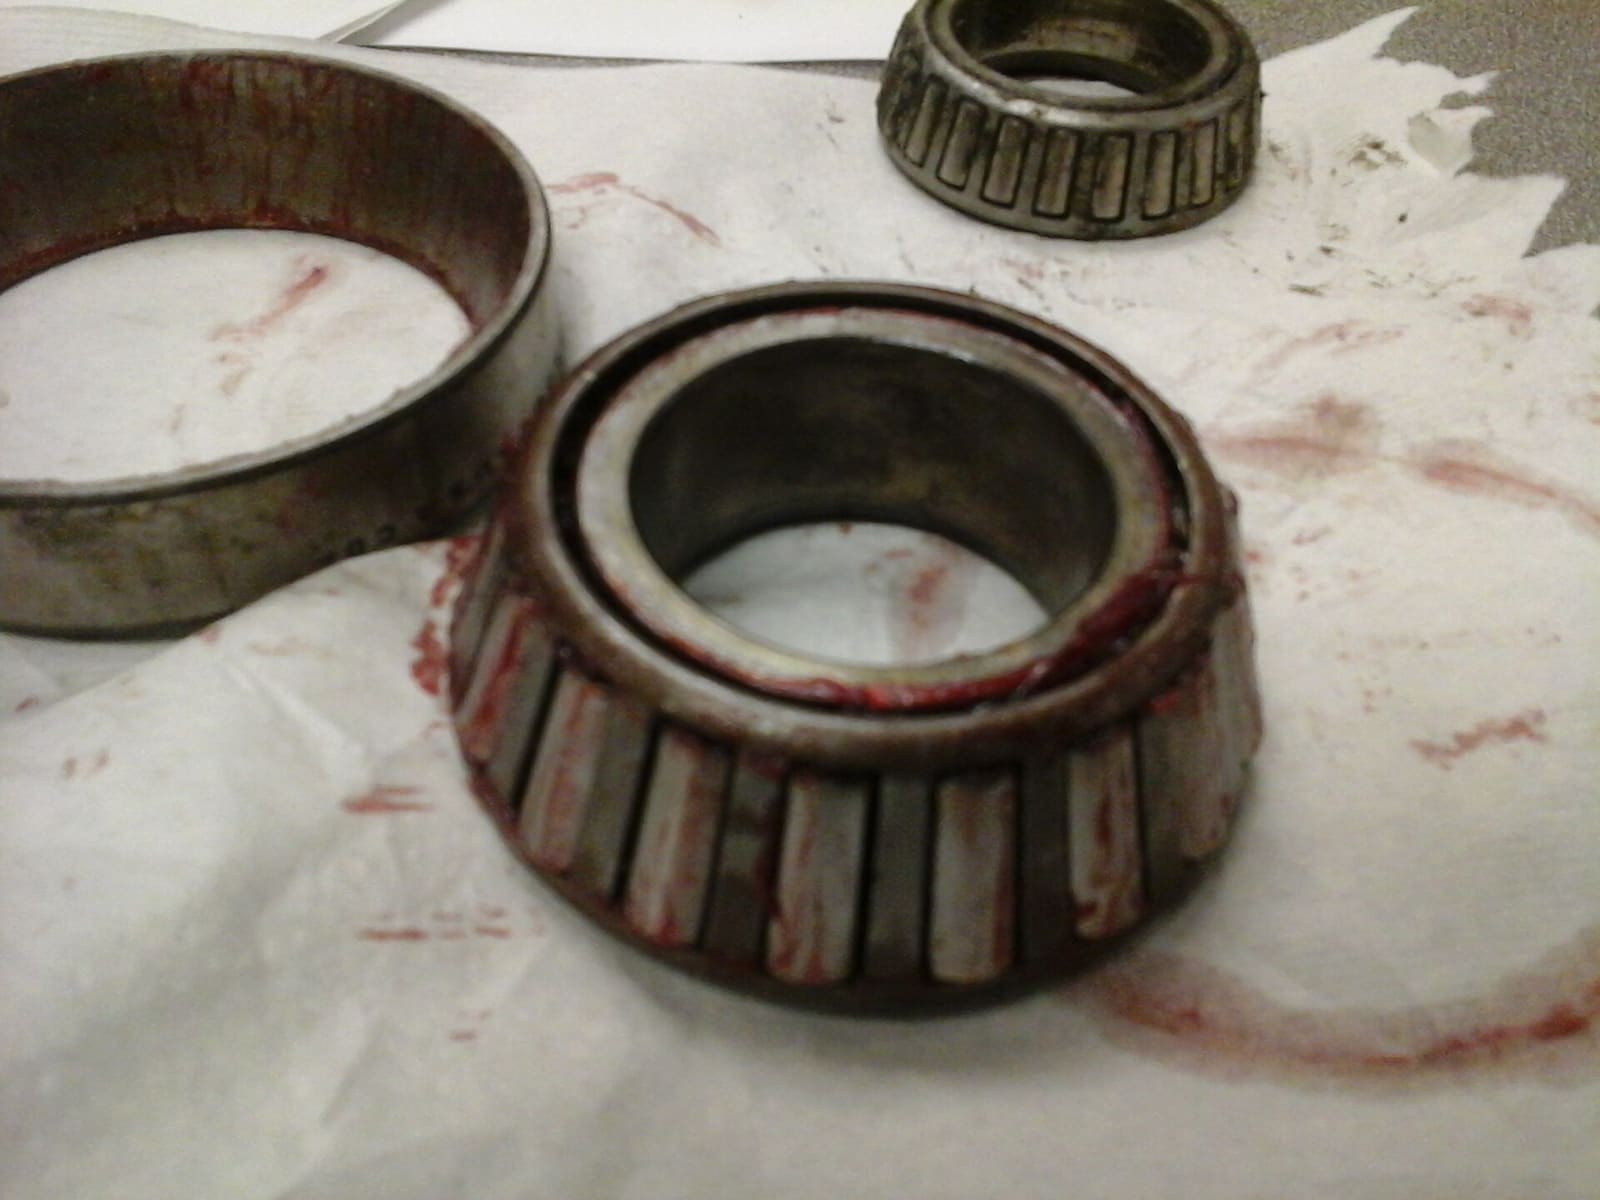
Photo: SkyMWard / Wikimedia Commons · CC BY-SA 3.0 Use the grease your axle maker approves. Do not mix grease types: Dexter warns that some grease bases are incompatible, so clean out all the old grease if you are switching. Put a dab of grease in your palm and press the wide side of the bearing into it until grease squeezes out through the rollers on the other side. Work all the way around. Put a light coat of grease on the races.
Set the packed inner bearing into the back of the hub. A double-lip seal, if one is made for your hub, keeps water out better than a single-lip one. Start the new seal square and tap it in evenly with a seal driver or a flat block of wood until it is flush. A cocked seal will leak. Put a thin film of grease on the seal lip.
Slide the hub onto the spindle, being careful not to damage the seal. Install the outer bearing, washer and nut. Bearing adjustment matters: too tight and the bearings overheat, too loose and the wheel wobbles. Follow the exact adjustment procedure and spec in your axle manual. When you are done, the wheel should spin freely with no noticeable rock. If you cannot get rid of the play without the wheel starting to bind, the bearing (or a race that isn't fully seated) is the problem; don't just crank the nut tighter. Fit a new cotter pin and bend the legs so they cannot catch on anything.
Tap the dust cap or bearing protector on squarely. If you have a bearing protector, add grease slowly with a hand gun only until the piston just starts to move out. On a grease-through spindle such as E-Z Lube, Dexter's method is to pump slowly while turning the hub until clean grease starts coming out around the nozzle, then stop and refit the rubber plug. Reinstall the wheel and tighten the lug nuts in a star pattern to the spec in your trailer manual. Lower the trailer and recheck lug nuts after the first short drive.
Tow a few miles, stop, and feel each hub again. Check for grease leaking past the seal on the back of the wheel. Log the date in BoatMend so you know when the next repack is due.
Common mistakes
- Pumping a bearing protector every launch "just in case." Too much grease pushes past the inner seal and onto the brakes or the back of the wheel. Add grease only when the piston no longer has some give.
- Using an air-powered grease gun. Dexter warns it can blow the seal out. Use a hand gun and go slowly.
- Launching right after a long drive. Hot hubs dunked in cold water pull water in past the seal as they cool. Give them time to cool before backing down the ramp when you can.
- Reusing the old seal or cotter pin. Both are cheap and are meant to be replaced every time.
- Tightening the spindle nut like a lug nut. Bearings need a specific light preload, not brute force.
- Thinking a grease fitting means you never have to pull the hub. You still need to see the bearings once a year.
When to call a pro
- A bearing has already failed, welded itself to the spindle, or the spindle is scored or blue from heat
- The races need replacing and you do not have the tools to drive them out and in squarely
- The trailer has surge brakes or electric brakes and the drum or brake parts look worn, leak fluid or are rusted
- You find cracks in the axle, spring hangers or frame
- The trailer carries a heavy boat on tandem or triple axles and you are not confident with the jacking points
Tips
- Carry a spare hub kit (pre-packed hub, bearings, seal, cotter pin and nut) and the tools to swap it. It can save a weekend.
- Buy bearings and seals by the numbers stamped on the old parts, or by your axle's model, and bring the old parts to the store.
- After each launch in salt water, rinse the hubs, brakes and springs with fresh water.
- If your trailer has hydraulic surge brakes, Mercury suggests checking the fluid in the master cylinder on the tongue a couple of times a season. The level drops slowly as the brakes wear; a sudden drop means a leak that needs fixing before you tow.
- Check tire pressure and lug nuts at the same time; it is all part of the same safe trip.
Official references
We read these to write this guide. Your engine's own manual always wins.
Safety: BoatMend is for information only and does not replace a certified marine technician. You are responsible for your safety and your boat. Read the full disclaimer.
Last updated 2026-10-24
Related guides
How to Fix Boat Trailer Lights That Flicker, Dim or Don't Work
Track down the real cause of dead or flickering trailer lights, from a bad ground to a corroded plug, and fix it so the repair lasts. Working brake, turn and tail lights are required by law and keep the driver behind you from rear-ending your boat.

Launch Day and Haul-Out Checklist for Trailer Boats
A step-by-step checklist for getting your boat off the trailer and back on again safely and quickly, from the drain plug and tie-downs to the blower and ramp etiquette. Following it in order prevents the classic mistakes that sink boats and back up the ramp.