How to Fix Boat Trailer Lights That Flicker, Dim or Don't Work
Track down the real cause of dead or flickering trailer lights, from a bad ground to a corroded plug, and fix it so the repair lasts. Working brake, turn and tail lights are required by law and keep the driver behind you from rear-ending your boat.
Time
1 h
Shop would charge
$75-250
Applies to
All engines
Safety first: Do not tow at night or in rain without working brake and turn lights; it is illegal and dangerous. Work on wiring with the trailer unplugged from the tow vehicle unless you are actively testing. If the tow vehicle's fuse keeps blowing or wires get hot, stop and have the vehicle and trailer harness checked by a trailer shop.
Owners often ask
- My trailer lights work one day and not the next. What's wrong?
This guide walks you through it. Still stuck? Ask the AI Mechanic about your engine.
Tools
- Trailer plug tester (plugs into the tow vehicle socket) or a 12-volt test light
- Multimeter
- Wire brush and fine sandpaper or a small file
- Wire stripper and ratcheting crimper
- Heat gun for heat-shrink (if you use a small torch instead, keep the flame well away from the boat's fuel tank, fuel vent and fuel lines)
- Screwdrivers and nut drivers
- A helper to work the brake and turn signals
Parts & supplies
- Dielectric grease
- Heat-shrink butt connectors and heat-shrink tubing
- Stainless self-tapping screw and star (lock) washer for the ground
- Marine-grade or tinned trailer wire (if replacing runs)
- Replacement trailer plug (4-pin flat or 5-pin flat to match your setup)
- Submersible LED trailer lights (if replacing fixtures)
Before you start
Boat trailers are hard on lights because they get dunked in water at every launch. Most trouble comes down to a few causes, in this order:
- A bad ground (by far the most common)
- A corroded or damaged plug on the vehicle or the trailer
- A burned-out bulb or a flooded light
- A chafed, broken or shorted wire along the frame
Common US color code (4-pin flat plug):
- White: ground
- Brown: tail/running lights
- Yellow: left turn and brake
- Green: right turn and brake
- Blue (5-pin flat only): surge brake reverse lockout solenoid
Colors at the lights themselves vary by brand, so check the instructions for your fixtures.
Steps
Plug a trailer tester into the vehicle's socket, or probe the socket pins with a test light grounded to the hitch. Have a helper turn on the headlights, press the brake, and use each turn signal. If any function is missing at the vehicle socket, the problem is the vehicle (fuse, converter module or socket), not the trailer.
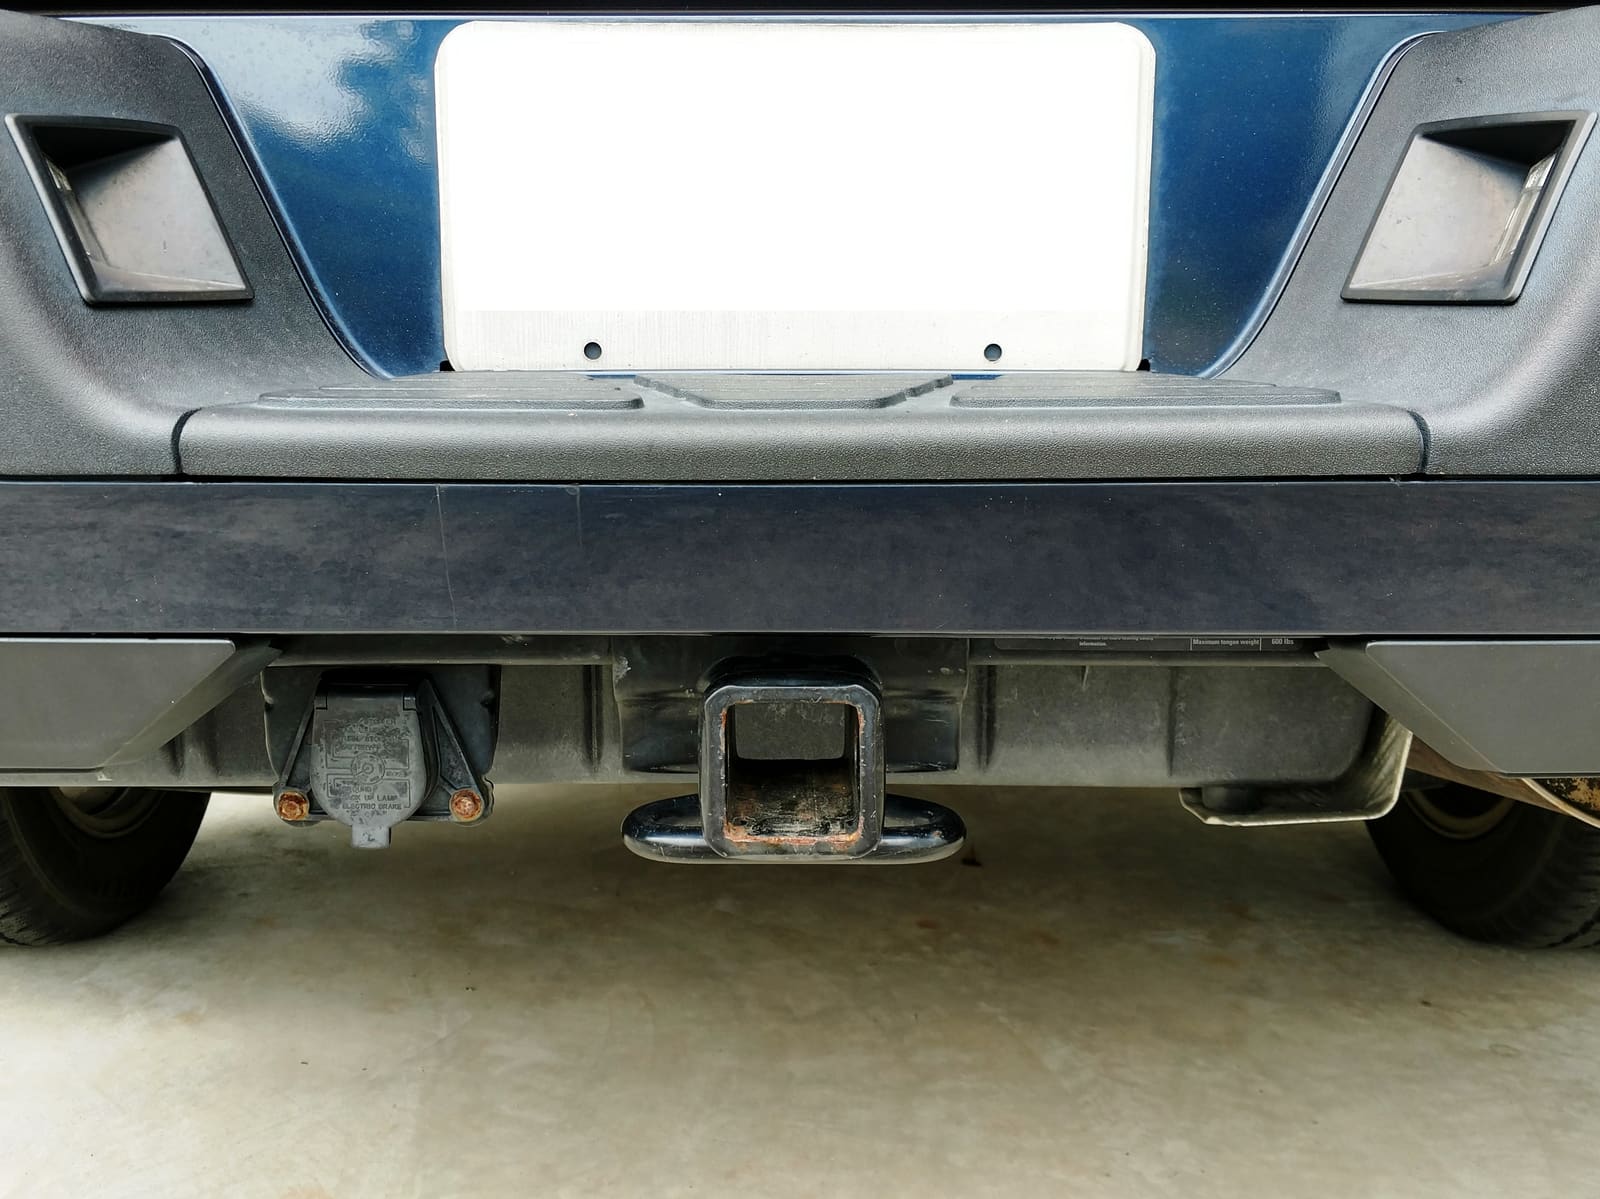
Start at the vehicle's socket (a 7-pin blade socket here). If a function is missing at the socket, the trailer isn't the problem. Photo: McChizzle / Wikimedia Commons · Public domain If the turn signals work but blink very fast once the trailer is plugged in, the vehicle's flasher may not be rated for the extra bulbs. BoatUS notes that a heavier-duty flasher relay for the vehicle usually fixes it.
Look inside the vehicle socket and the trailer plug for green or white corrosion and bent or pushed-back pins. Clean the contacts with a small wire brush or fine sandpaper until they are bright. Coat them lightly with dielectric grease. A plug that has been run over, crushed or cracked should be replaced.
With the lights on, wiggle the plug and the wires right behind it. If the lights come and go, the plug or a wire at the plug is the problem. Give the trailer side a little extra length so wires do not get pulled tight in sharp turns.
Find where the white wire bolts to the trailer frame, usually near the coupler. Remove the screw, scrape the paint and rust off down to bare metal, and reattach it with a stainless screw and a star washer so it bites into the metal. Seal it with a dab of dielectric grease. This one fix cures many flicker, dim and "everything blinks together" problems. A classic ground symptom, per BoatUS: you use a turn signal and the brake or tail lights glow along with it, or every light is dimmer than it should be.
While testing, BoatUS suggests unhooking the coupler and safety chains from the hitch so the only ground path is the white wire. Otherwise the ball can carry the ground and hide a bad wire, which then fails on the road. Never remove the white ground wire on the theory that the hitch ball will do the job.
Galvanized frames and bolted crossmembers do not always conduct well, and many lights ground through their own mounting bolts. Clip a jumper wire with alligator clips from a light's ground wire (or its metal housing) to the white wire at the plug or to clean bare frame metal. If the light suddenly works properly, that light's ground is bad. Make the fix permanent by running a dedicated ground wire back to the main ground.
Remove the lens. If the fixture is full of water, rust or white powder, it has failed. On incandescent lights, check the bulb filament and clean the socket contacts. If the bulb looks fine, test it for continuity with the multimeter on ohms.
With a helper working the lights, set the multimeter to DC volts. Put the black lead on clean ground and the red lead on the wire feeding the light. You should see close to battery voltage when that function is on. Power at the light but no light means a bad fixture or bad ground. No power means the break is in the wire between the plug and the light.
Follow the wire run, looking for spots where it rubs on sharp edges, has been pinched between the boat and a bunk, is chewed, or has been cut by a winch strap. A wire that touches bare metal through worn insulation can blow a fuse. With power off, use the ohms setting between the wire and the frame: a reading near zero means a short to ground.
To check a wire for a break, BoatUS describes a simple continuity test: run a long jumper wire with alligator clips from the matching pin on the trailer plug back to the light. Clip one meter probe to the jumper, touch the other to the same-colored wire at the light, with the meter on ohms. Near zero means the wire is good; "OPEN" or "OL" means it is broken somewhere. Mice and other rodents like to chew wires run inside the frame, so look there if a run tests open.
Cut out damaged sections. Join wires with heat-shrink butt connectors crimped with a proper crimper, then shrink them so they seal. Avoid tape-only repairs, wire nuts and the "pinch" connectors that pierce insulation; they let water wick into the wire, especially in salt water. BoatUS points out that electrical tape actually traps moisture against the joint and speeds up corrosion. Heat shrink with an adhesive (glue) lining seals best. Use tinned, stranded wire for any new run, and secure it at least every 18 inches so it can't chafe.
If your fixtures keep flooding, replace them with sealed, submersible LED trailer lights. They draw less current, do not have filaments to break, and handle dunking far better than old incandescent lights. Follow the kit's wiring diagram, since some LED lights are sensitive to which wire is ground.
With a helper, check tail lights, brake lights, both turn signals and the side marker lights. Put a thin coat of dielectric grease on plug contacts, and route wires inside the frame or in loom where possible. Secure loose wires with UV-rated ties so they cannot drag.
Common mistakes
- Leaving the lights plugged in while backing into the water. Discover Boating recommends unplugging the trailer lights before you launch. Hot incandescent bulbs dunked in cold water can crack, and it also protects the vehicle's circuit.
- Trusting the trailer frame to carry the ground. Rust, paint and galvanizing break the path. A dedicated ground wire to each light is the reliable fix.
- Buying cheap automotive lights for a boat trailer. They are not built to be submerged and fill with water.
- Wrapping splices in electrical tape. It peels off and lets water in.
- Blaming the trailer when the vehicle socket or fuse is the problem. Always test at the vehicle first.
When to call a pro
- The tow vehicle socket is dead and you suspect the vehicle's wiring, fuse box or tow converter module
- Fuses keep blowing and you cannot find the short
- The trailer has electric brakes or a breakaway system that does not work
- The whole harness is brittle, green and patched in many places: a full rewire with a new harness is often faster done by a trailer shop
Tips
- Keep a trailer plug tester and a spare set of bulbs or one spare LED light in the tow vehicle.
- After salt water use, rinse the lights and plug with fresh water and let the plug dry before storing it.
- Store the trailer plug off the ground, clipped up near the coupler, so it does not get run over or fill with water.
- Check the lights before every trip, not just at the start of the season. Mercury also suggests a quick re-check at fuel stops, since the boat usually hides the tow vehicle's own lights and a failure on the road is easy to miss.
- Where the harness passes through a hole in the frame or rubs on a crossmember, protect it with split loom or a rubber grommet. A wire that chafes through to bare metal is what blows fuses on the highway.
- For a small boat or dinghy trailer, BoatUS describes a removable light board: the lights mount on a bar that straps to the trailer or boat for the road and comes off before you back down the ramp, so they never get dunked. Mount it at a legal height and width for your state, attach it securely, and remember the license plate light.
- Federal and state rules both apply to trailer lights. At minimum every trailer needs tail lights, brake lights, turn signals and a license plate light; your state may add side markers, reflectors or height rules.
Official references
We read these to write this guide. Your engine's own manual always wins.
- Boating Magazine – Quick Fixes for Trailer-Light Troubles
- Boating Magazine – How to Rewire Your Boat Trailer
- Discover Boating – How to Launch a Boat
- Mercury Marine – Basic Boat Trailer Maintenance (trailer lights)
- BoatUS – Troubleshooting Trailer Lights
- BoatUS – Trailer Electrical Systems
- BoatUS – Removable Trailer Lights
Safety: BoatMend is for information only and does not replace a certified marine technician. You are responsible for your safety and your boat. Read the full disclaimer.
Last updated 2026-10-25
Related guides
How to Inspect and Repack Boat Trailer Wheel Bearings
Check, clean and repack your trailer's wheel bearings so a seized hub does not leave you stranded on the highway. Boat trailers get dunked in water every launch, which makes their bearings fail far more often than those on dry utility trailers.

Launch Day and Haul-Out Checklist for Trailer Boats
A step-by-step checklist for getting your boat off the trailer and back on again safely and quickly, from the drain plug and tie-downs to the blower and ramp etiquette. Following it in order prevents the classic mistakes that sink boats and back up the ramp.